DNIJGI – an acronyme unifying several meanings.
NOTE: If you want get full insight including all details about the whole project, please click here to read part one about the project.
"I need an exclusive packaging for my book!"

Well, yes. Starting from where we where, that was the whole brief I need to know, actually.
As I already dealt with this project from the beginning I had full insight and a perfect comprehension for my client, and soon knew in what kind of a direction it could go.
As the book already was printed 8 times all in all (yes, even it was targeted to only one single edition!) of course I still had a blank dummy by my side, which was very useful to get the approach and that very exclusive wrapper.
I knew the size; length, width, height. I knew its weight. I knew its shape.
From there on, I was ready to go for a first brainstorming and could already continue to do some research, especially considering the approach about material.
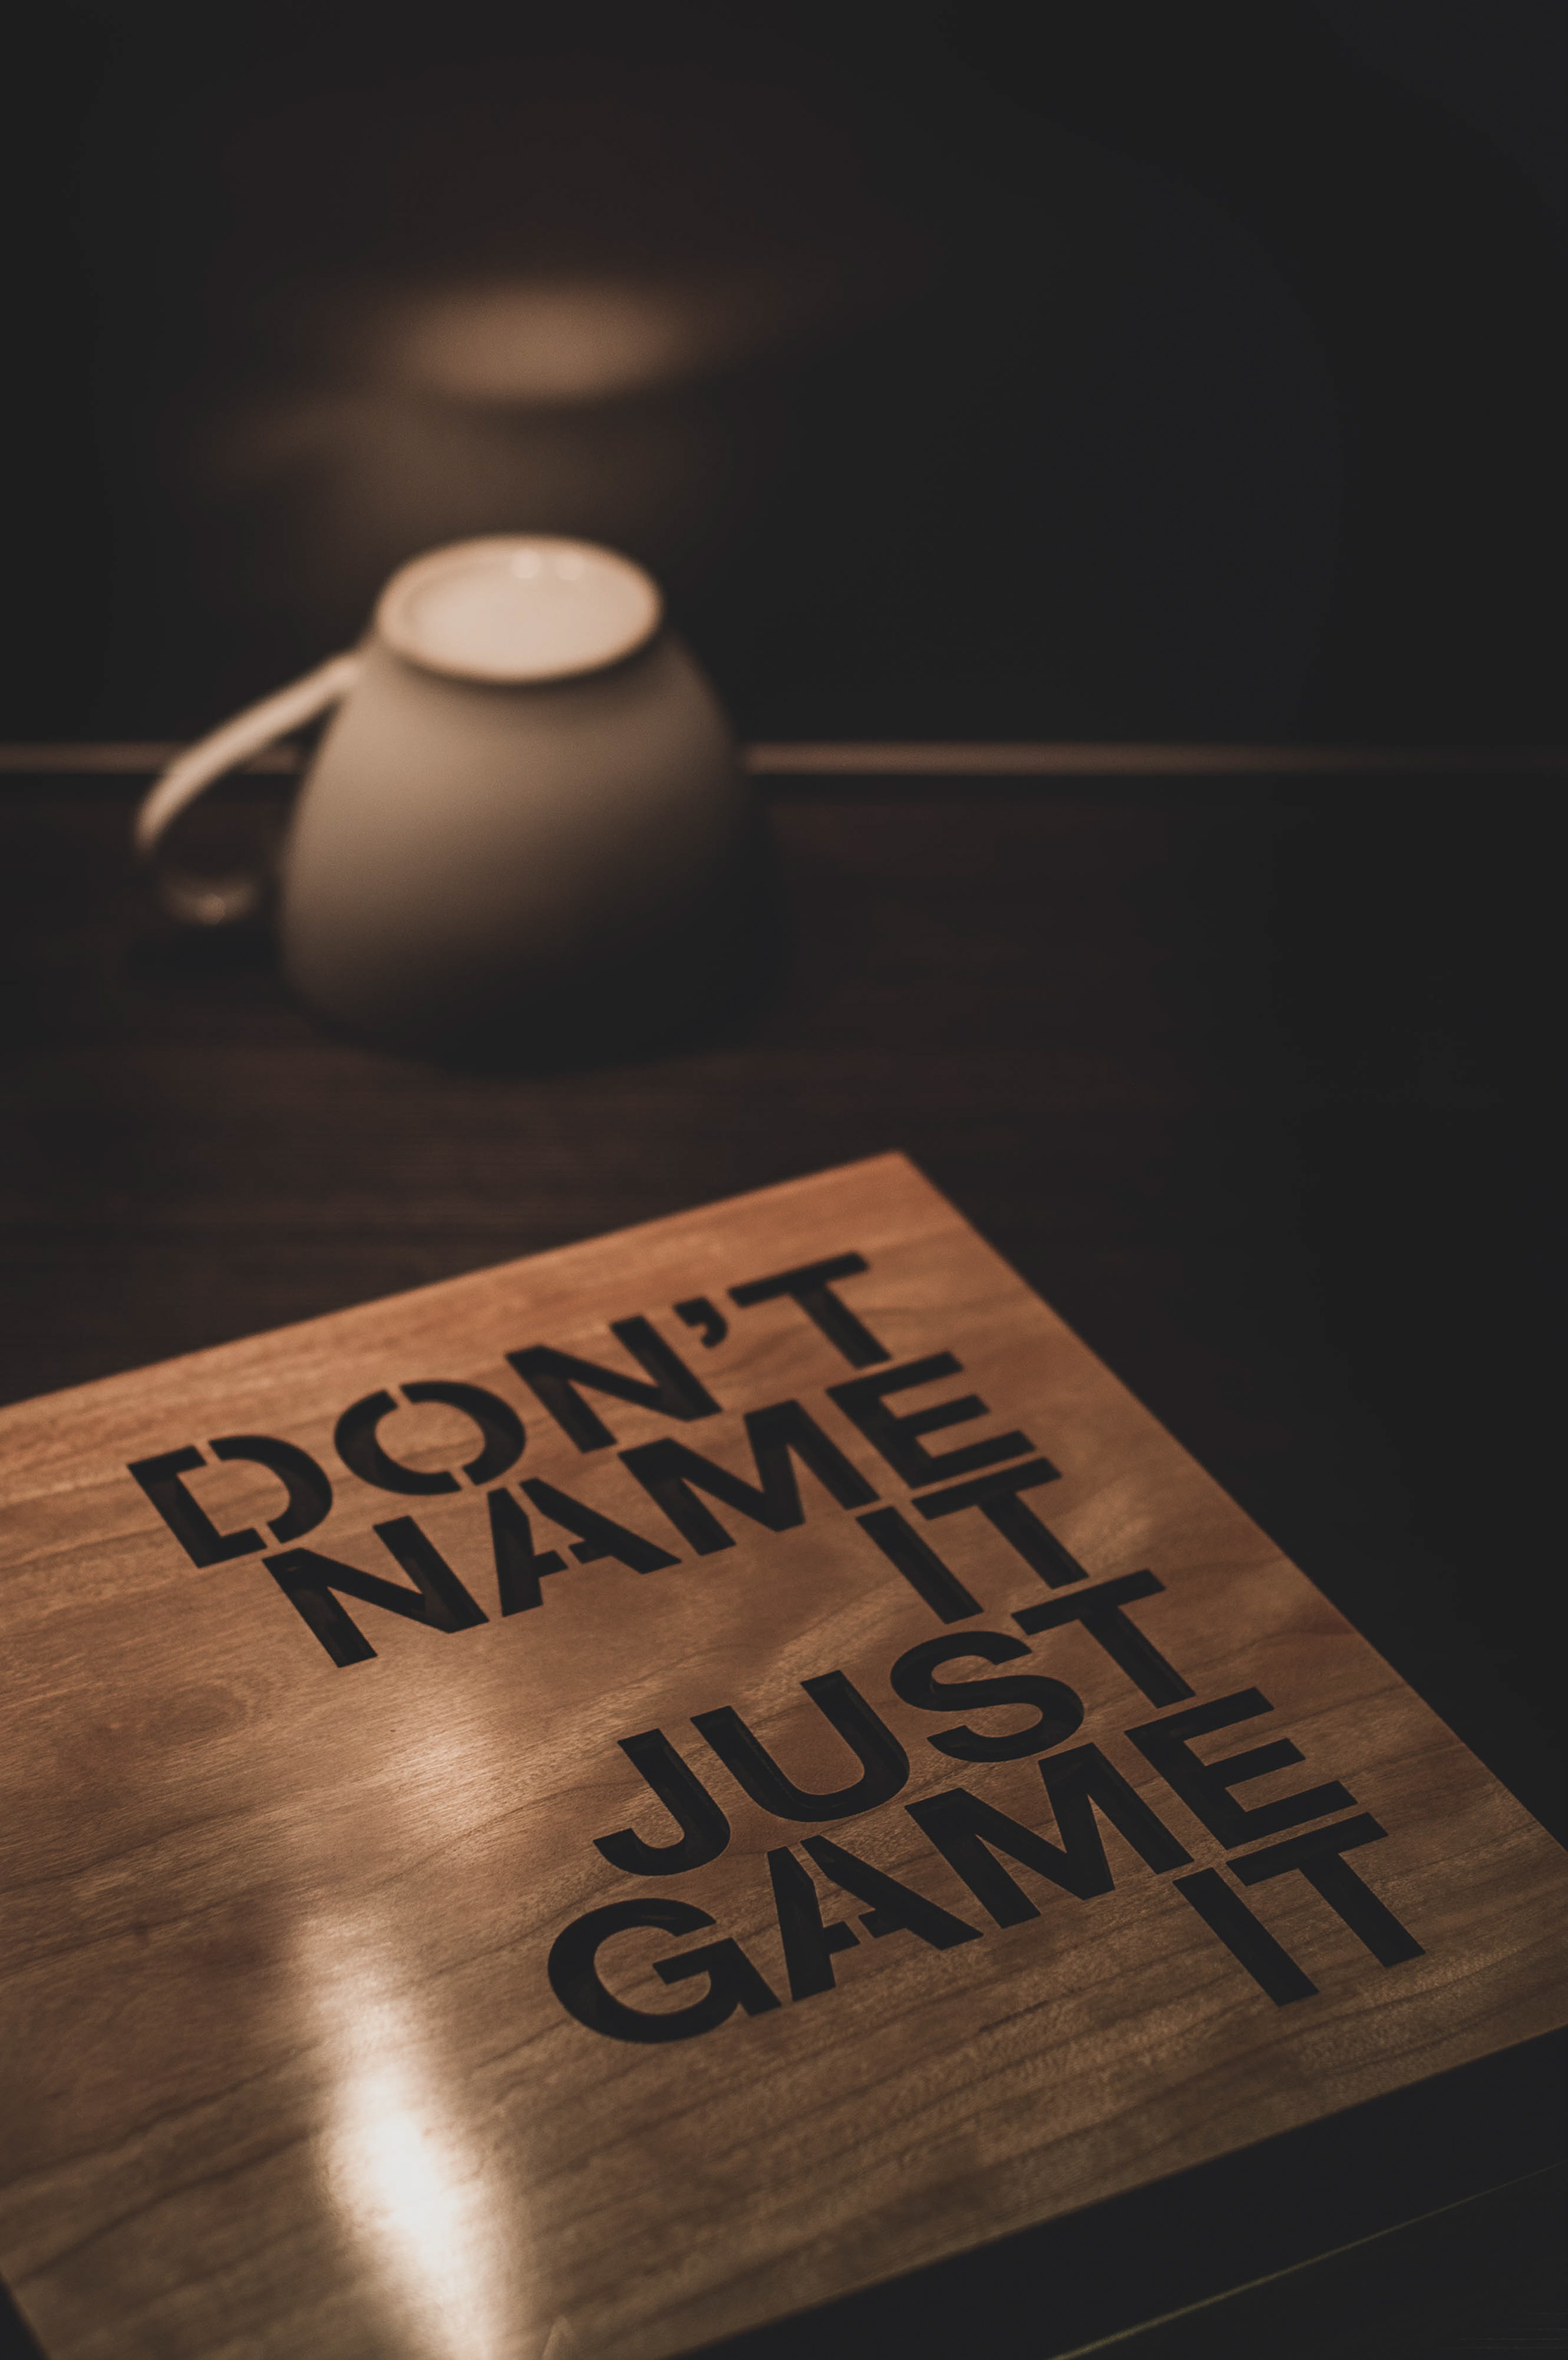
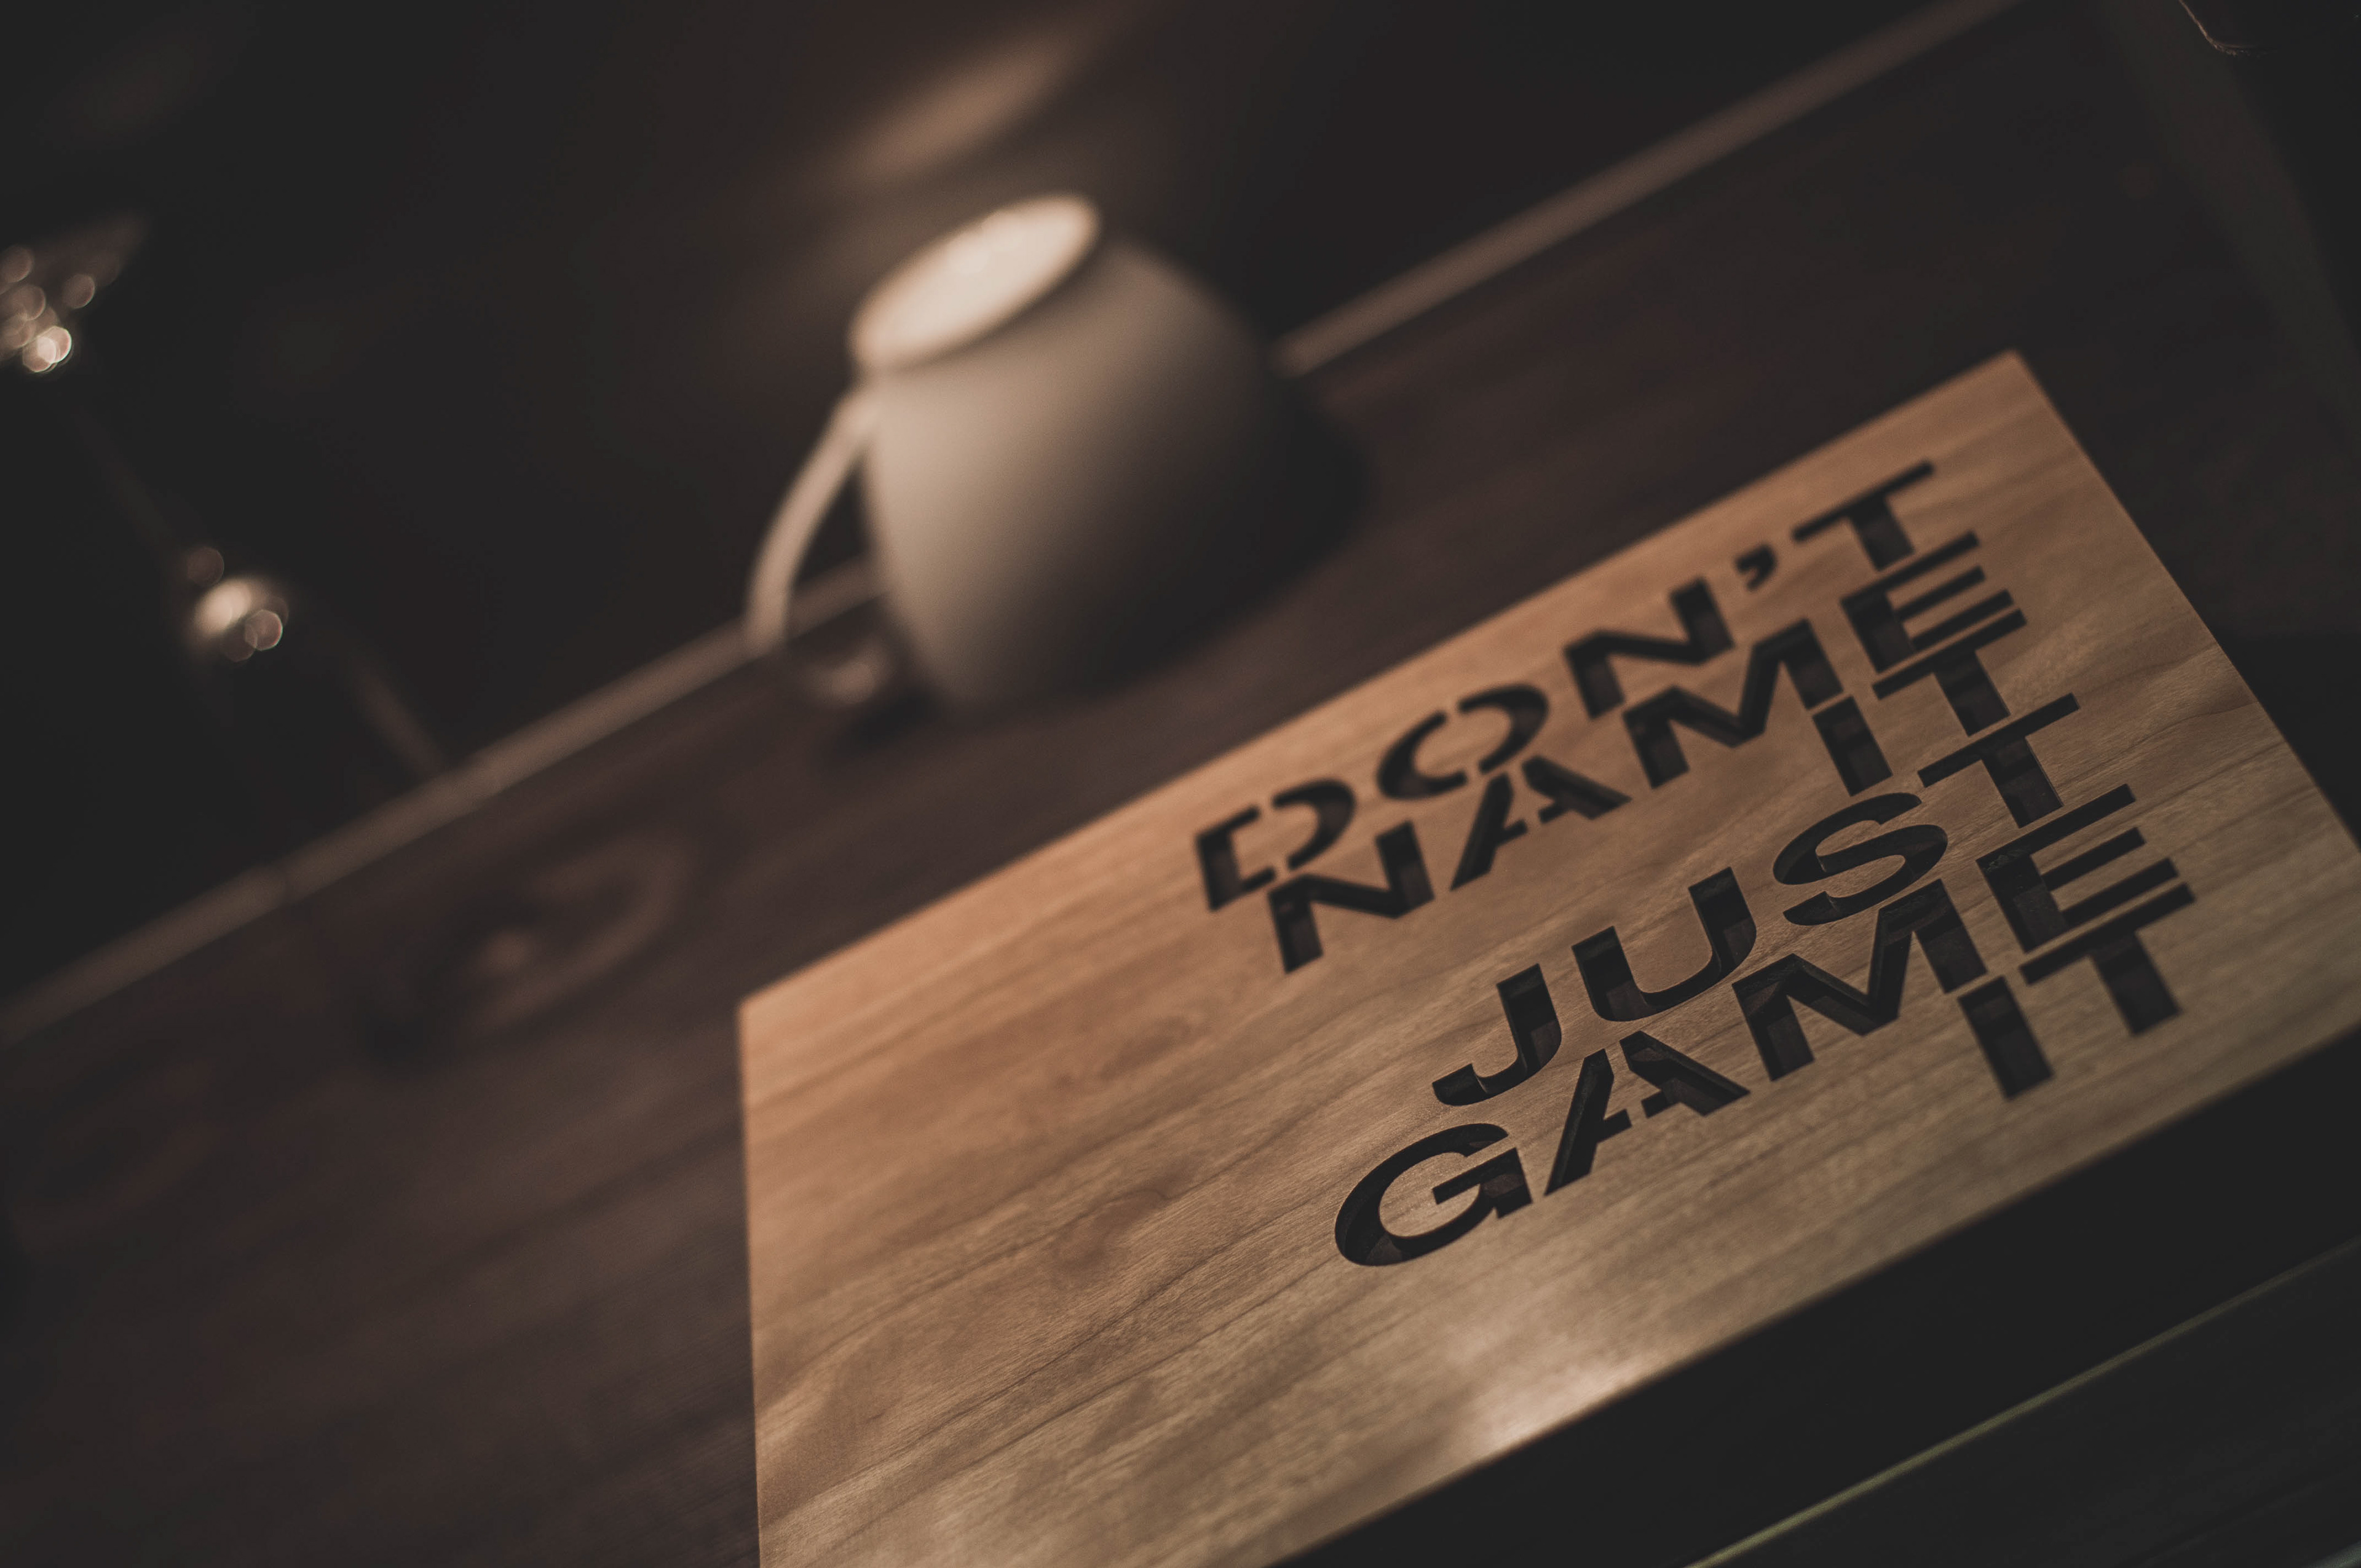
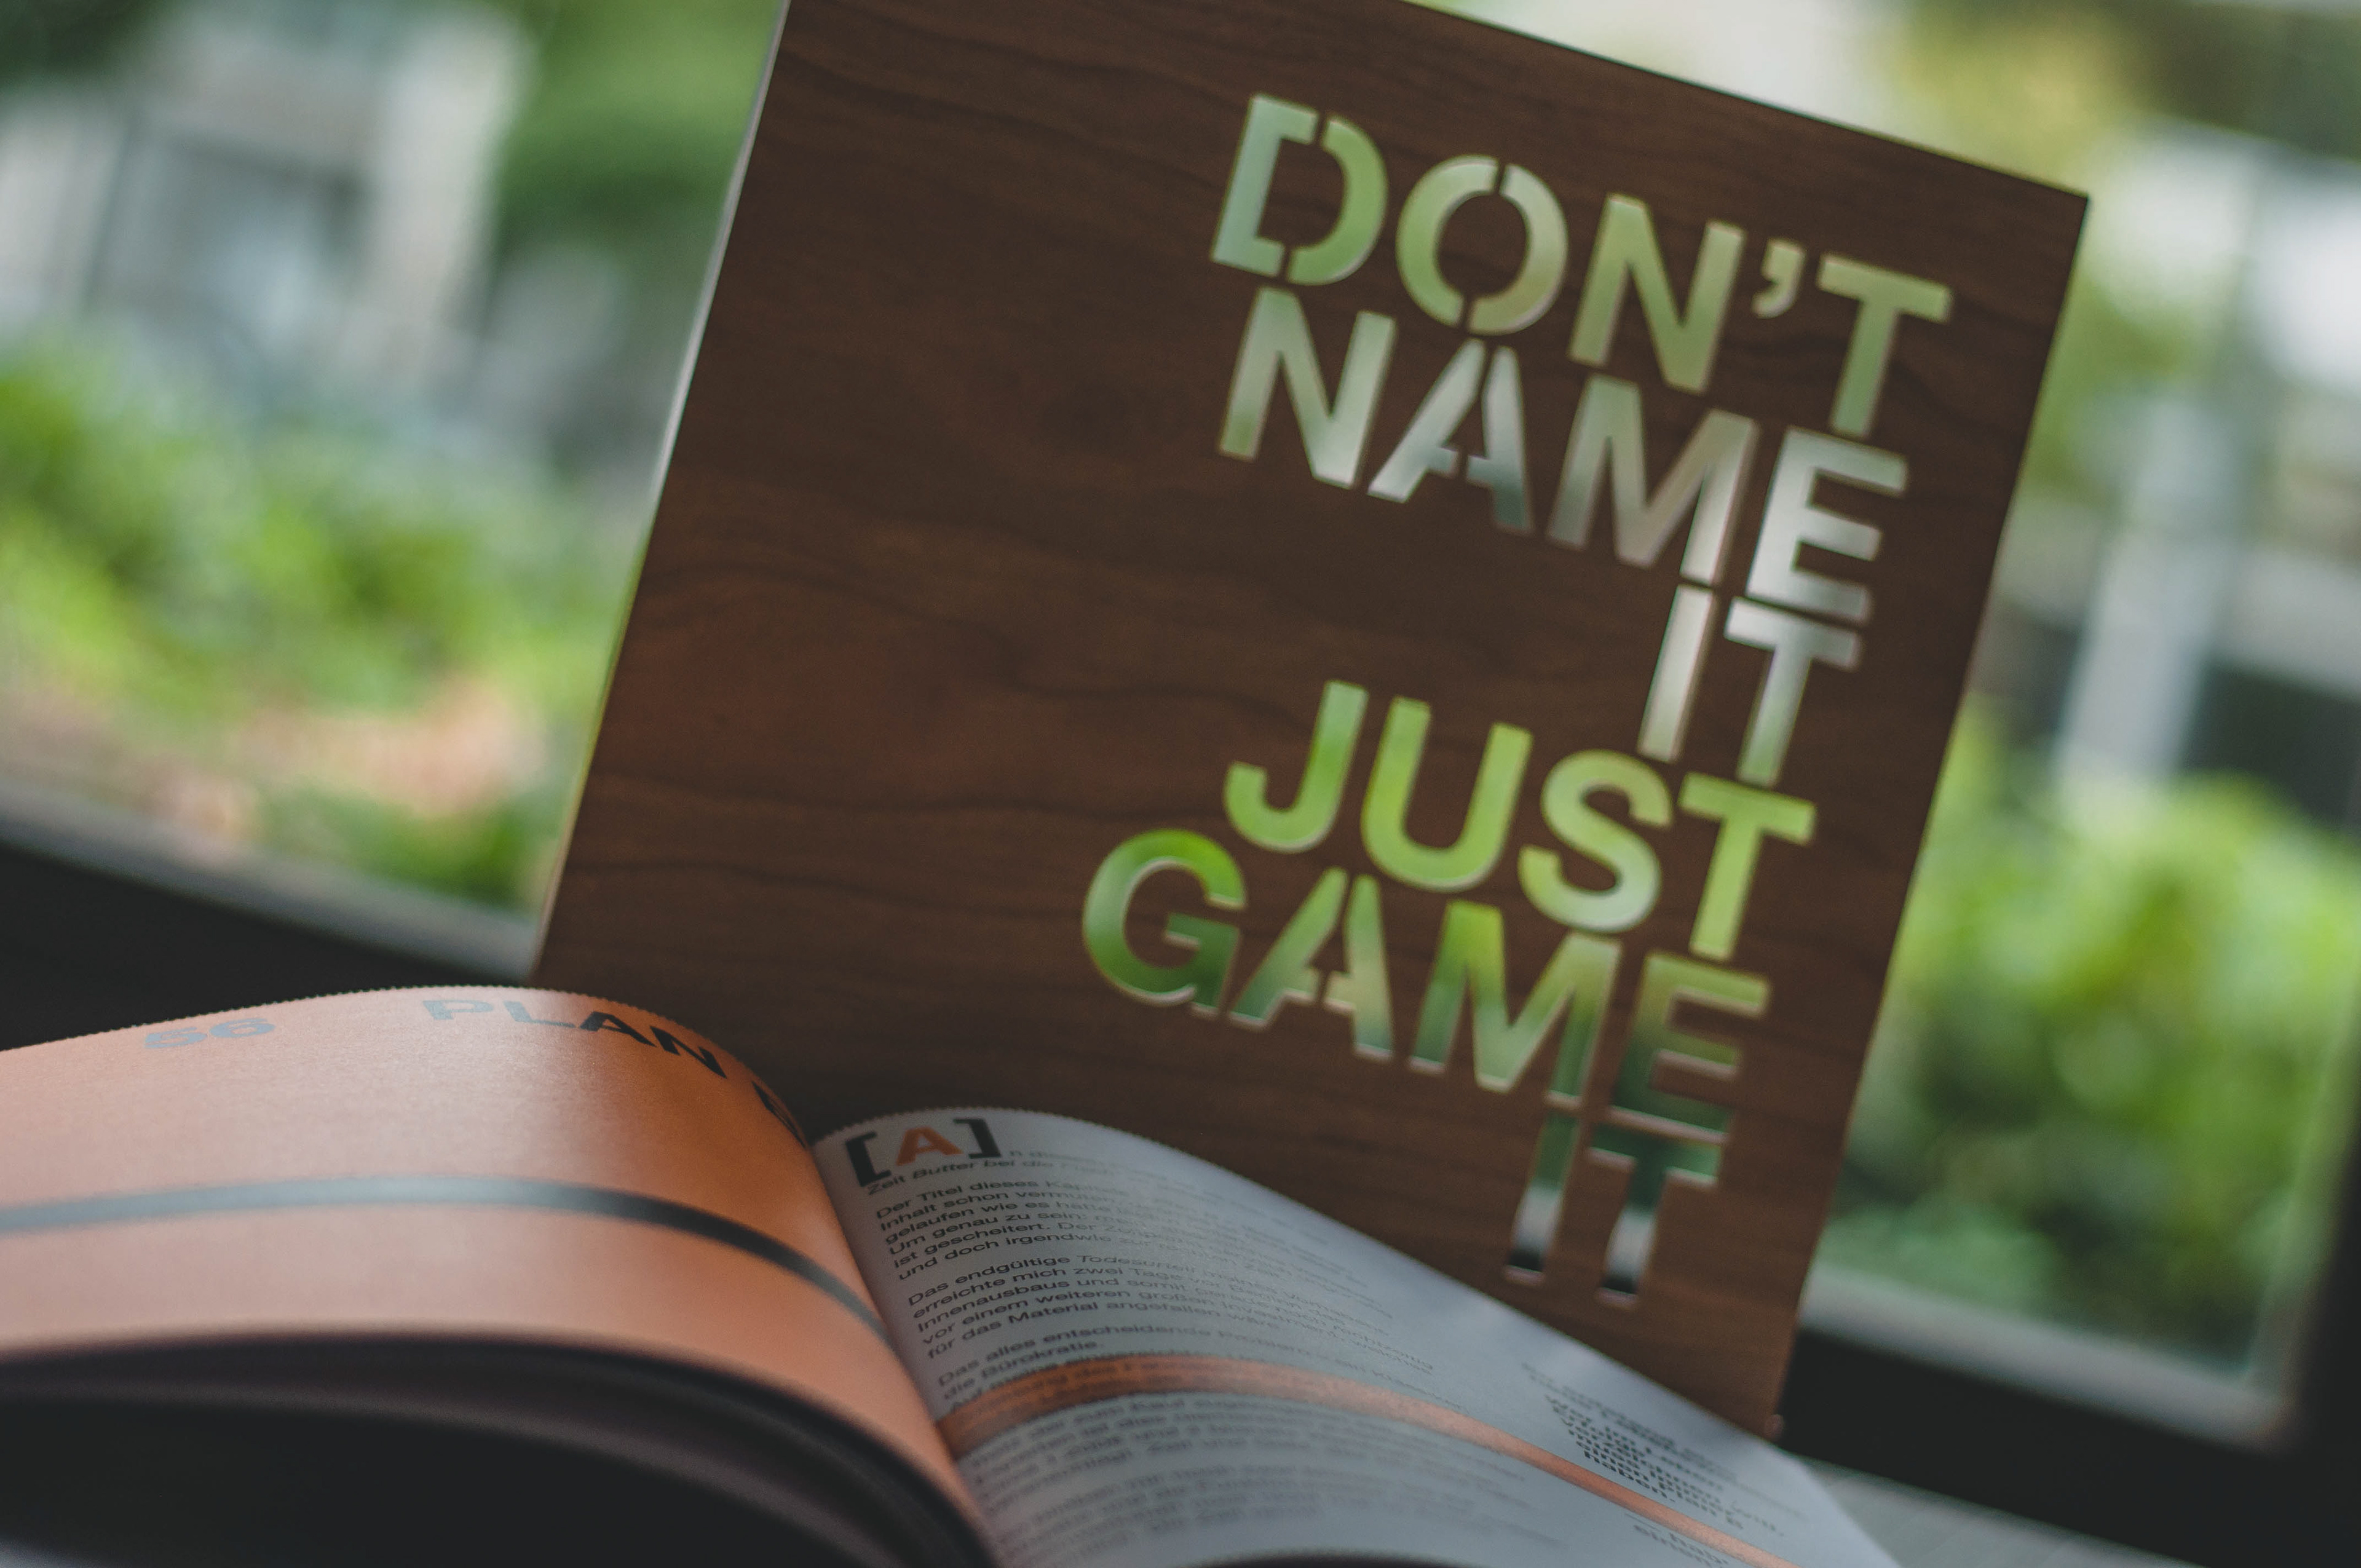
From the beginning it should state itself by just being. While all-over shining in a premium appearance by being conceived as a high-level quality product once hold in hand, overall I want it to deliverer a straight and an as bold statement.
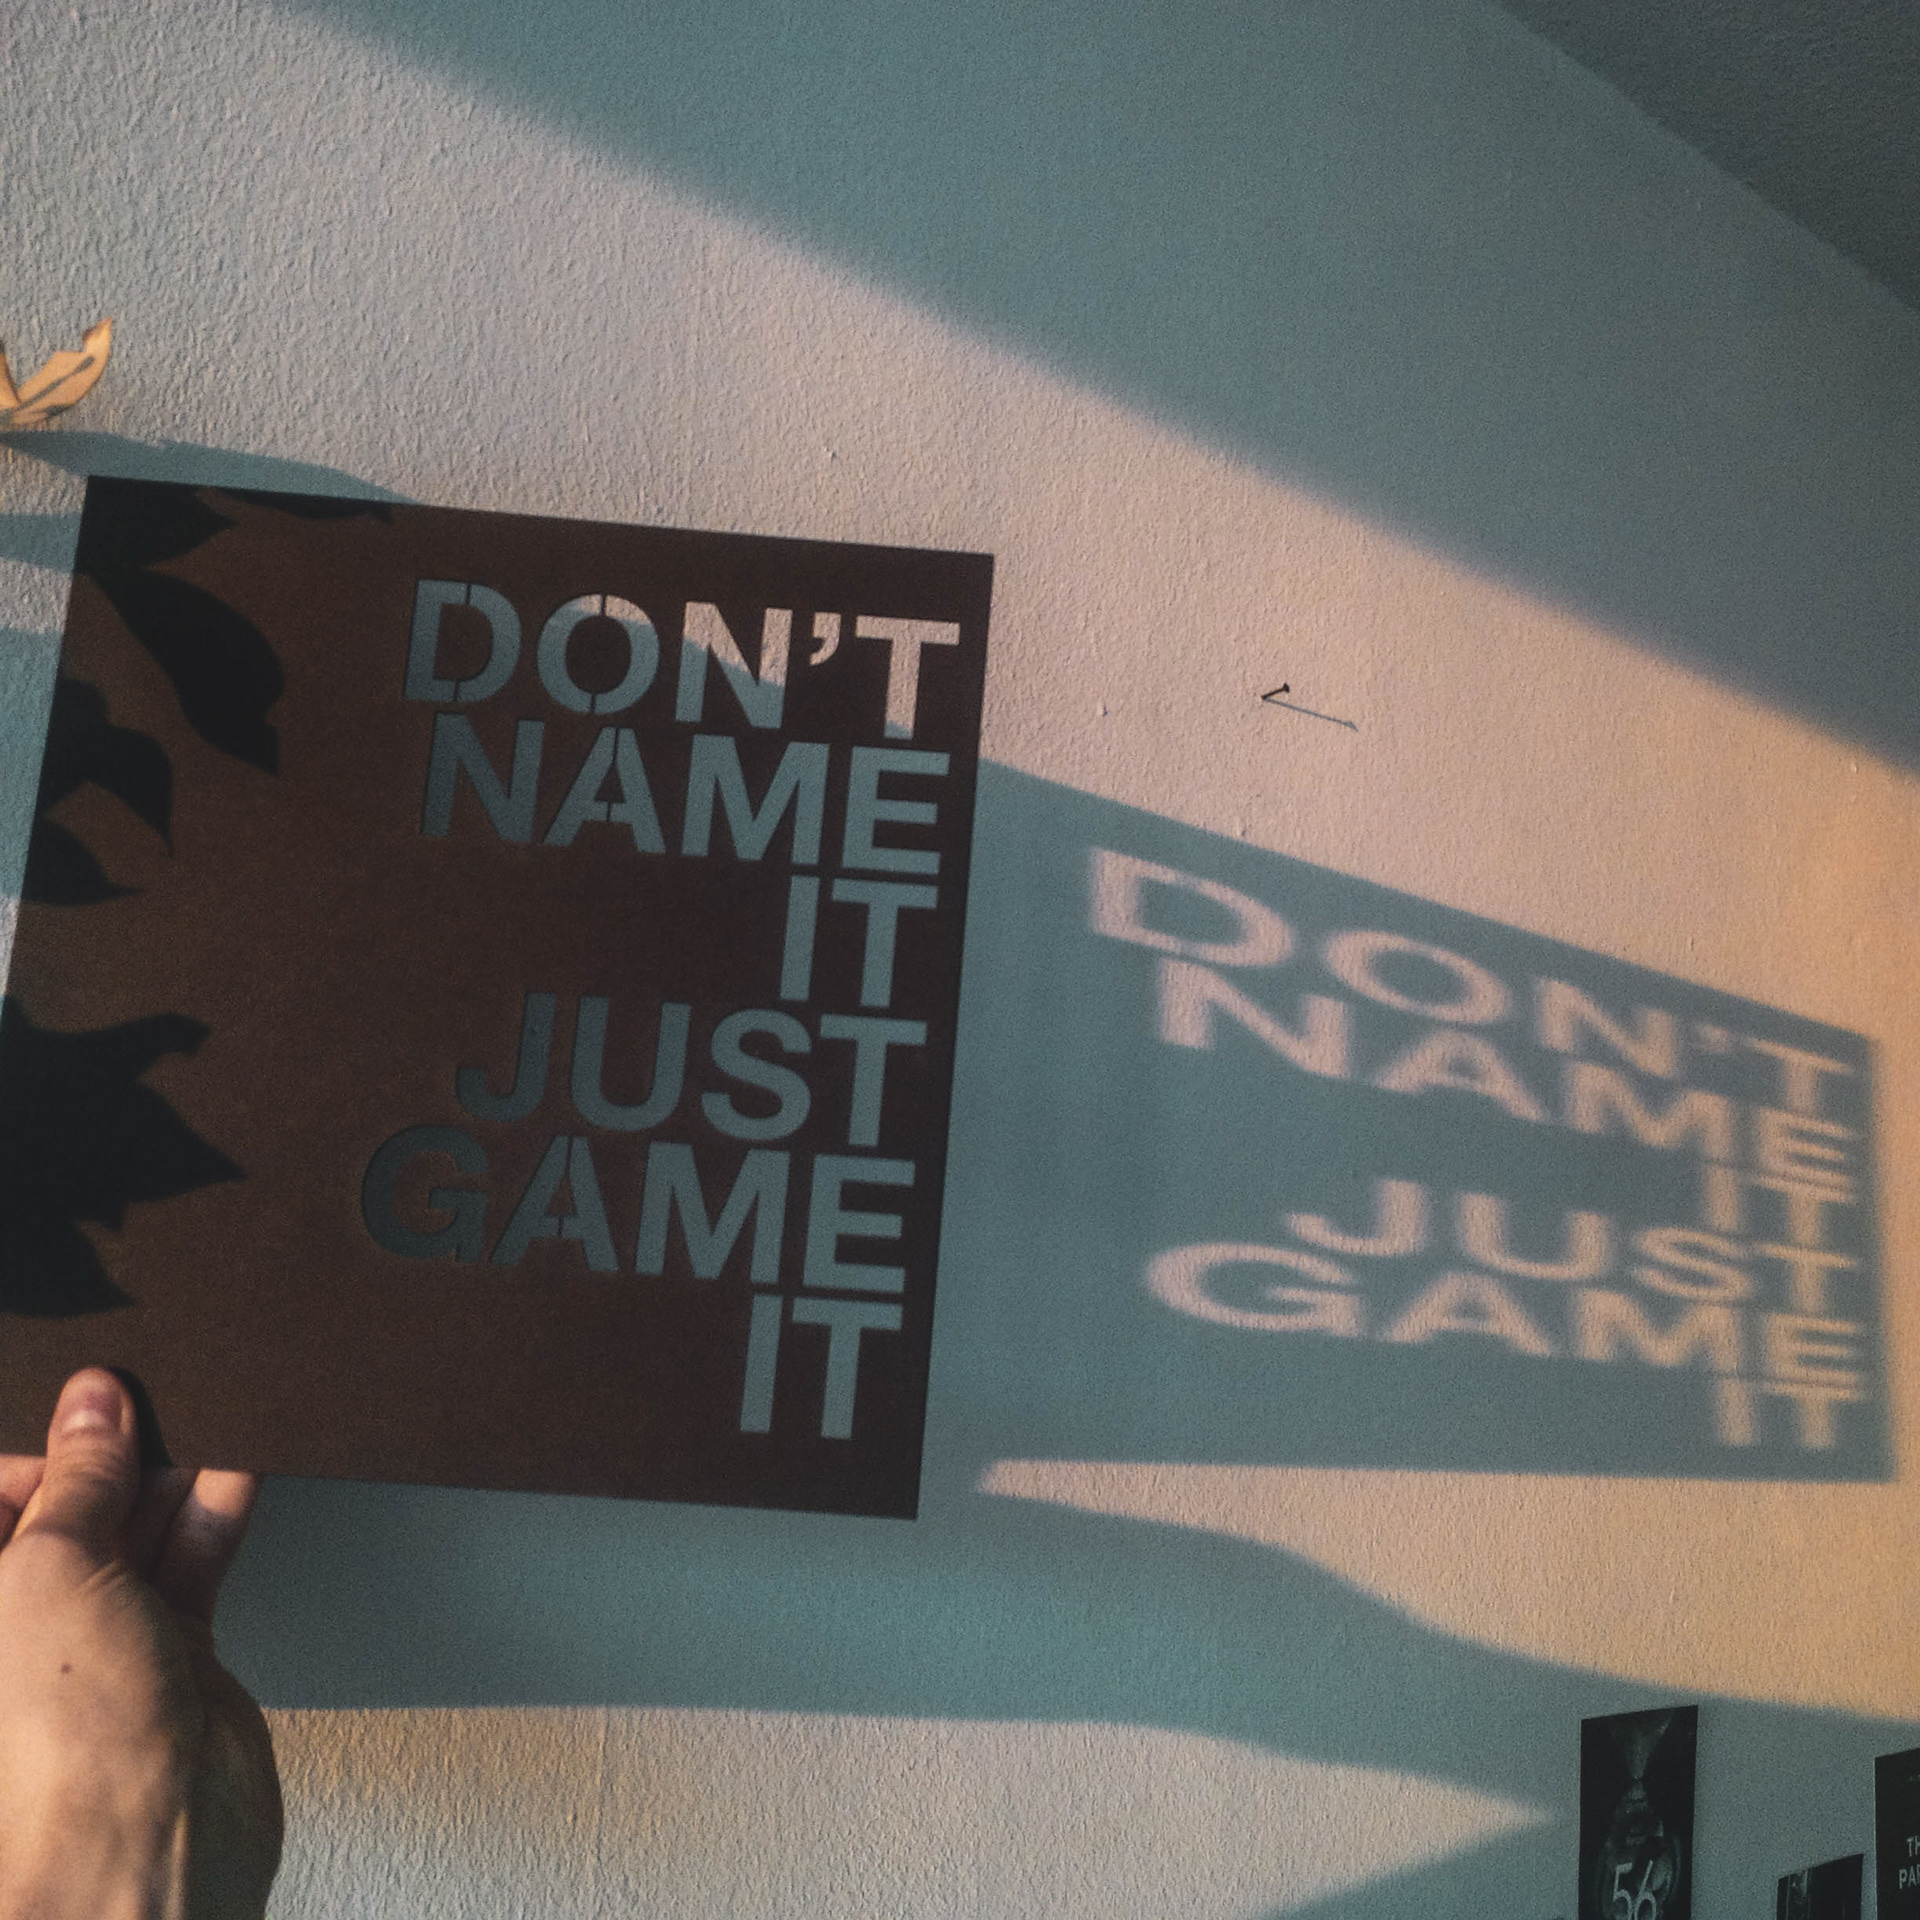
"IT AIN'T ABOUT THE IDEA"
While browsing through the book itself, I decided to stay close of the authors thought. As written on the very first page when open the opus, it says straight away:
«It ain't about the idea […] it is about giving them room they need to blossom»
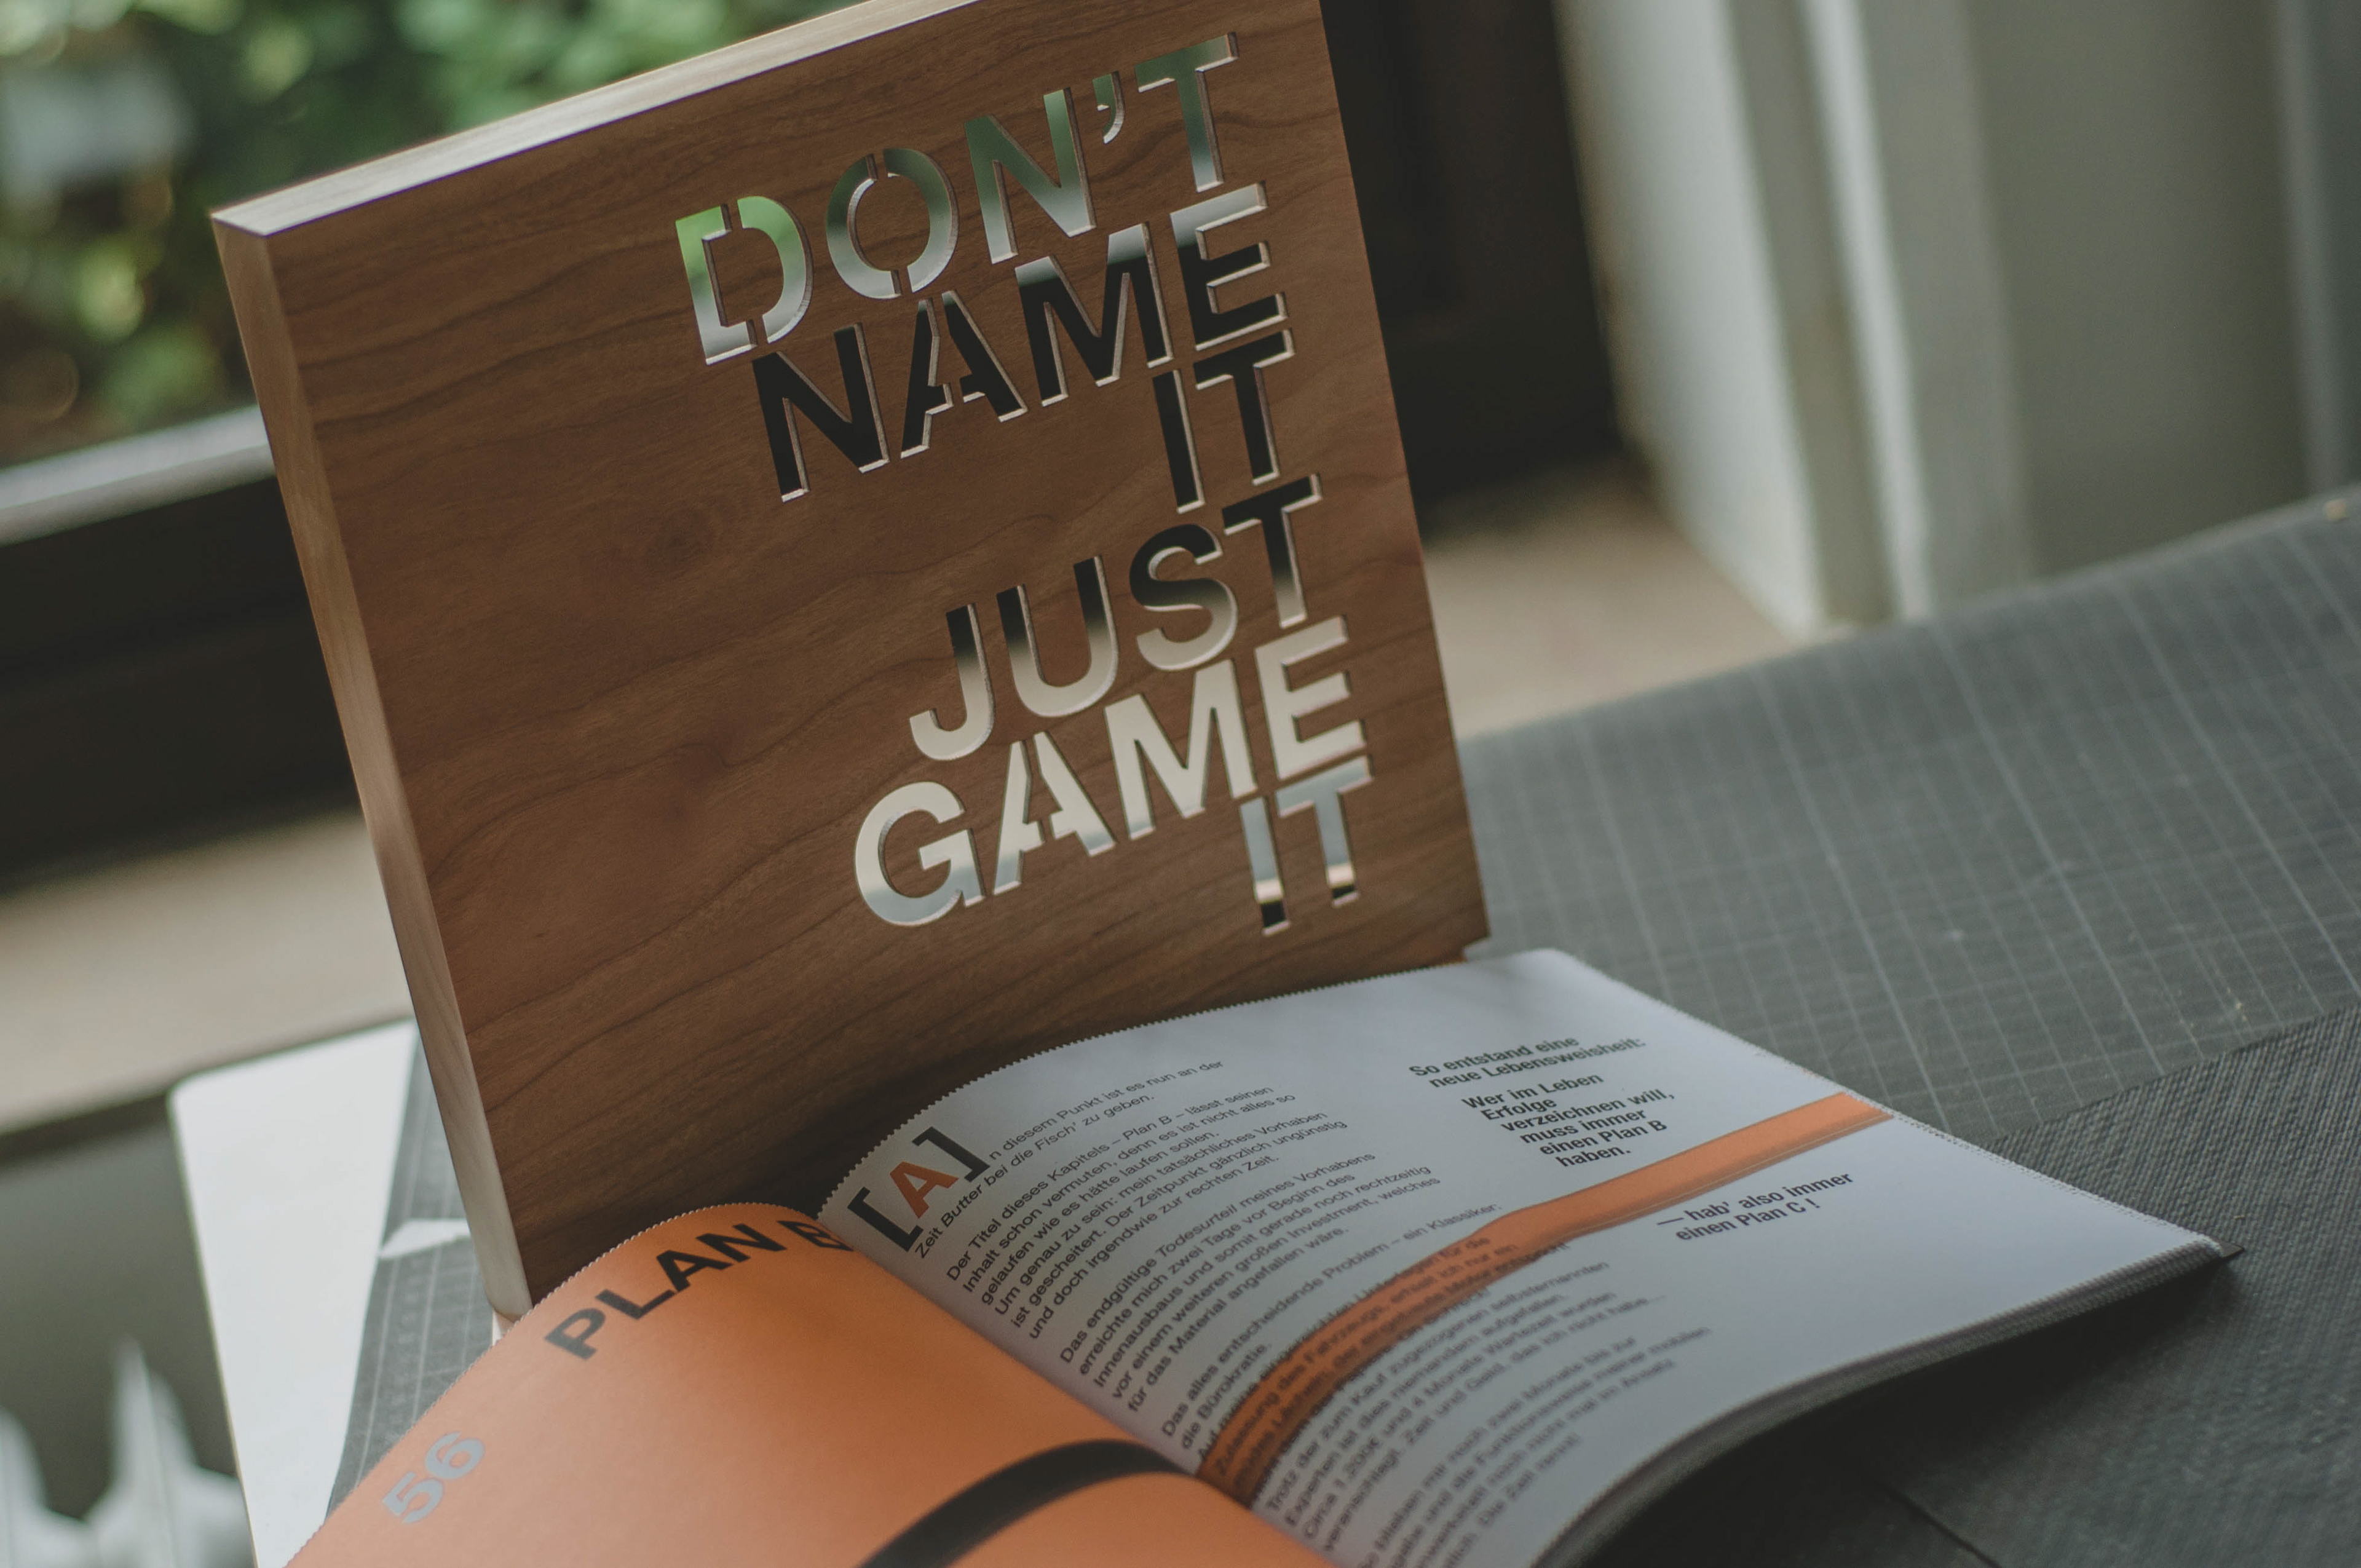
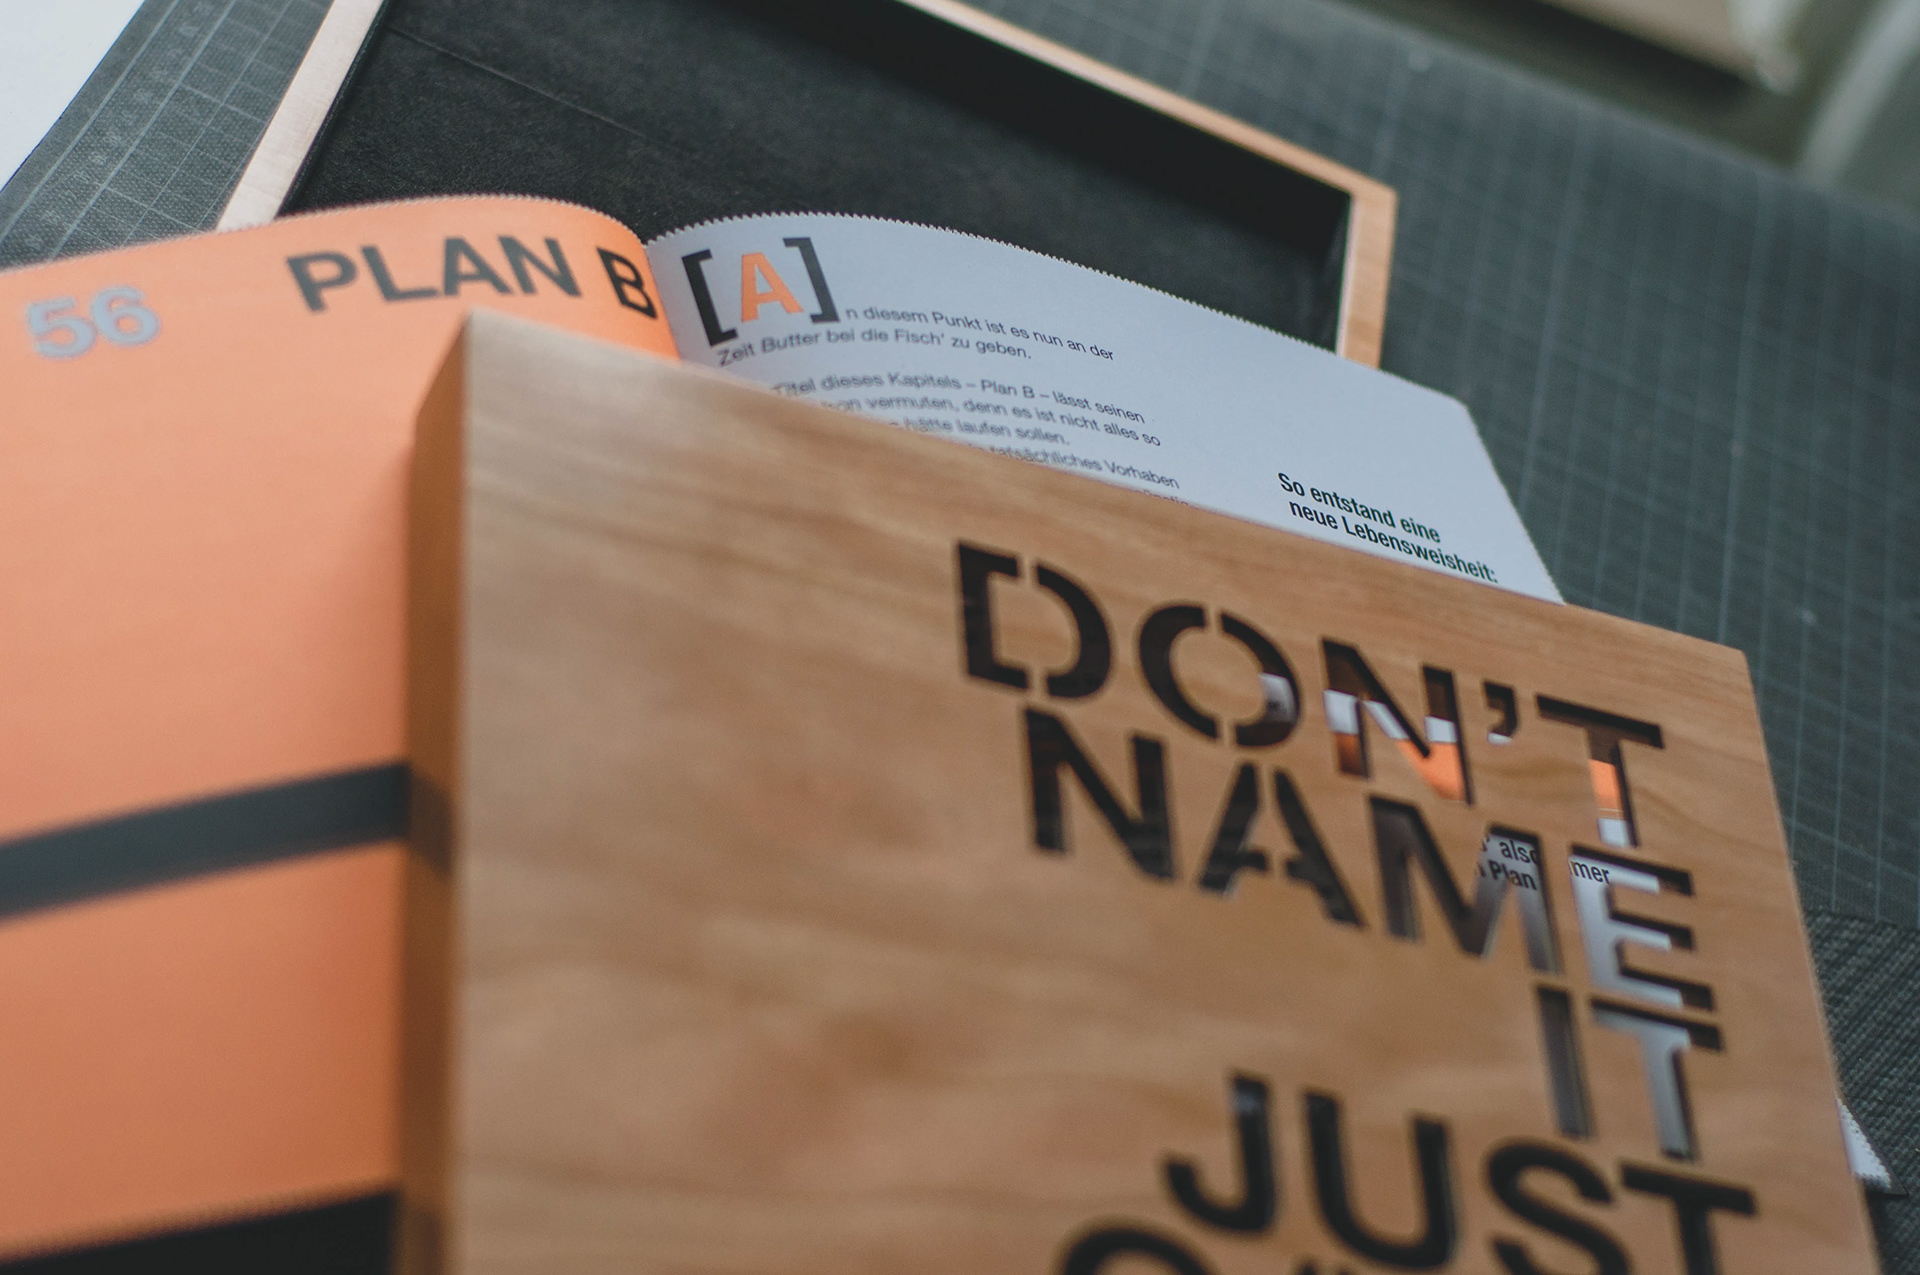
So, how about already giving the actual artwork an insight, while not holding it in hands?
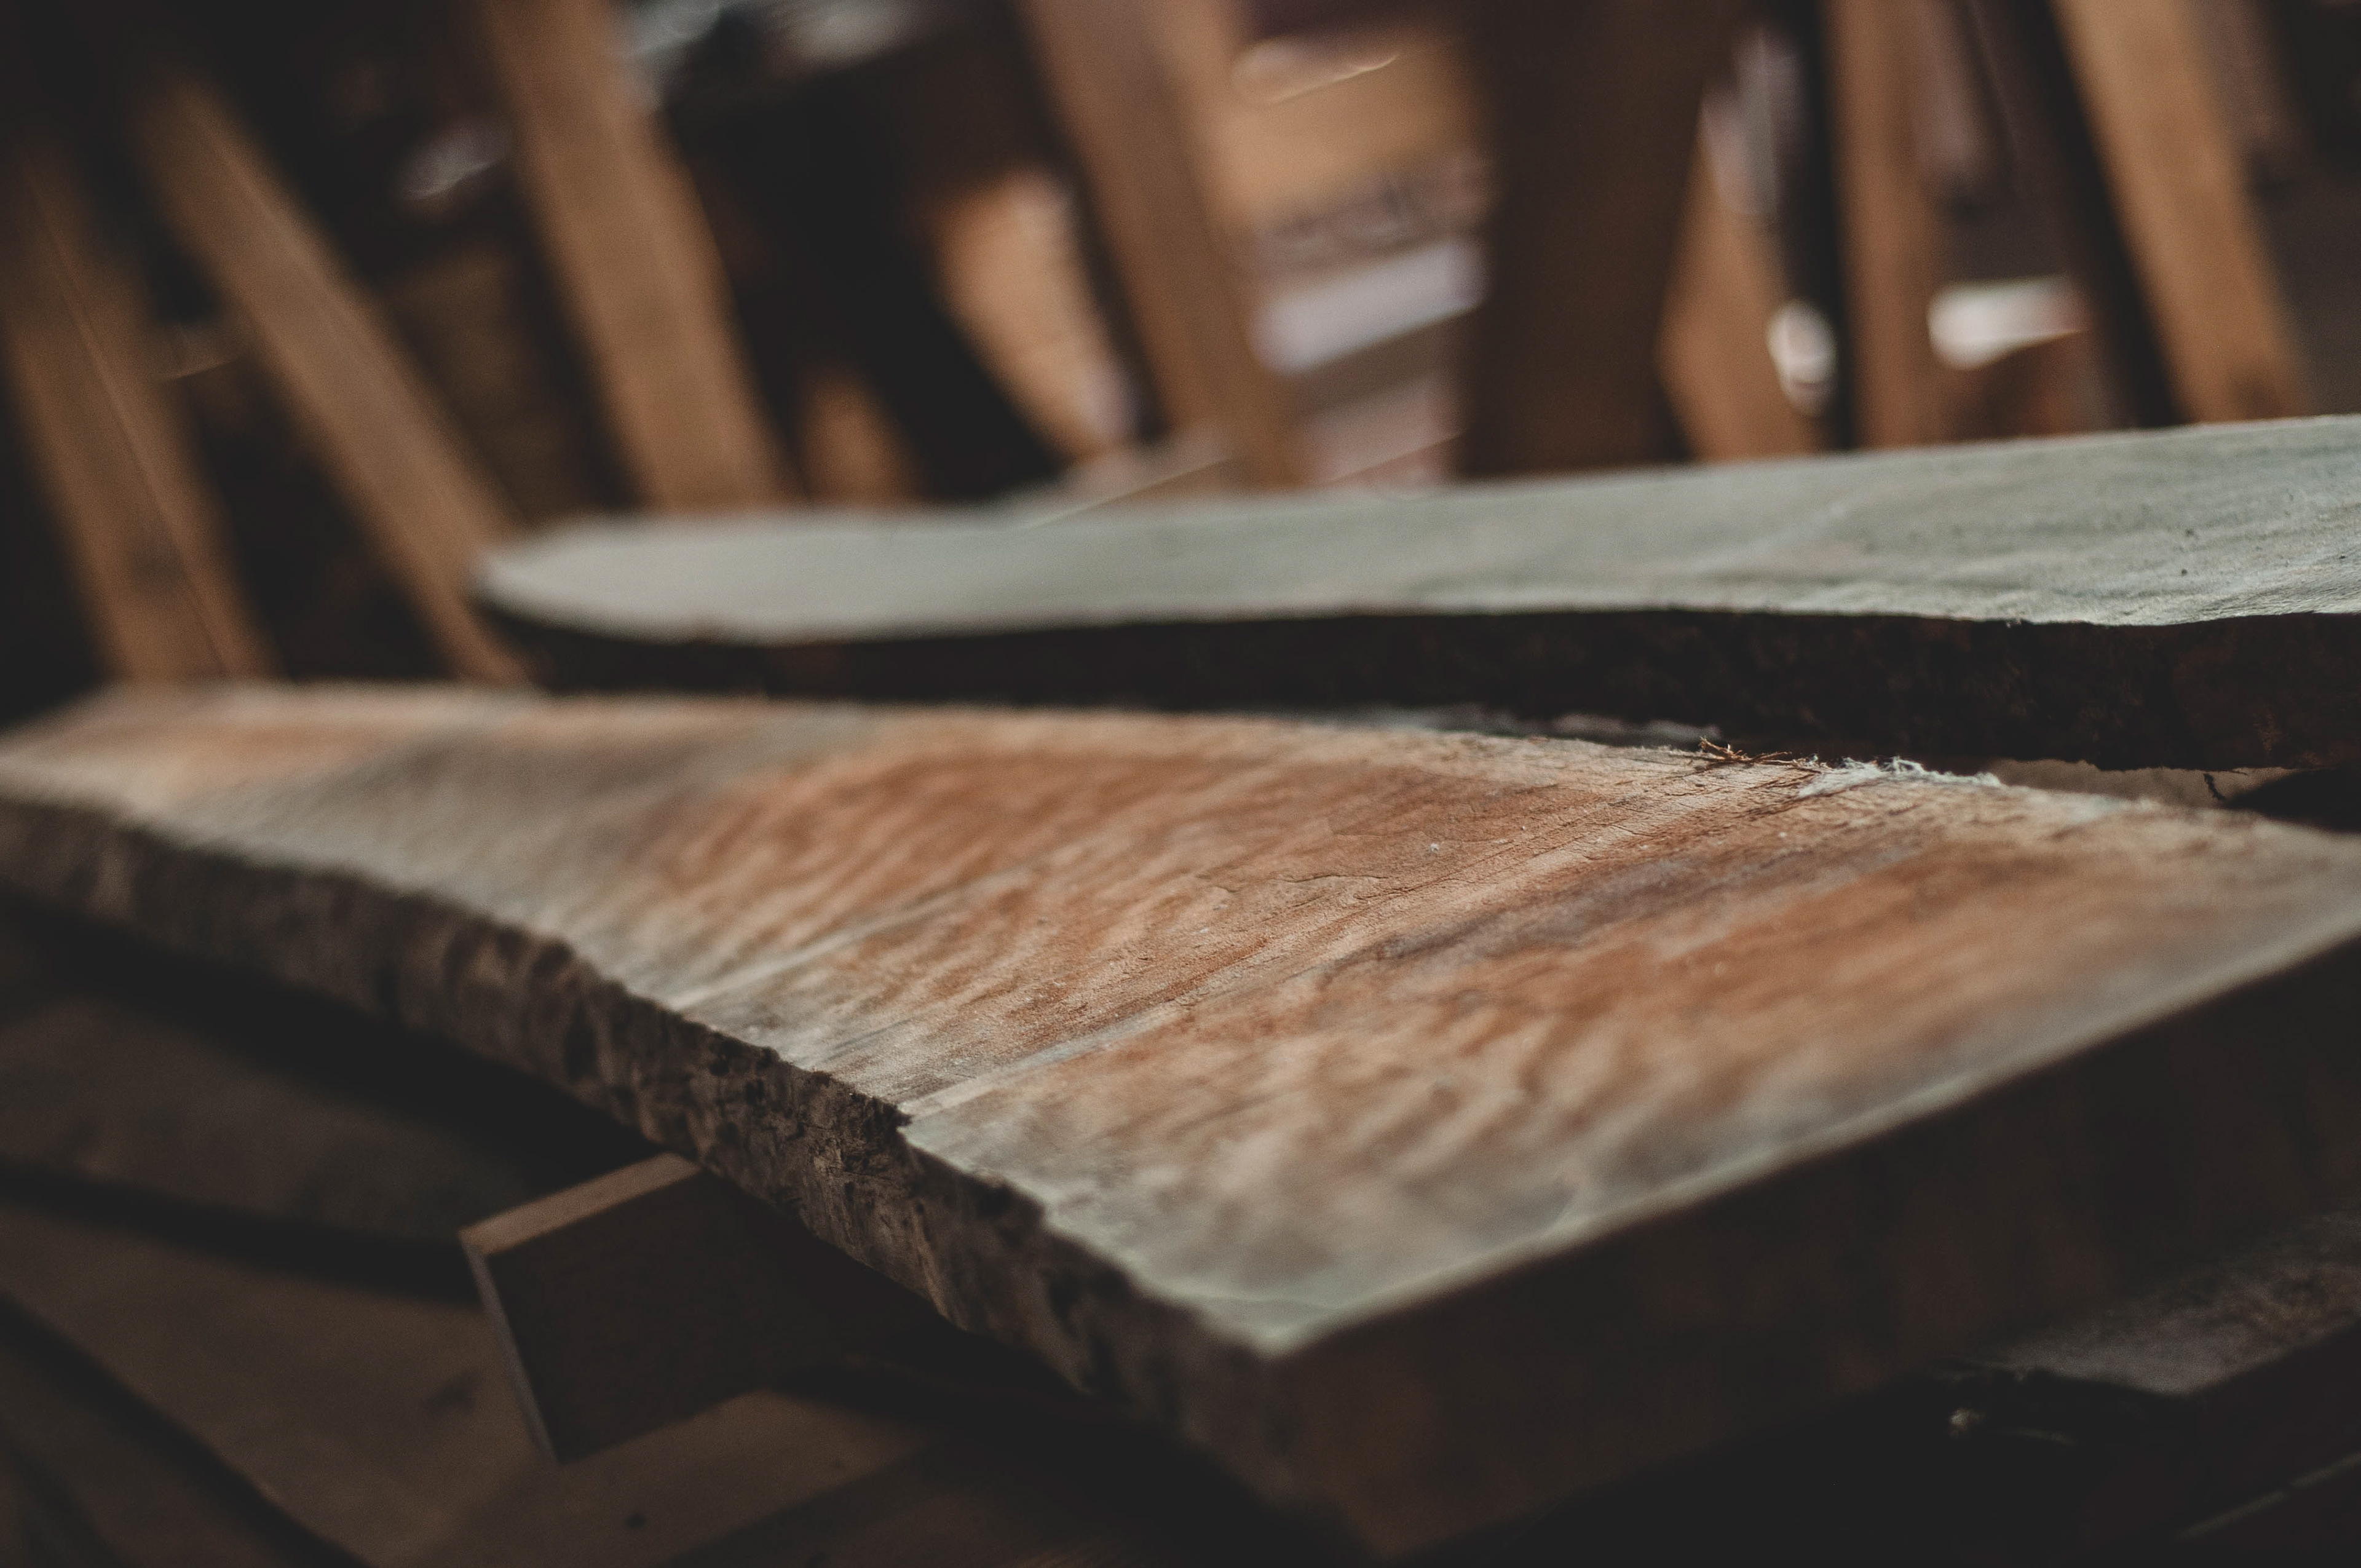
I made a first selection of different approach building a dummy out of cardboard…
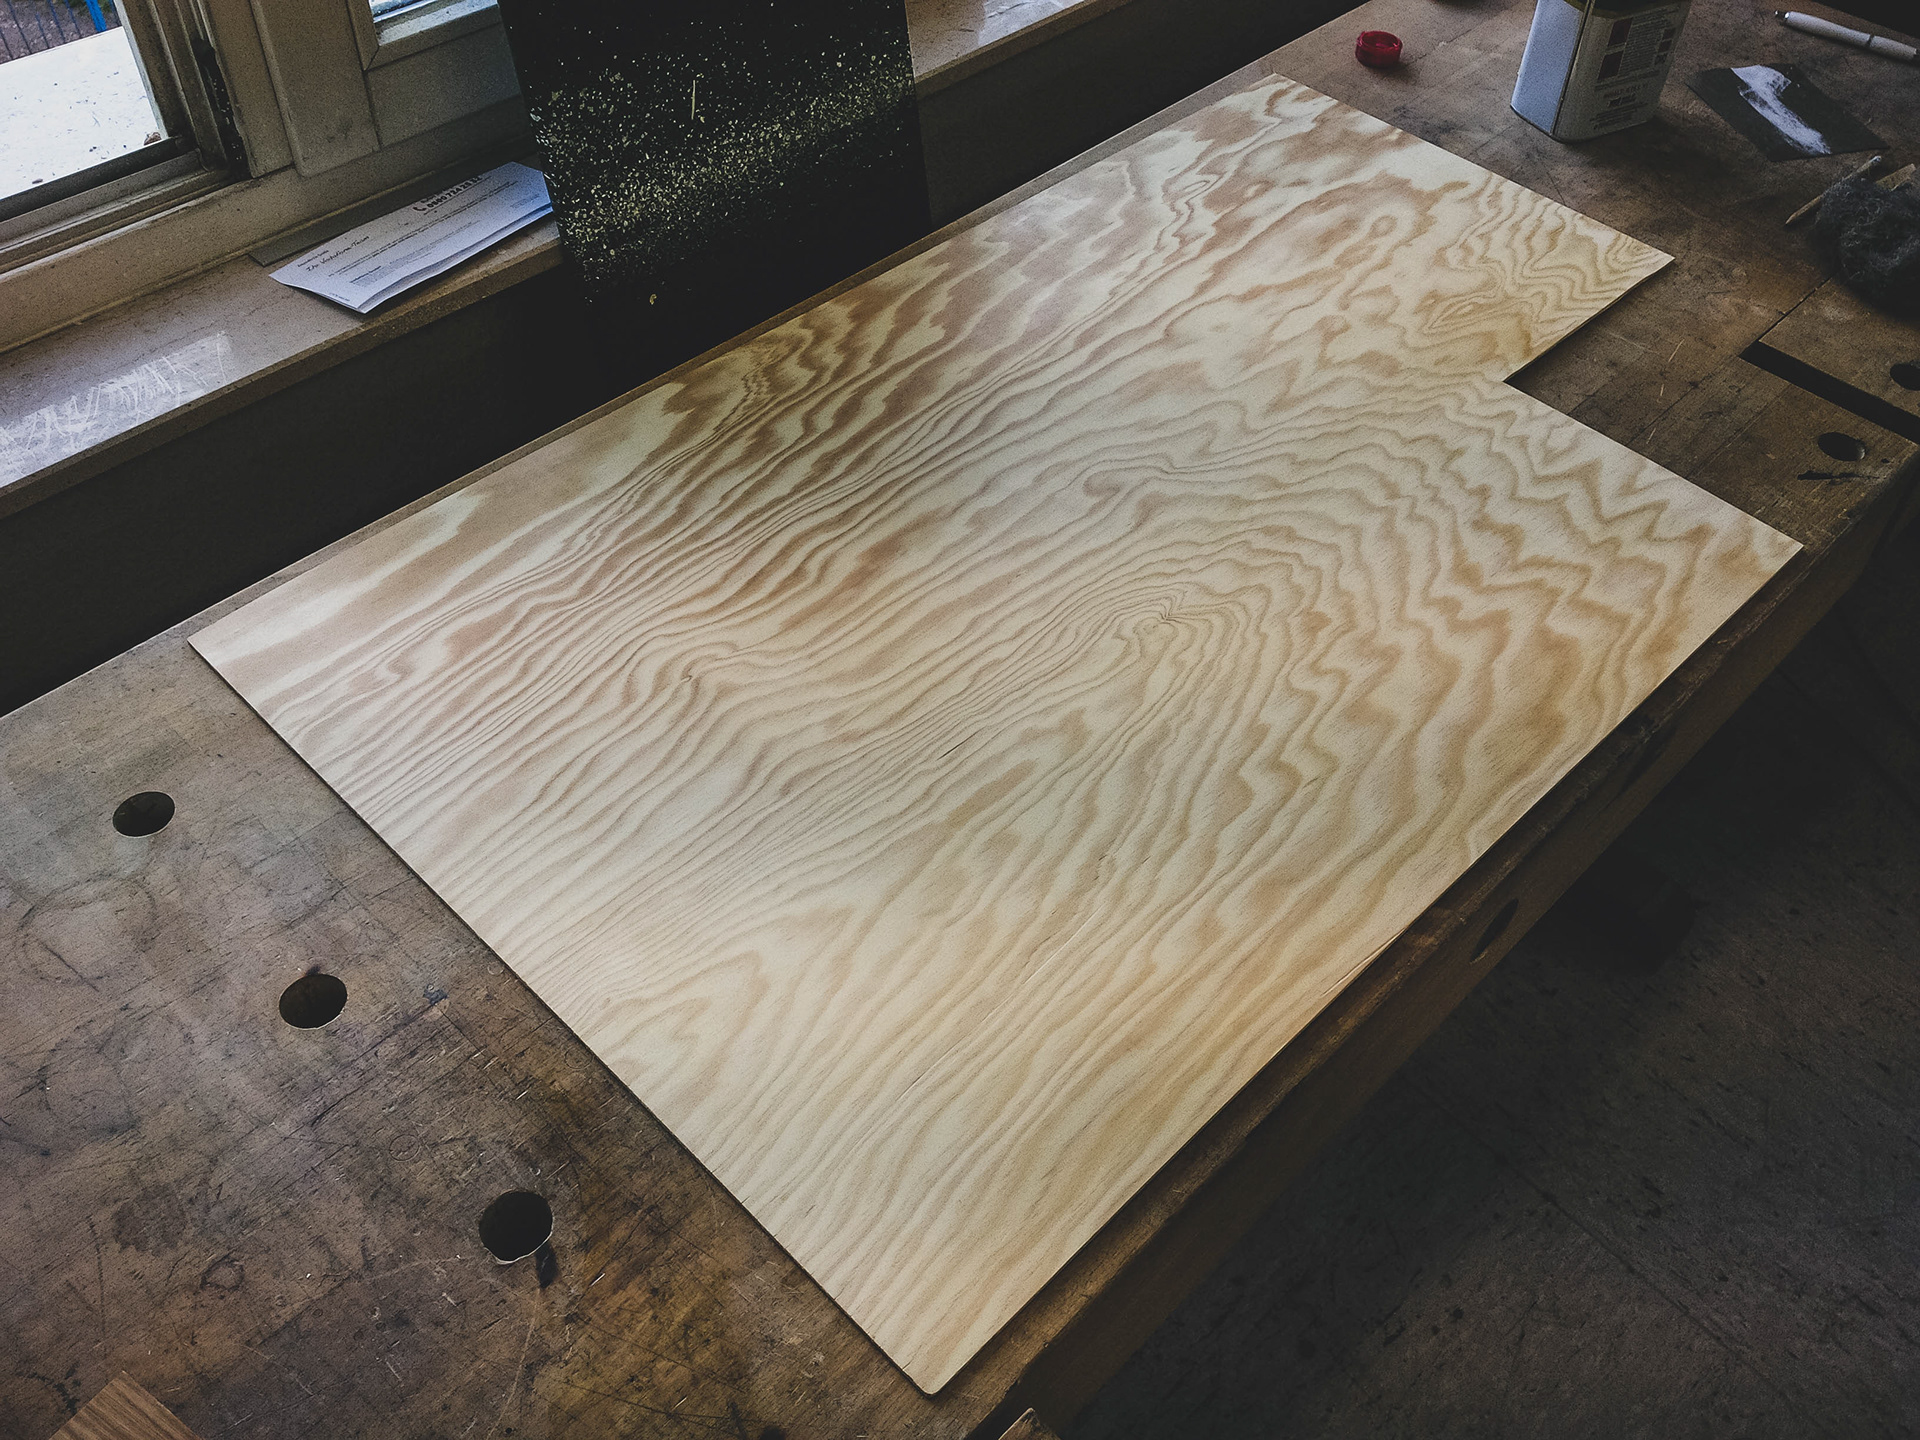
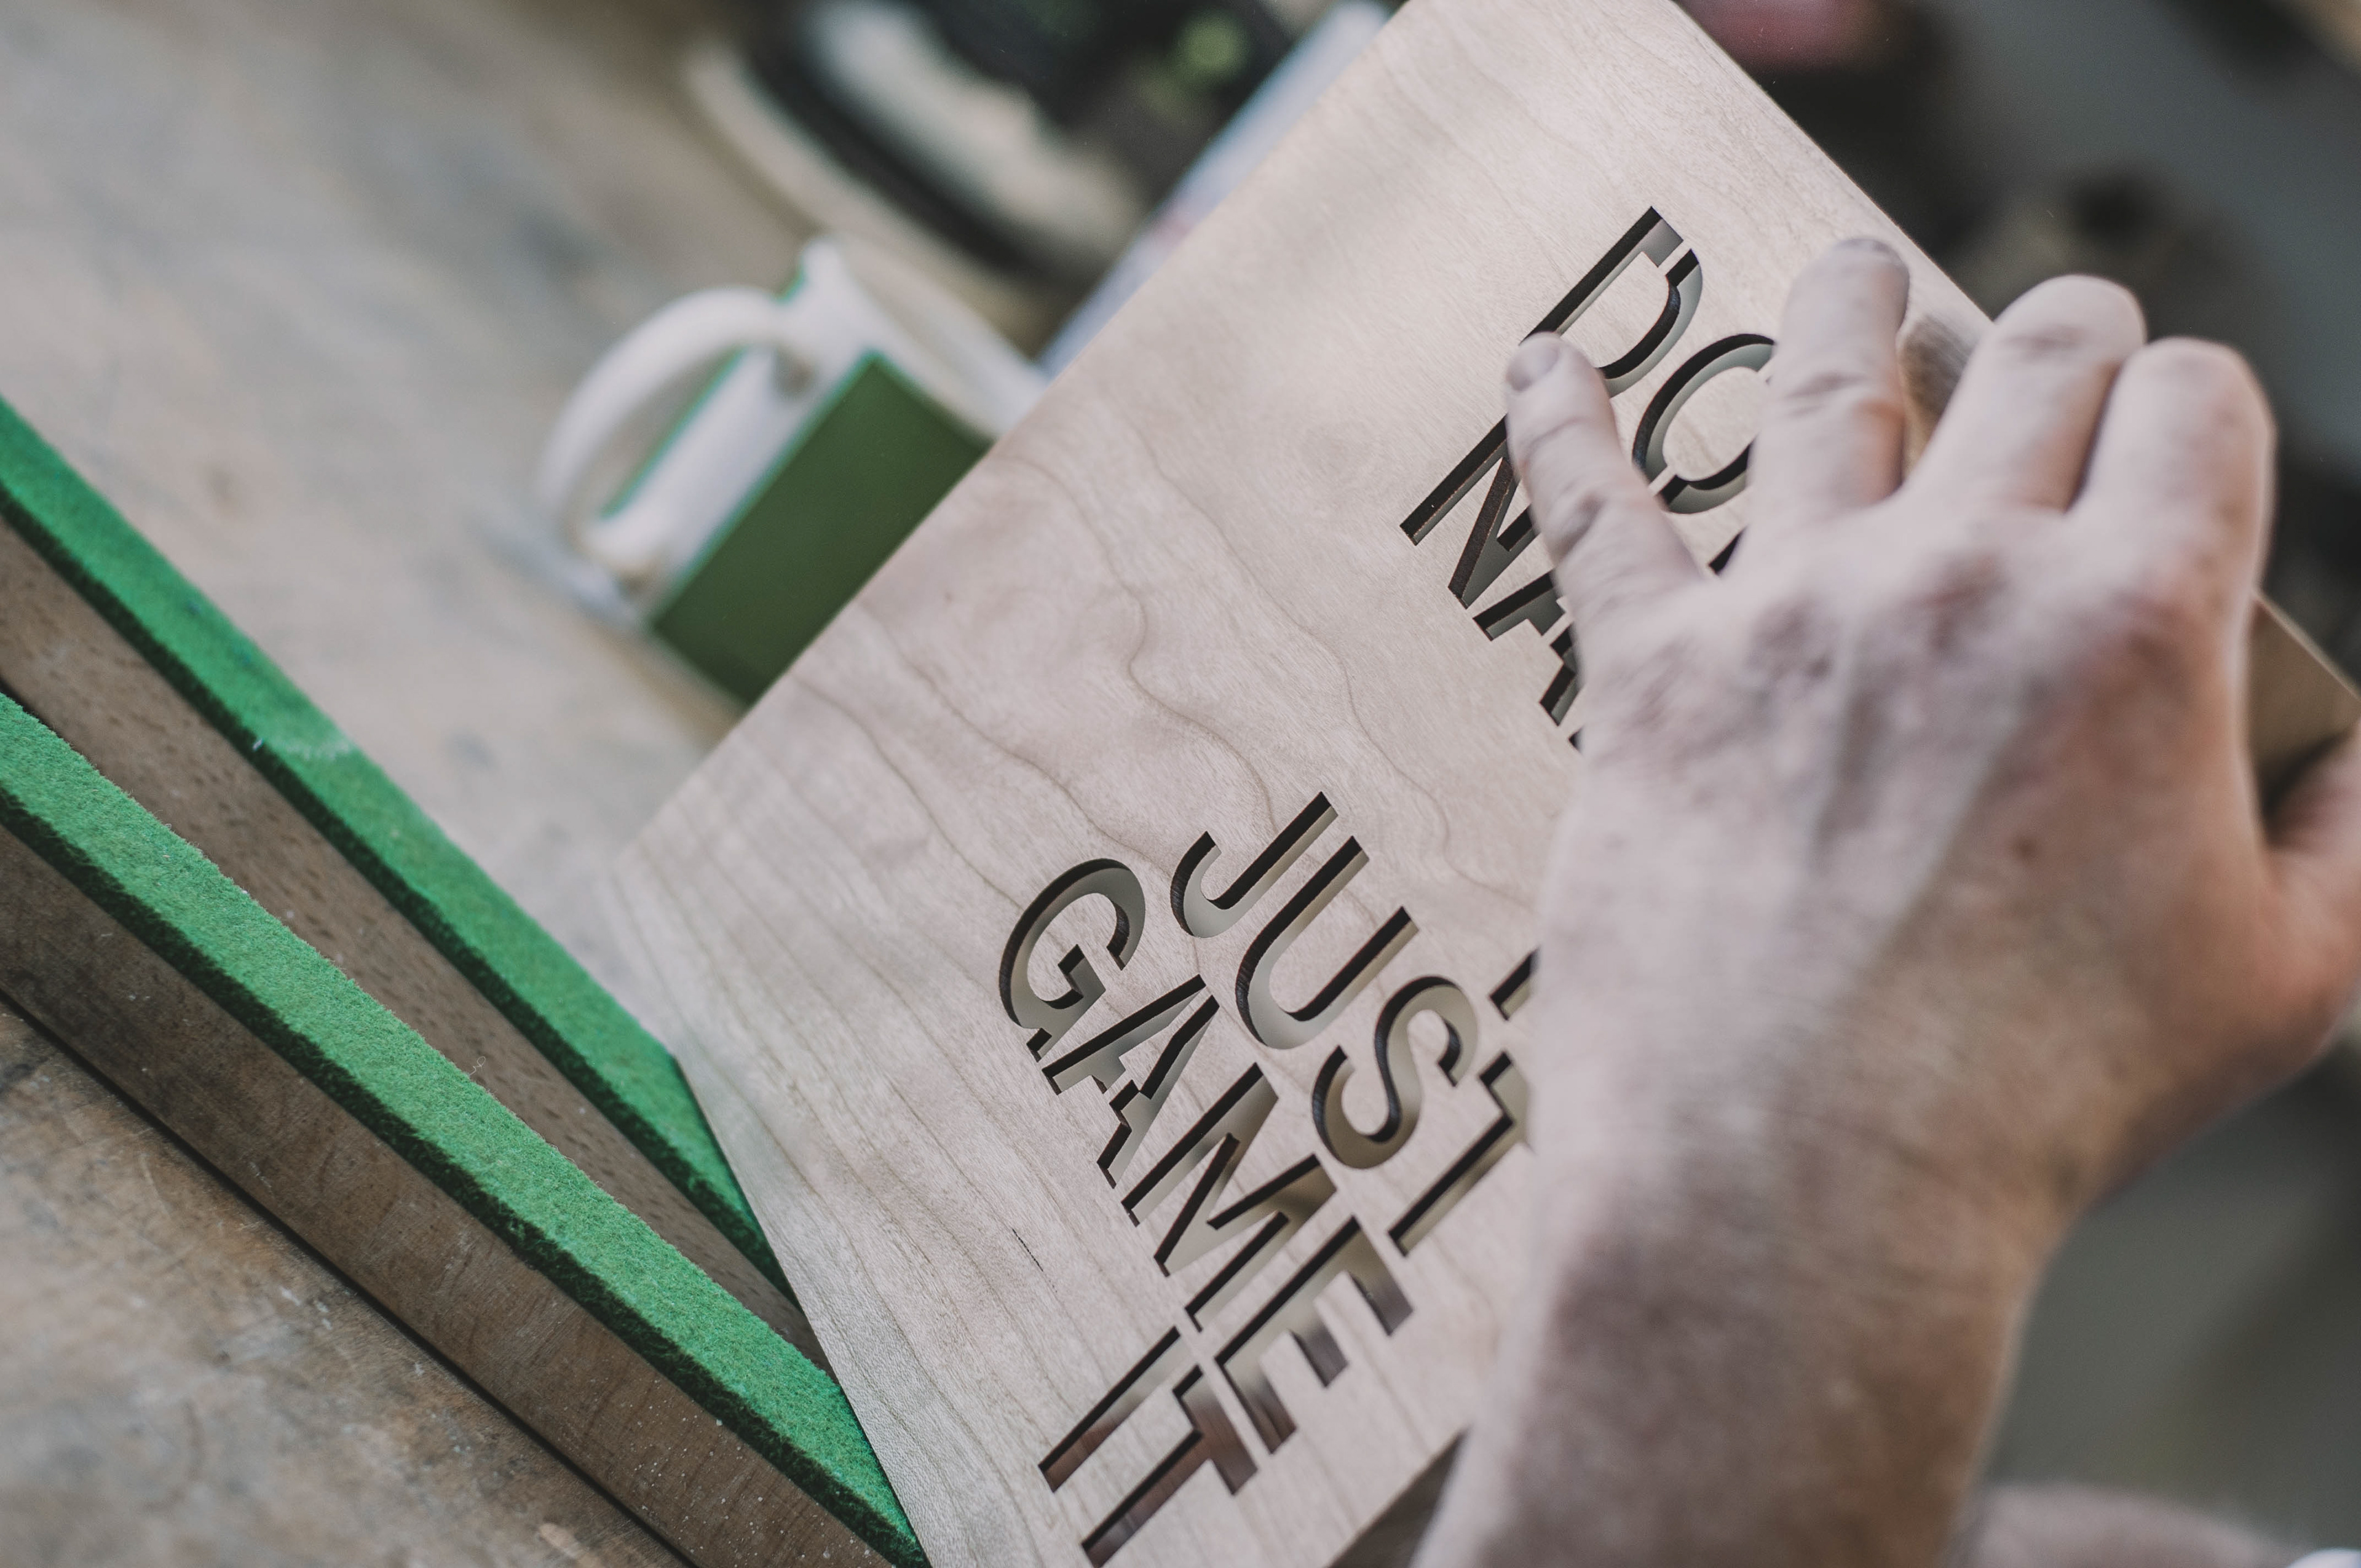
The approach of the cut-out looked great. So I was looking forward to get my idea slowly looking much more premium… This is how I decided turning towards thin wood.
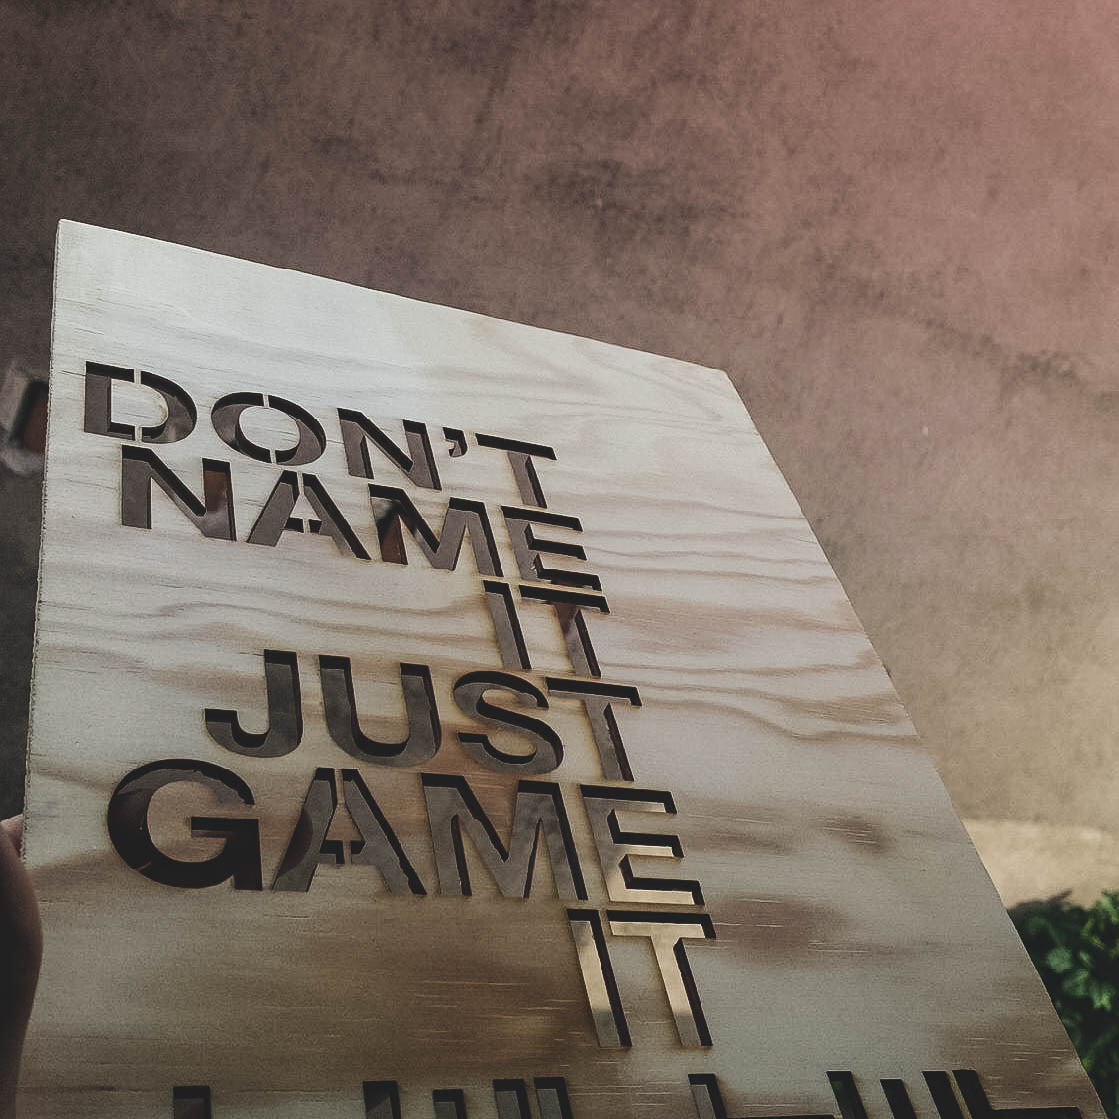
The testing went well, but how should this turn into a packaging?
"It is about giving them the room they need to blossom"
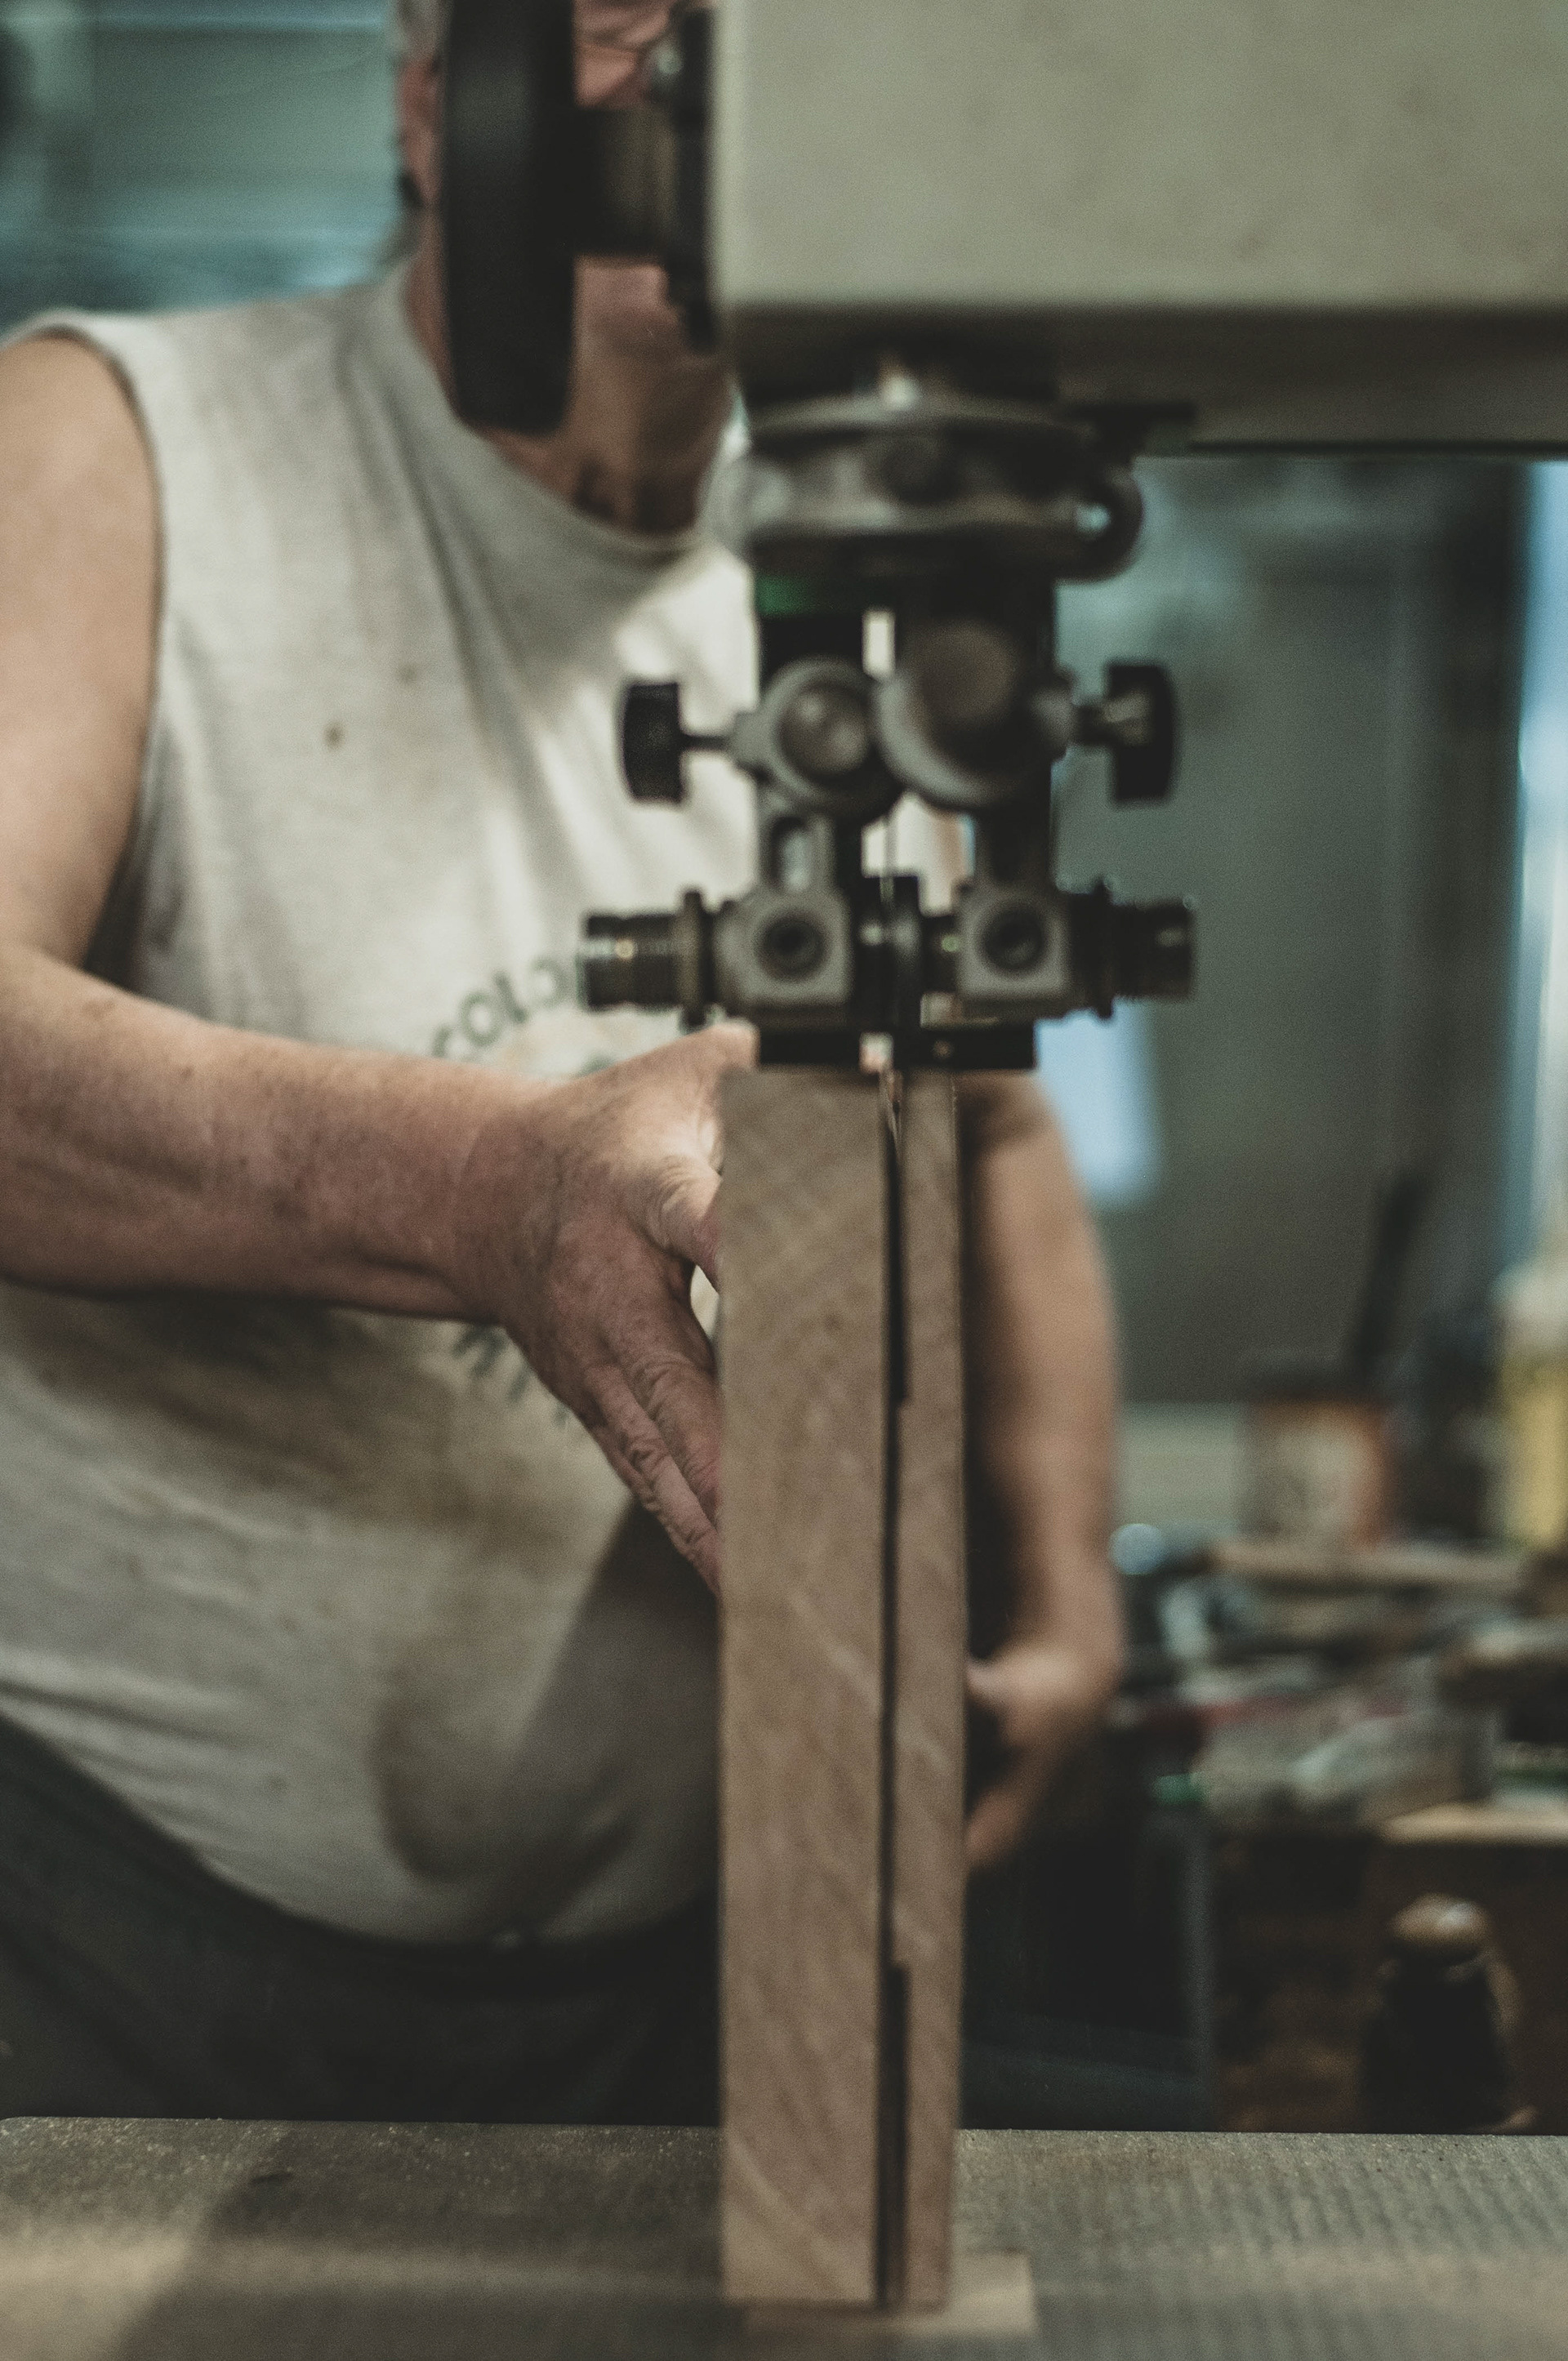
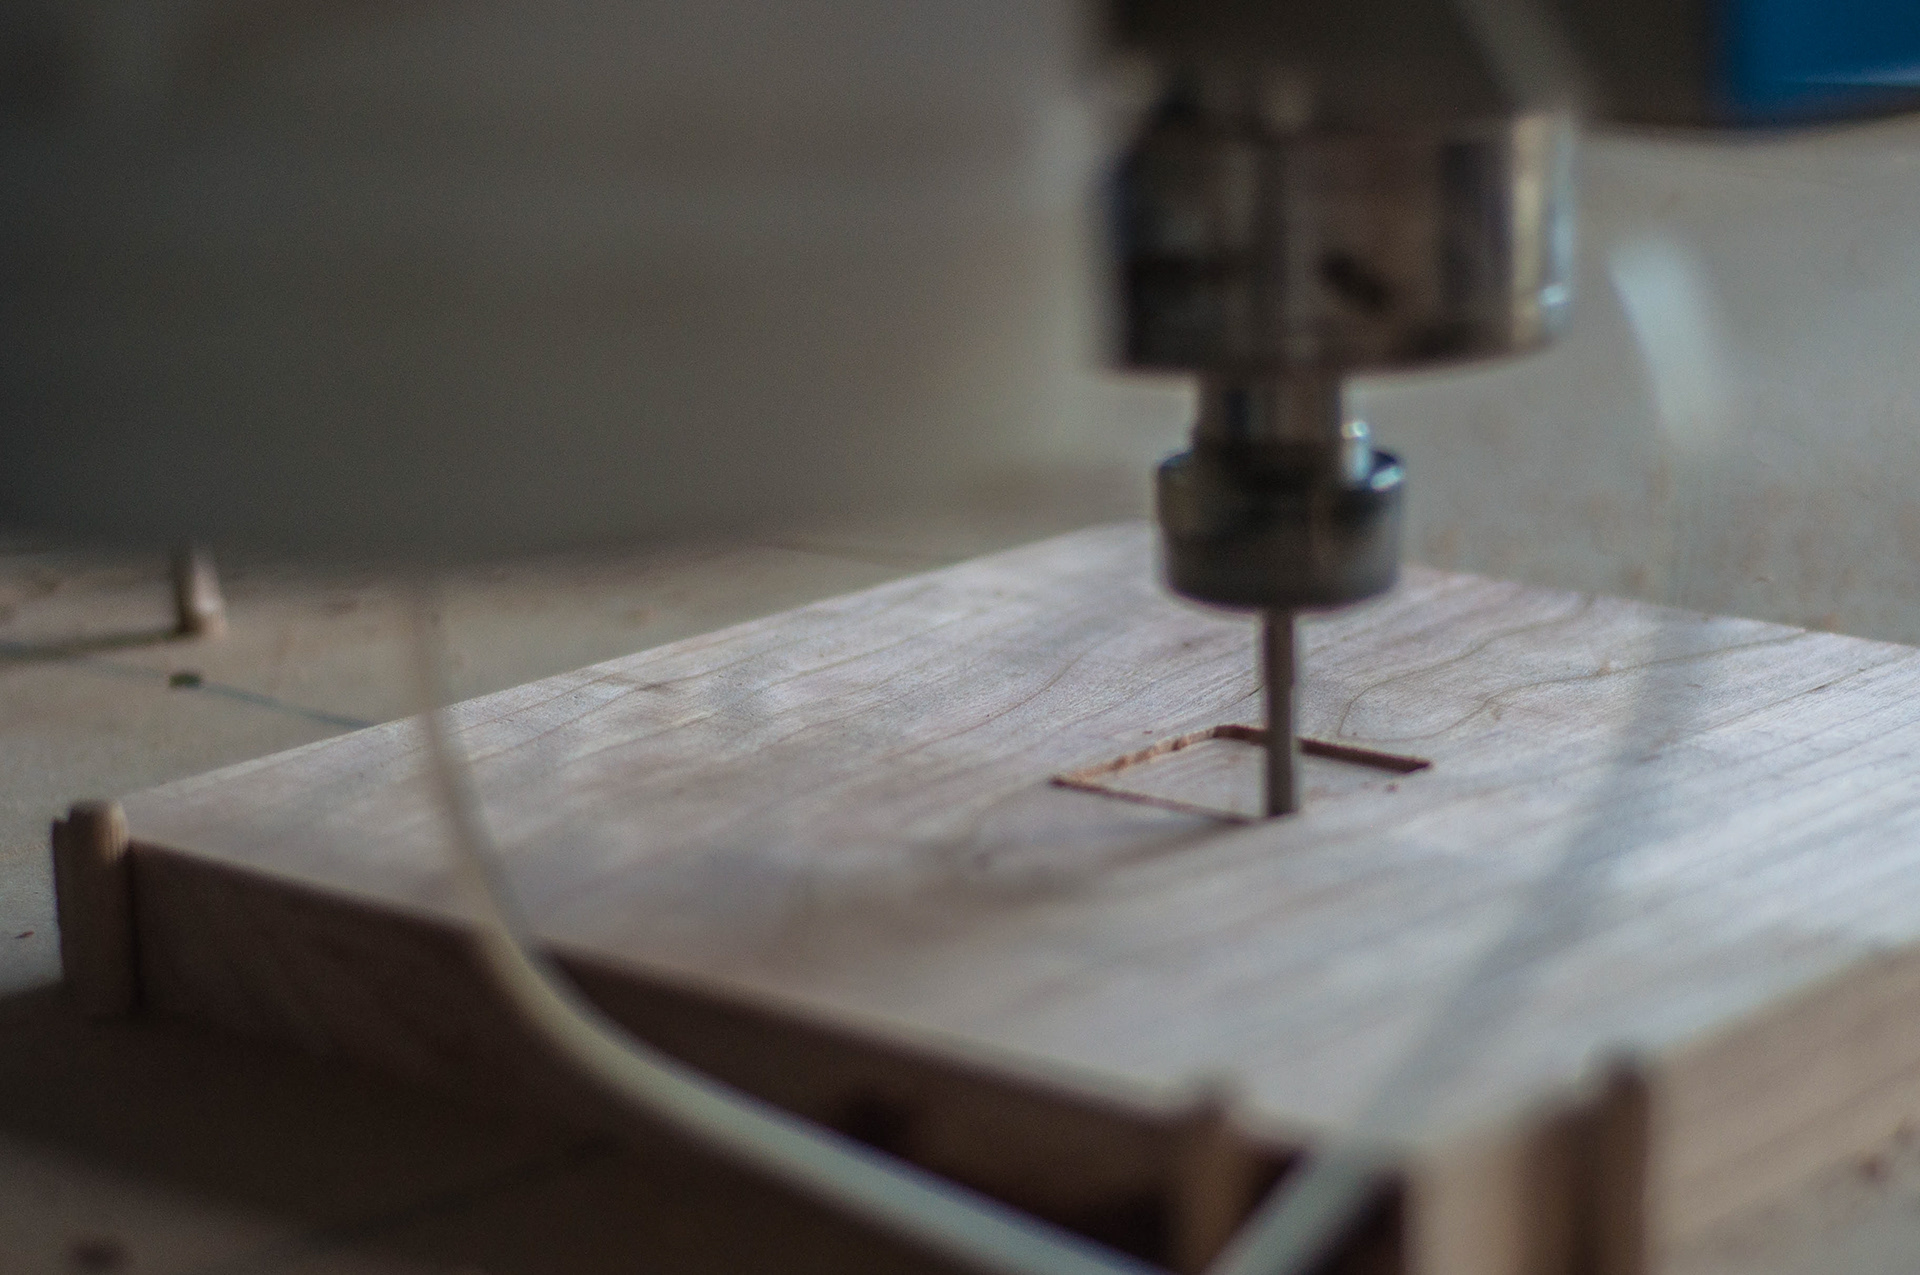
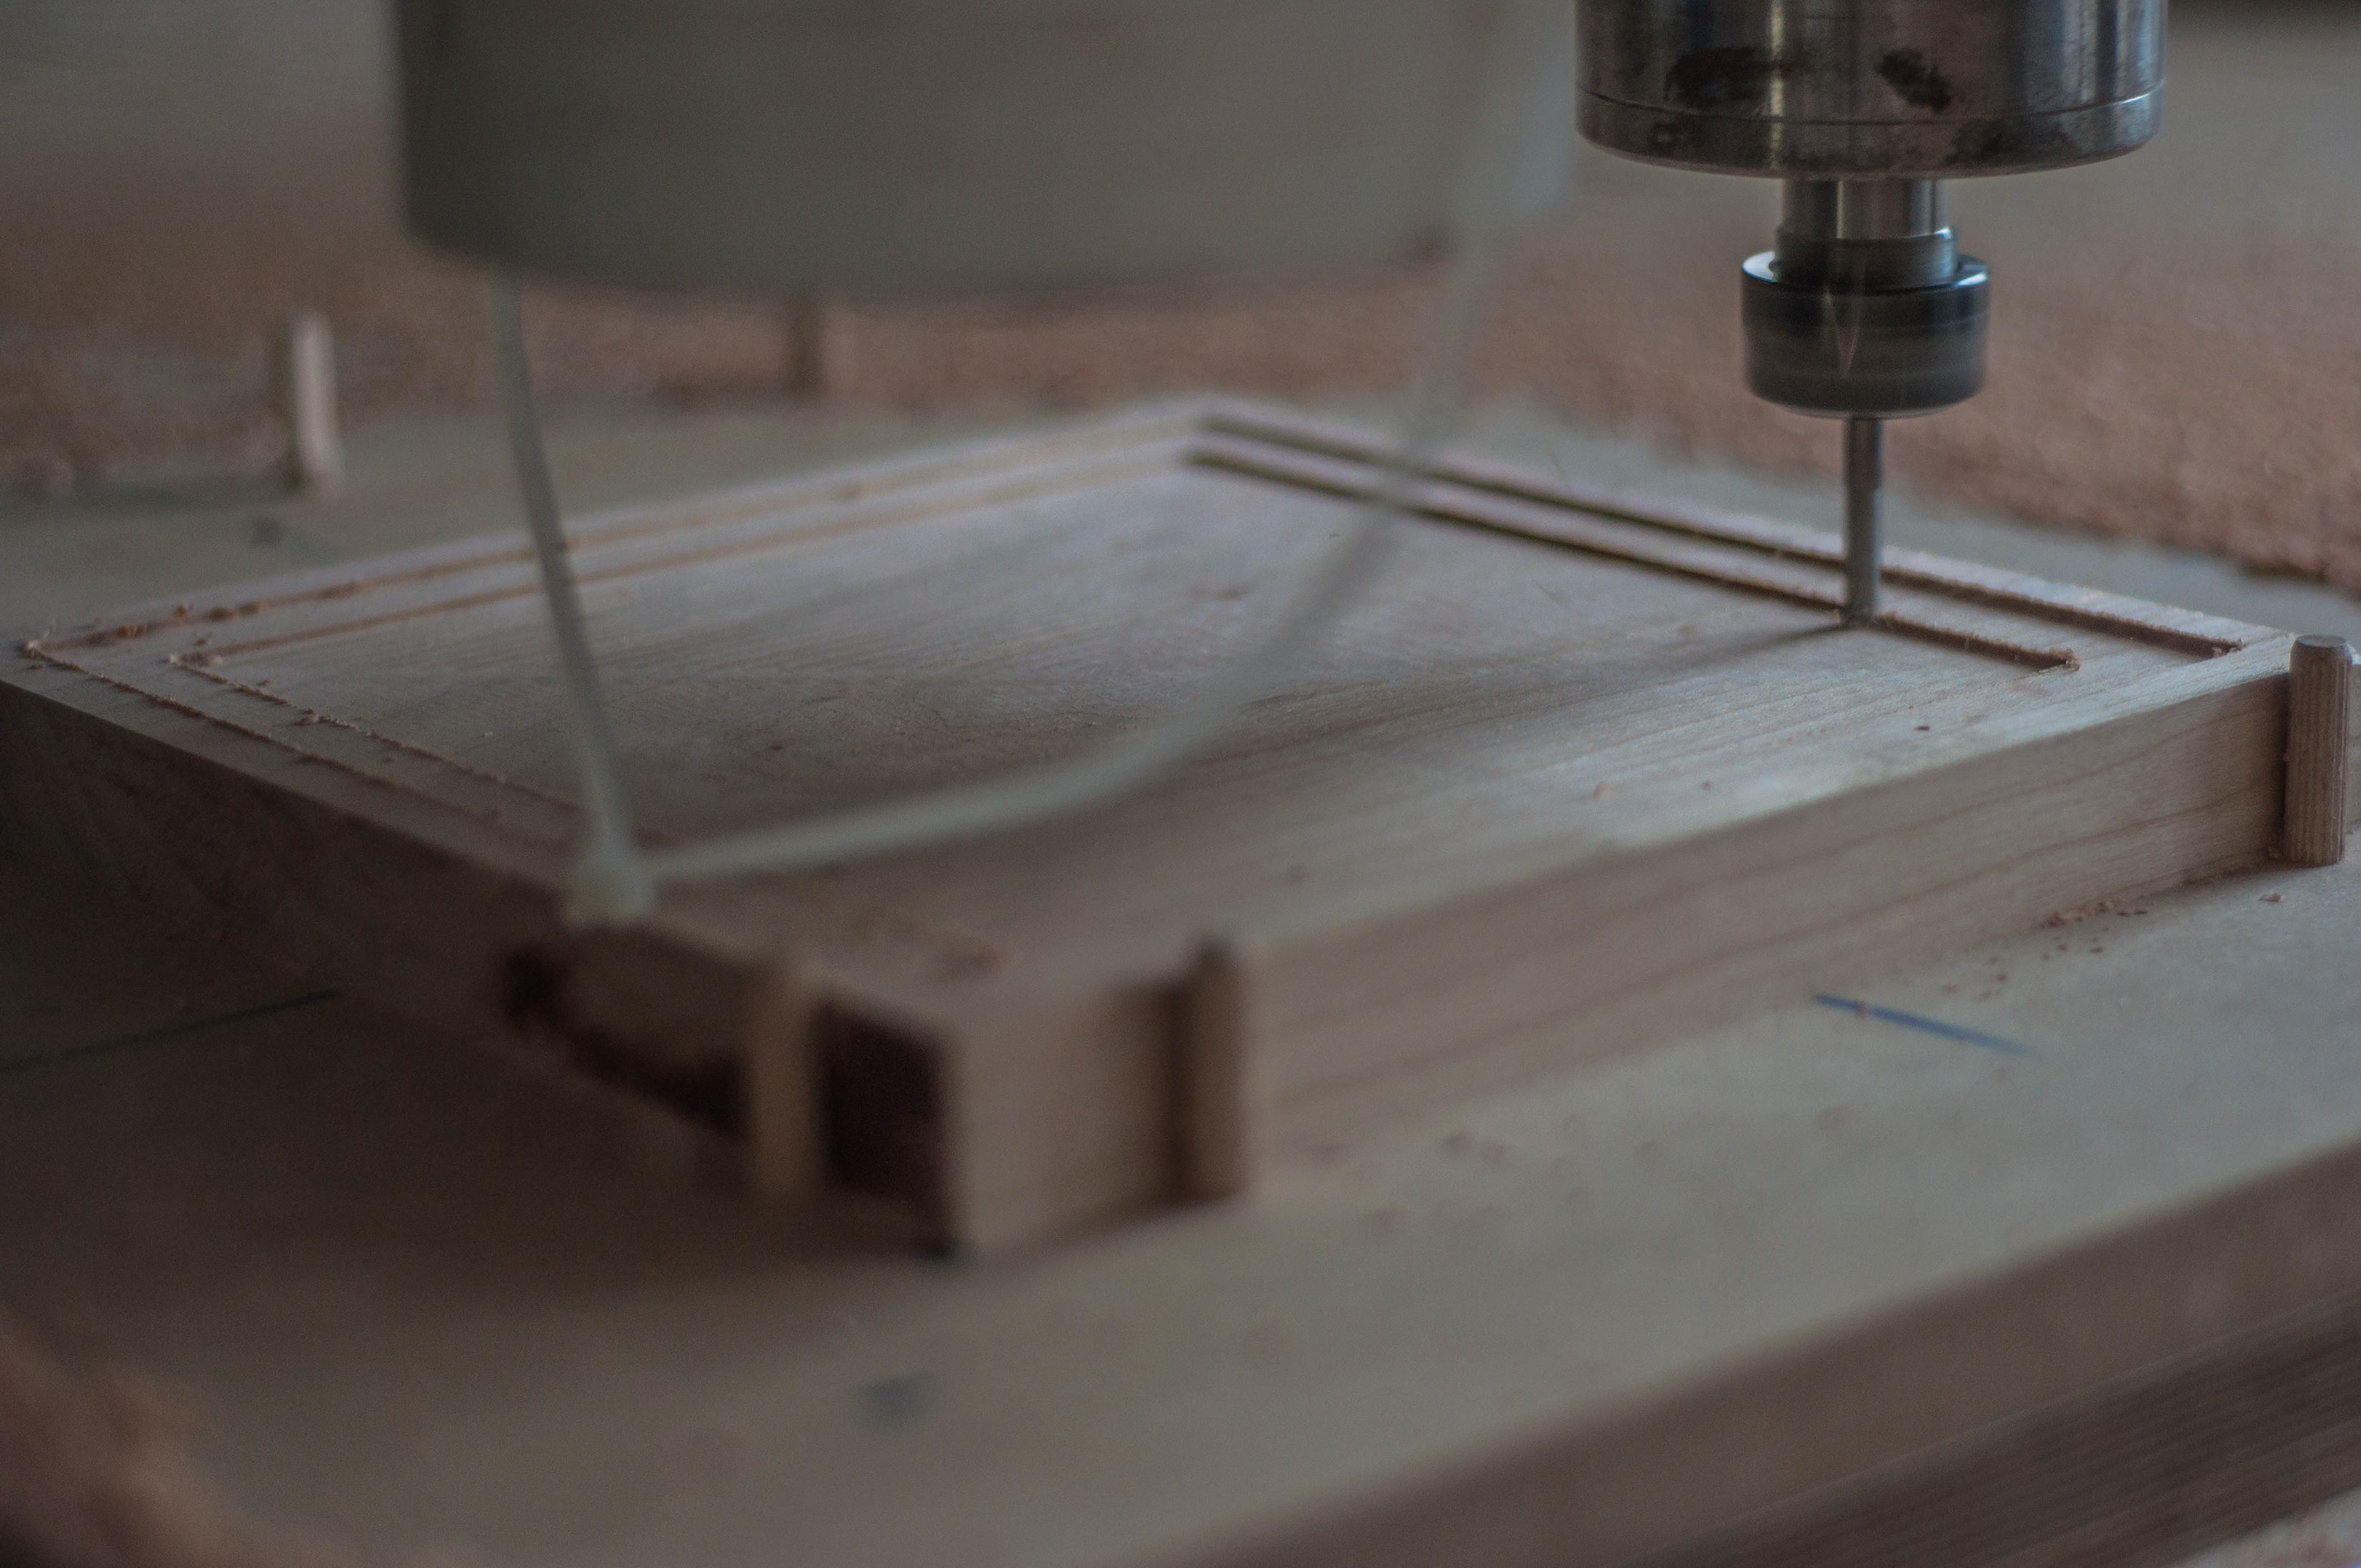
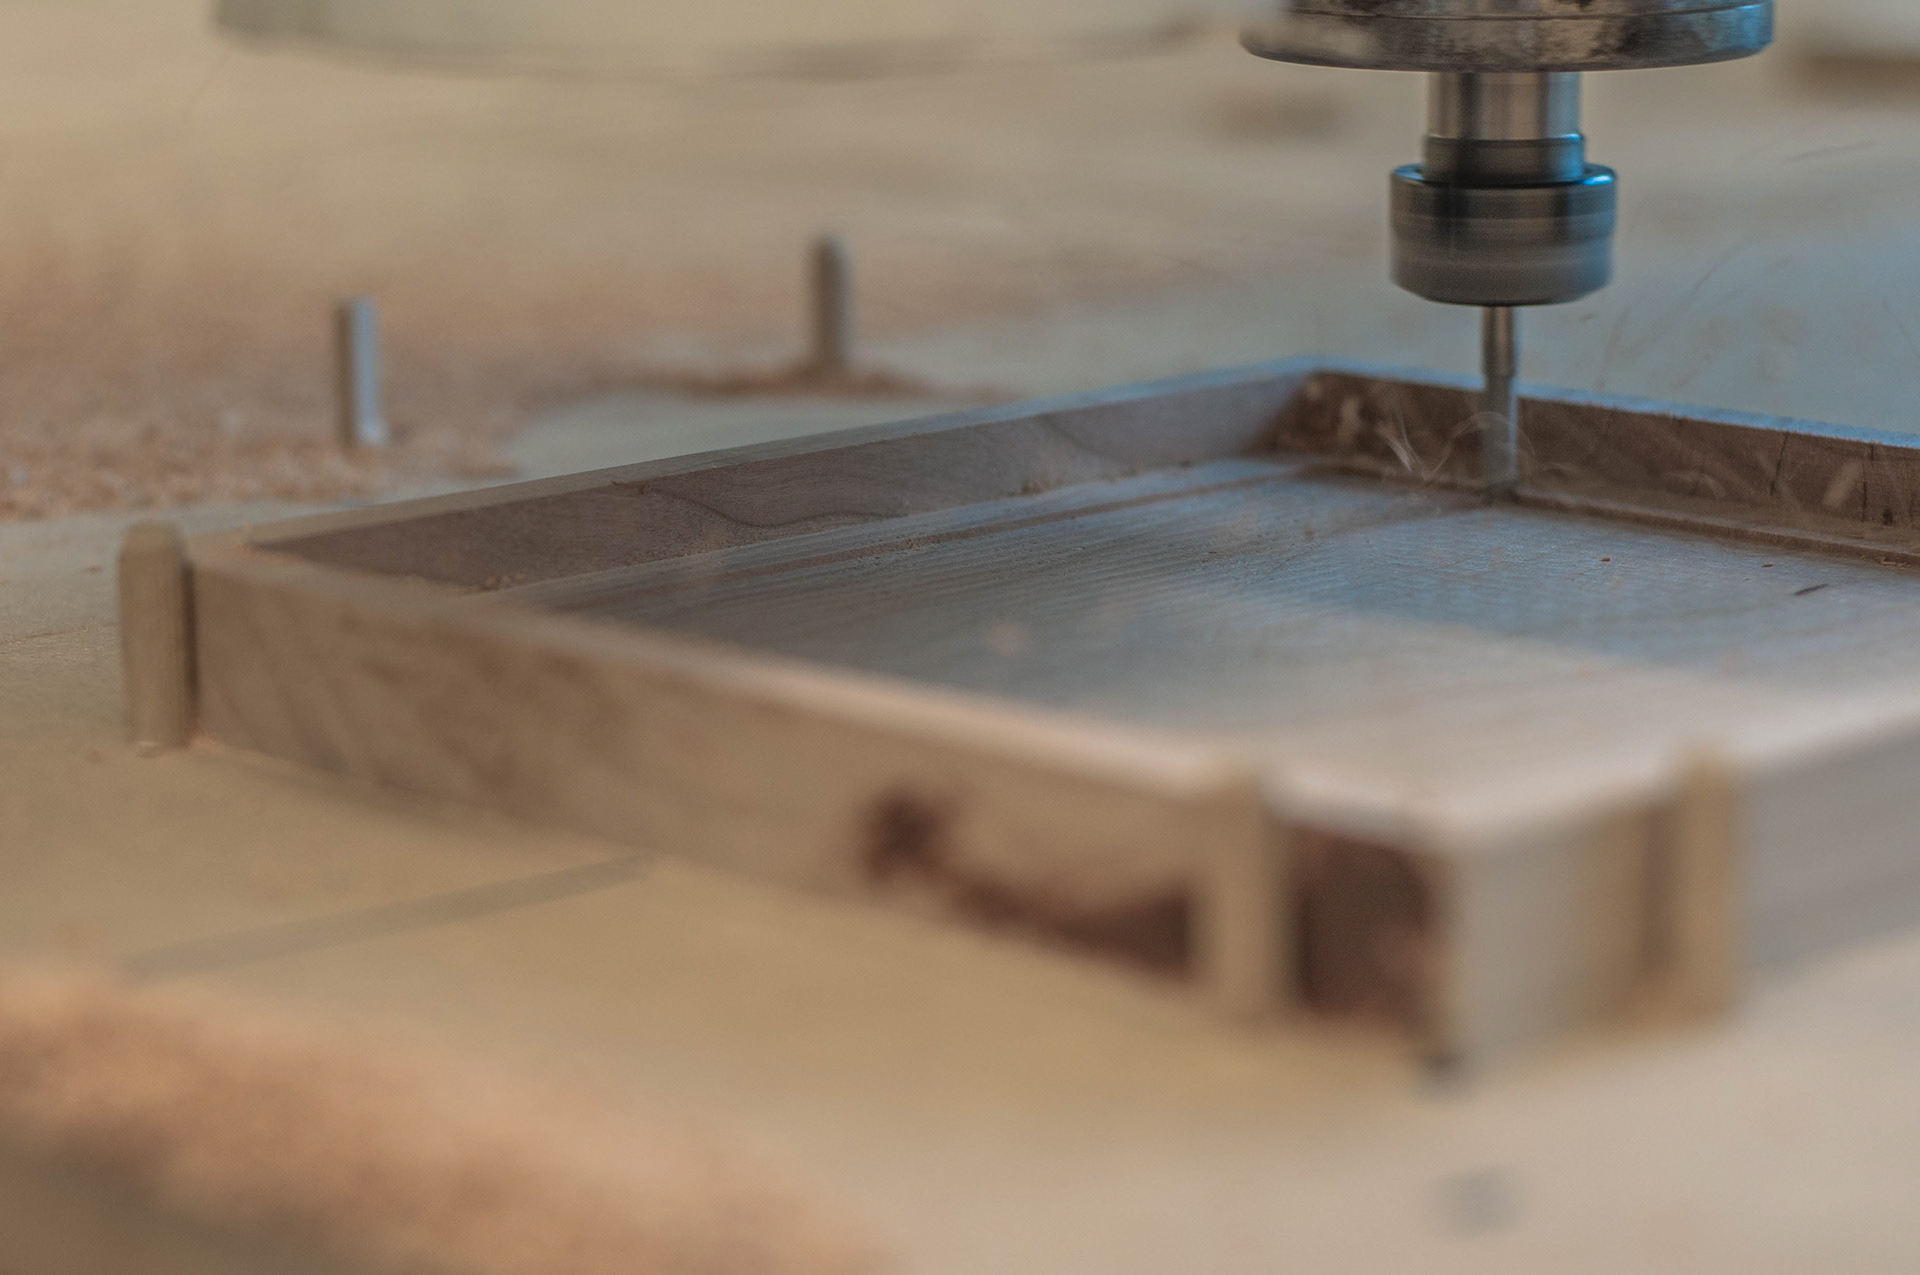
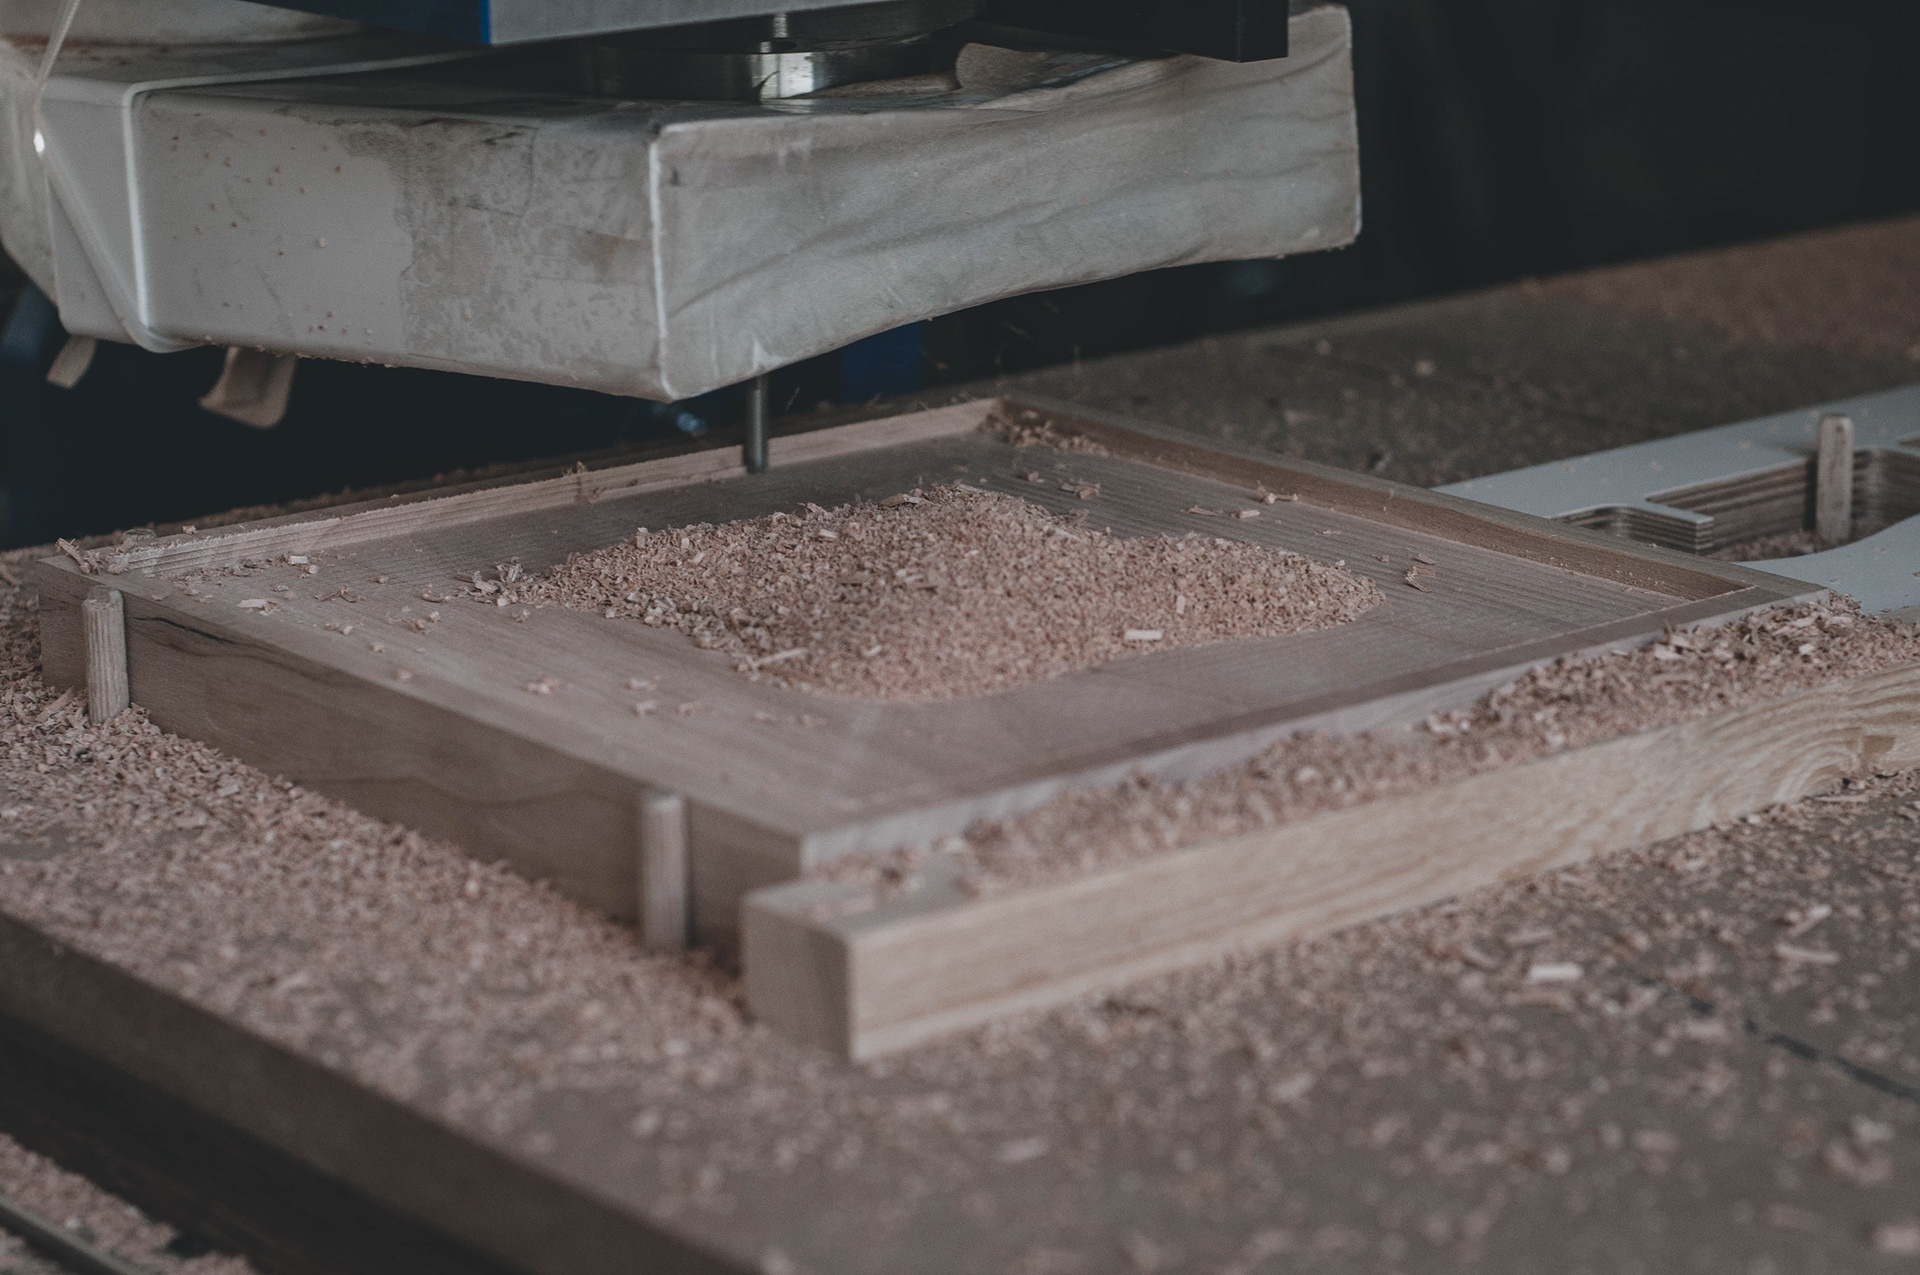
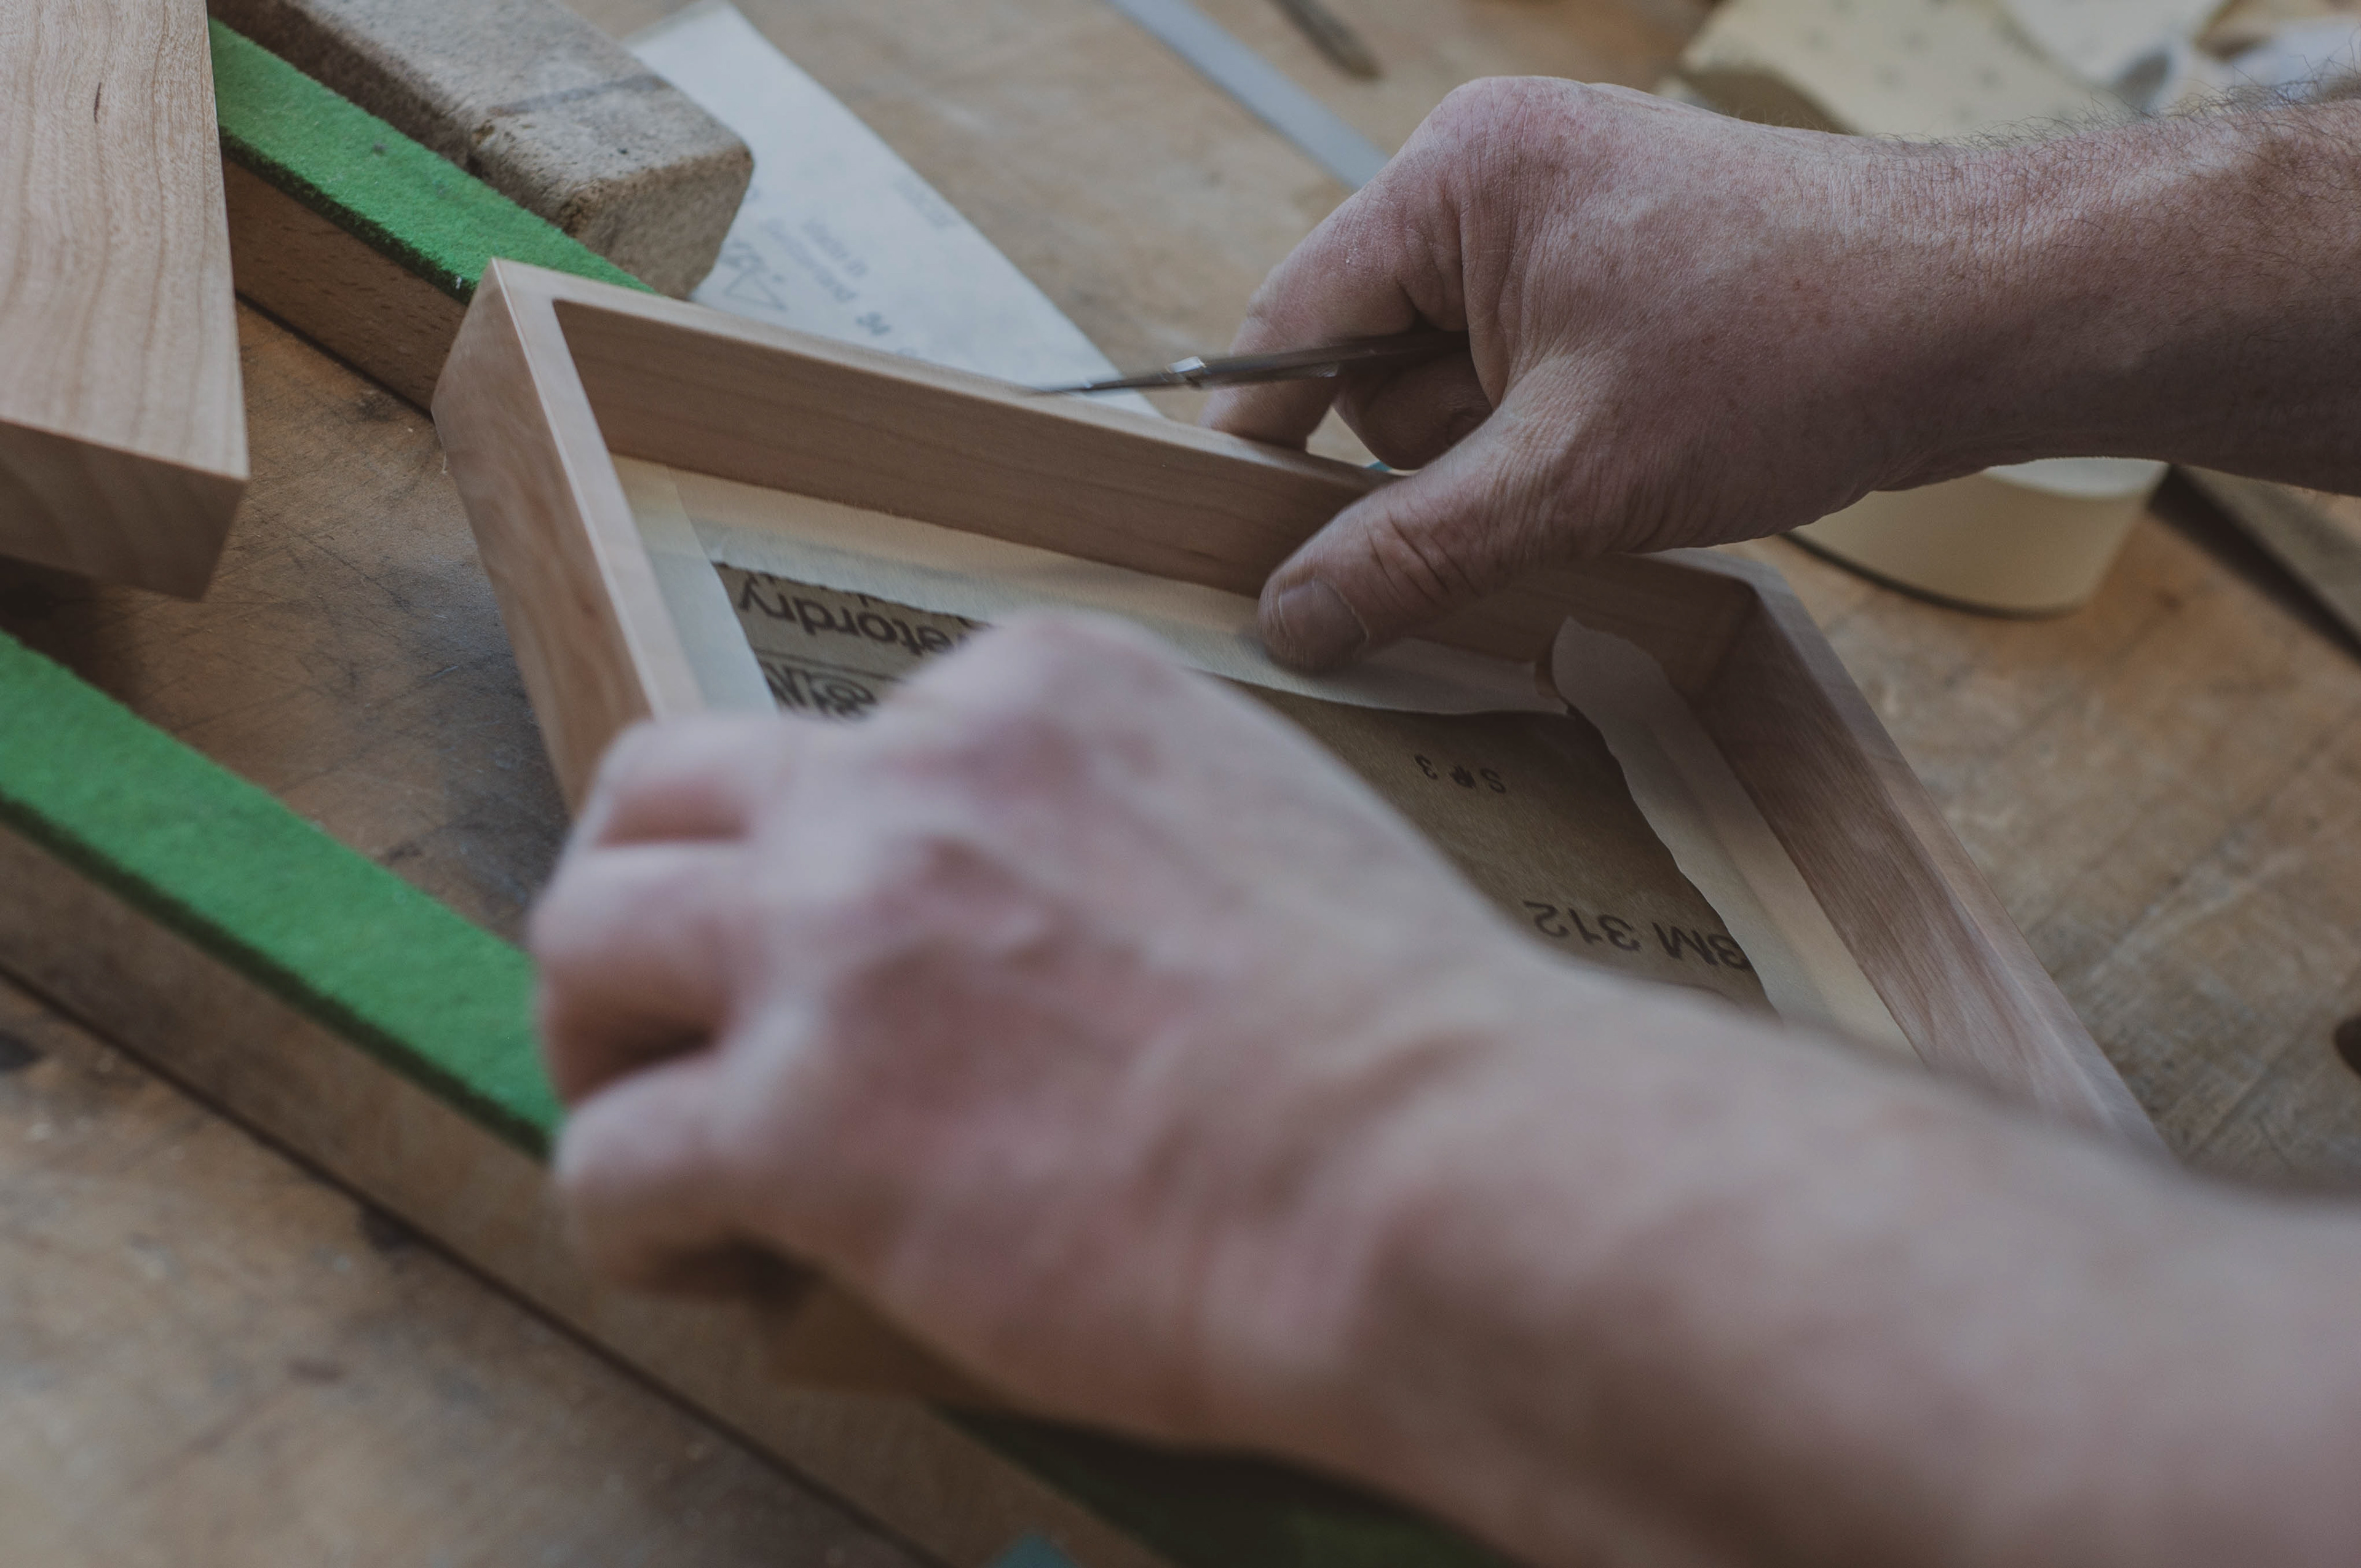
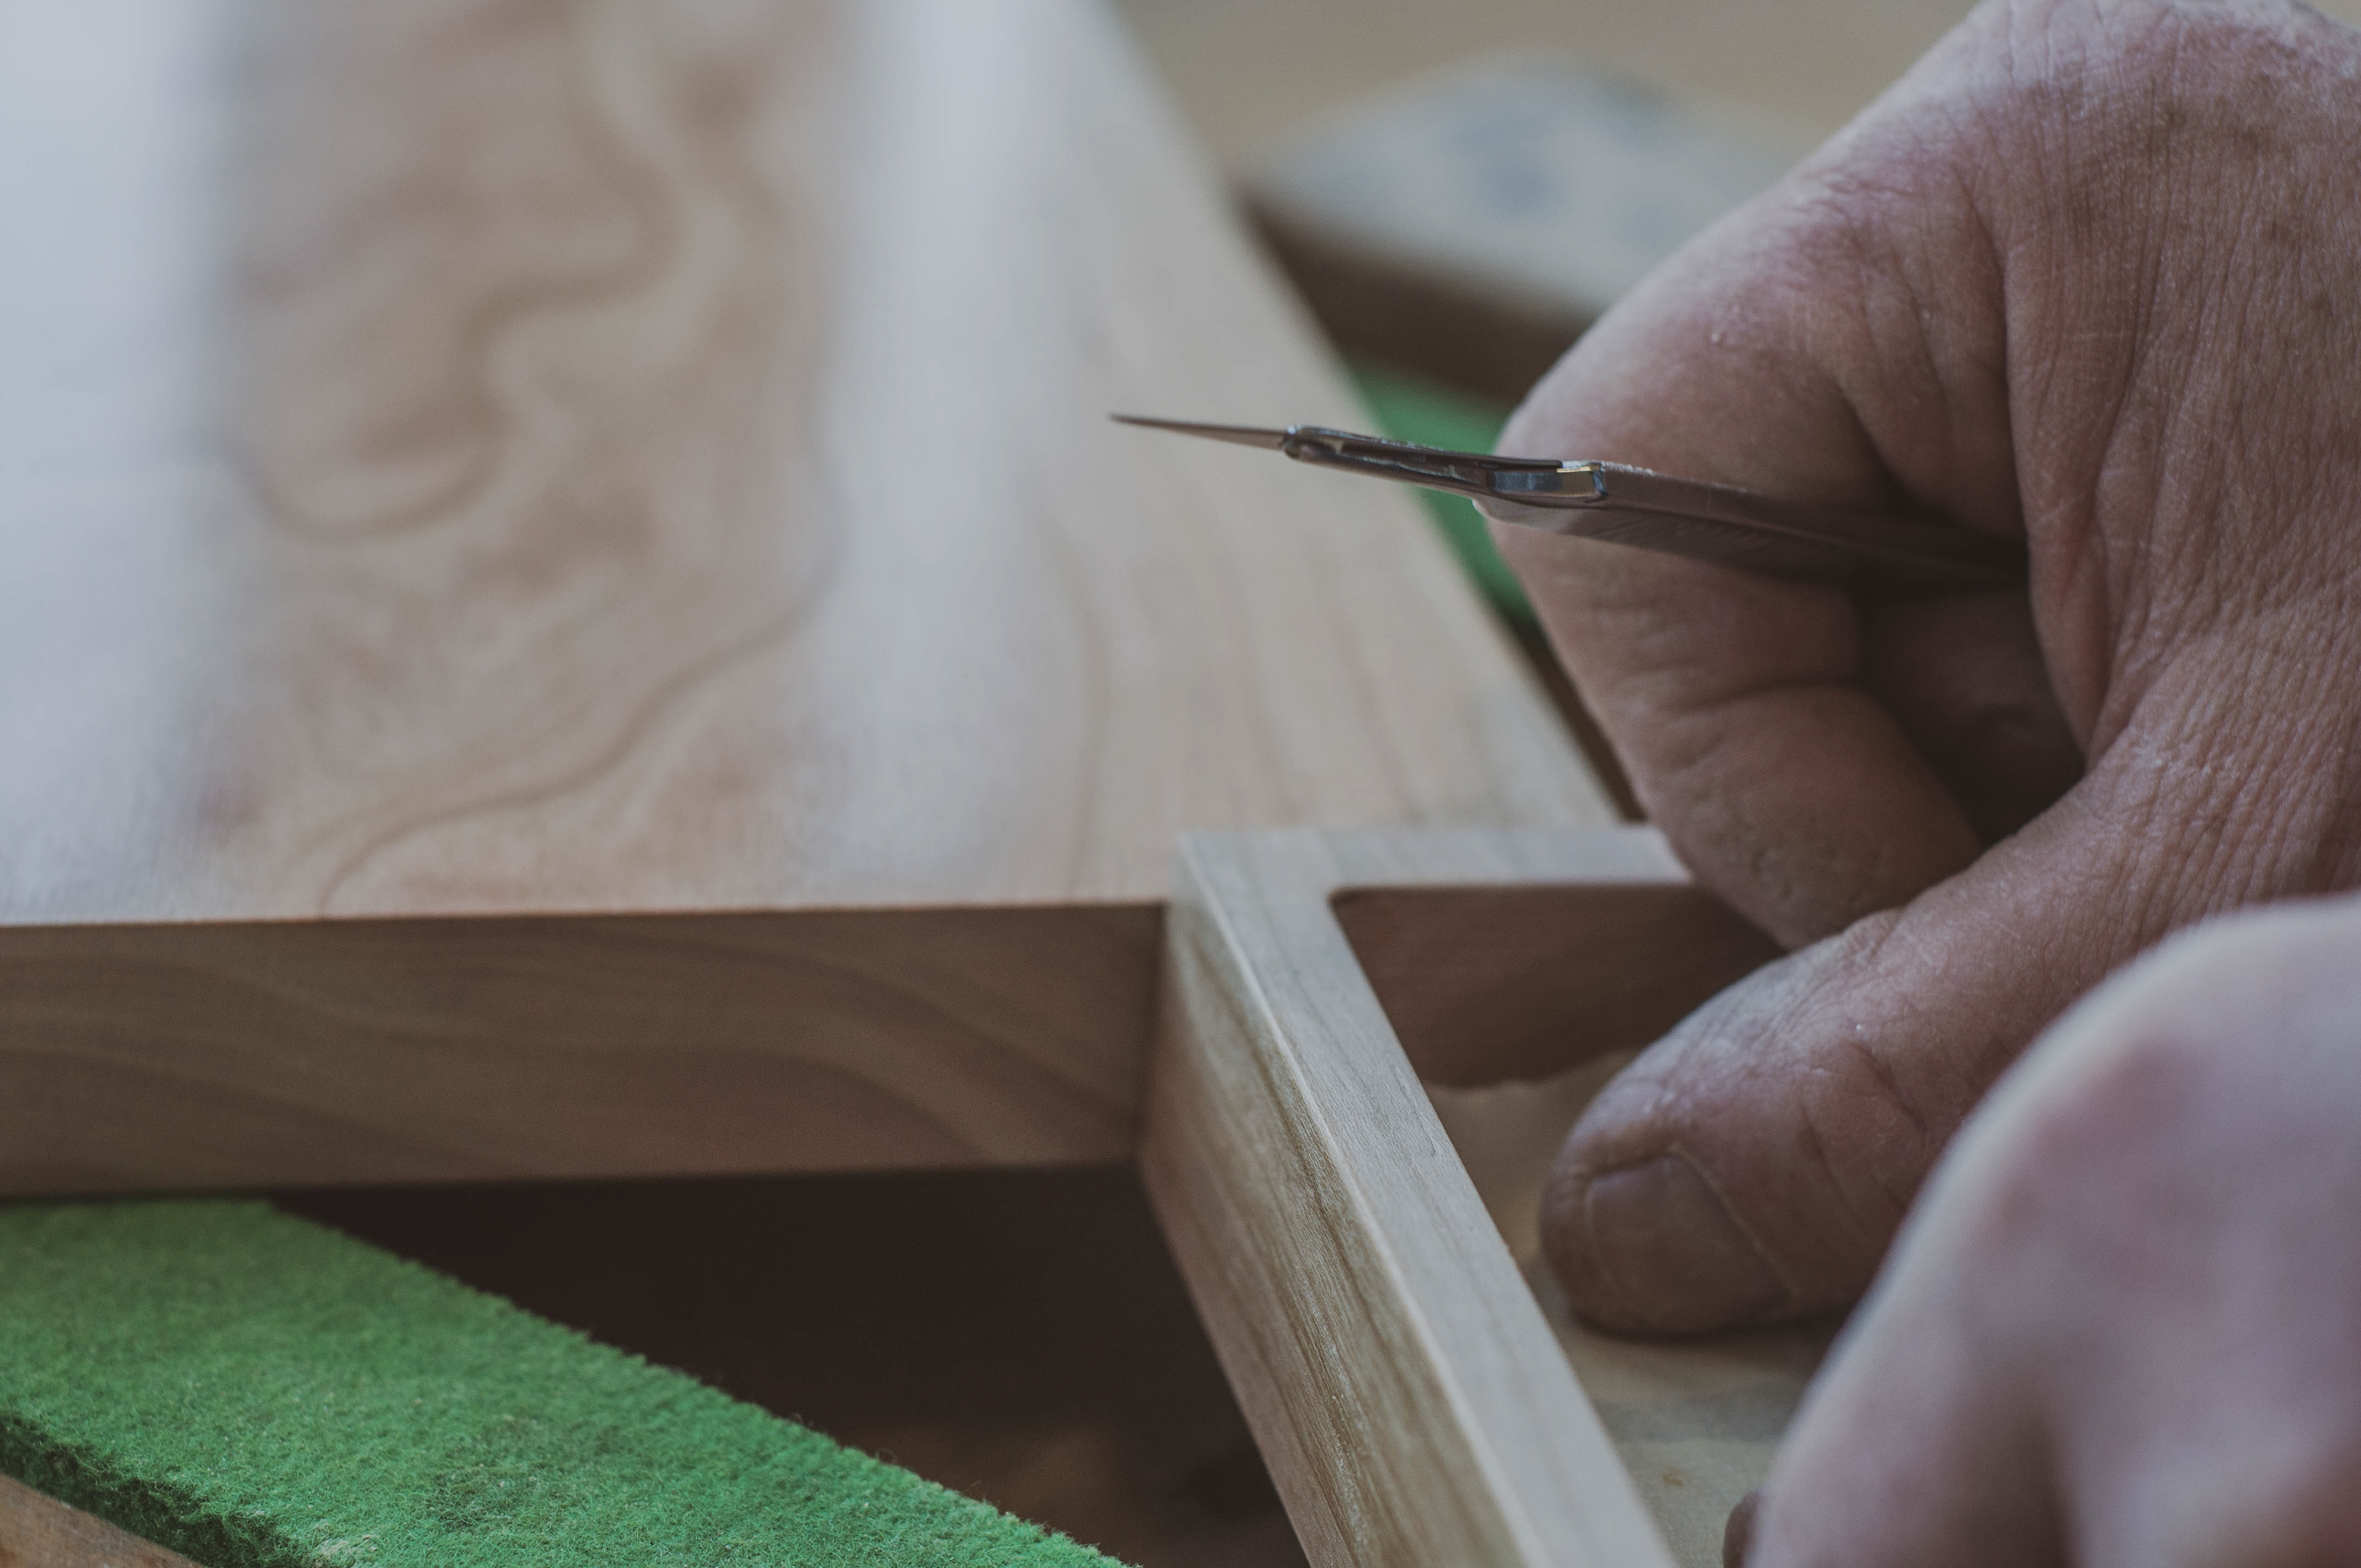
At this stage it is very important to get a step-by-step approach on something I somehow never did. Whereas in the past I interacted several times using wood, so in some way I knew the material and what I could and couldn't do out of it.
But still, at this stage the whole process was a kind of a trial and error.
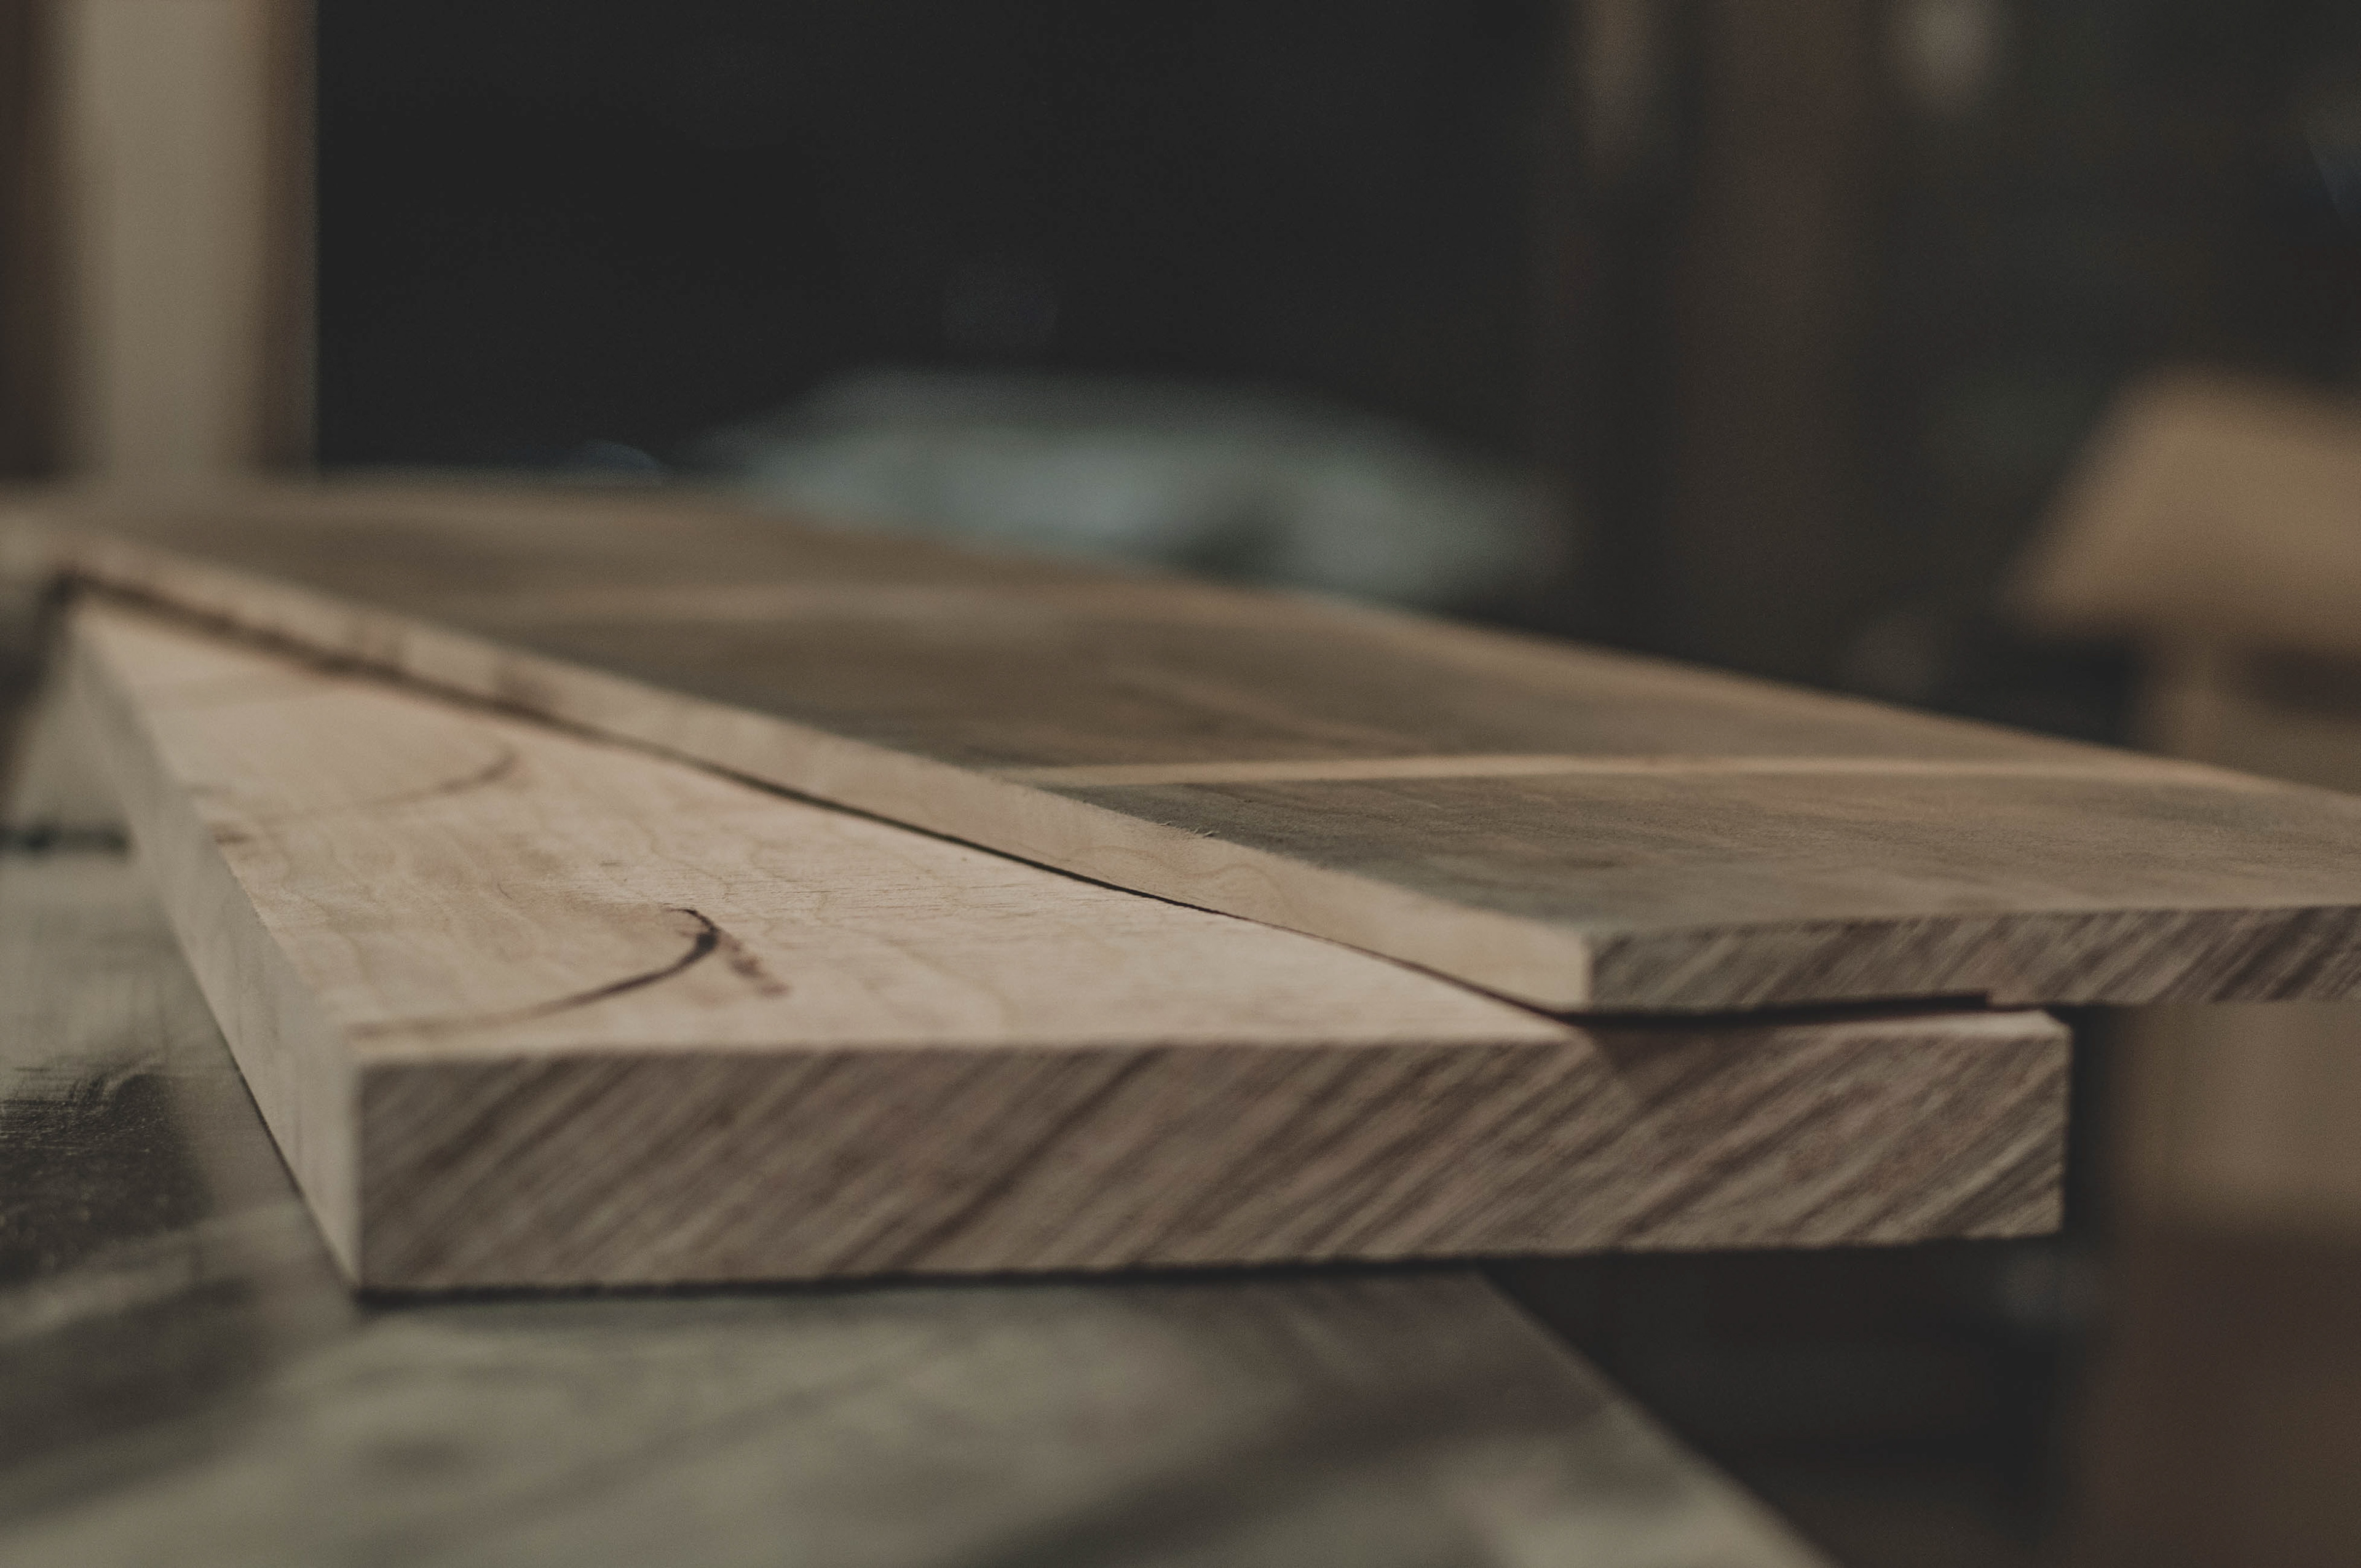
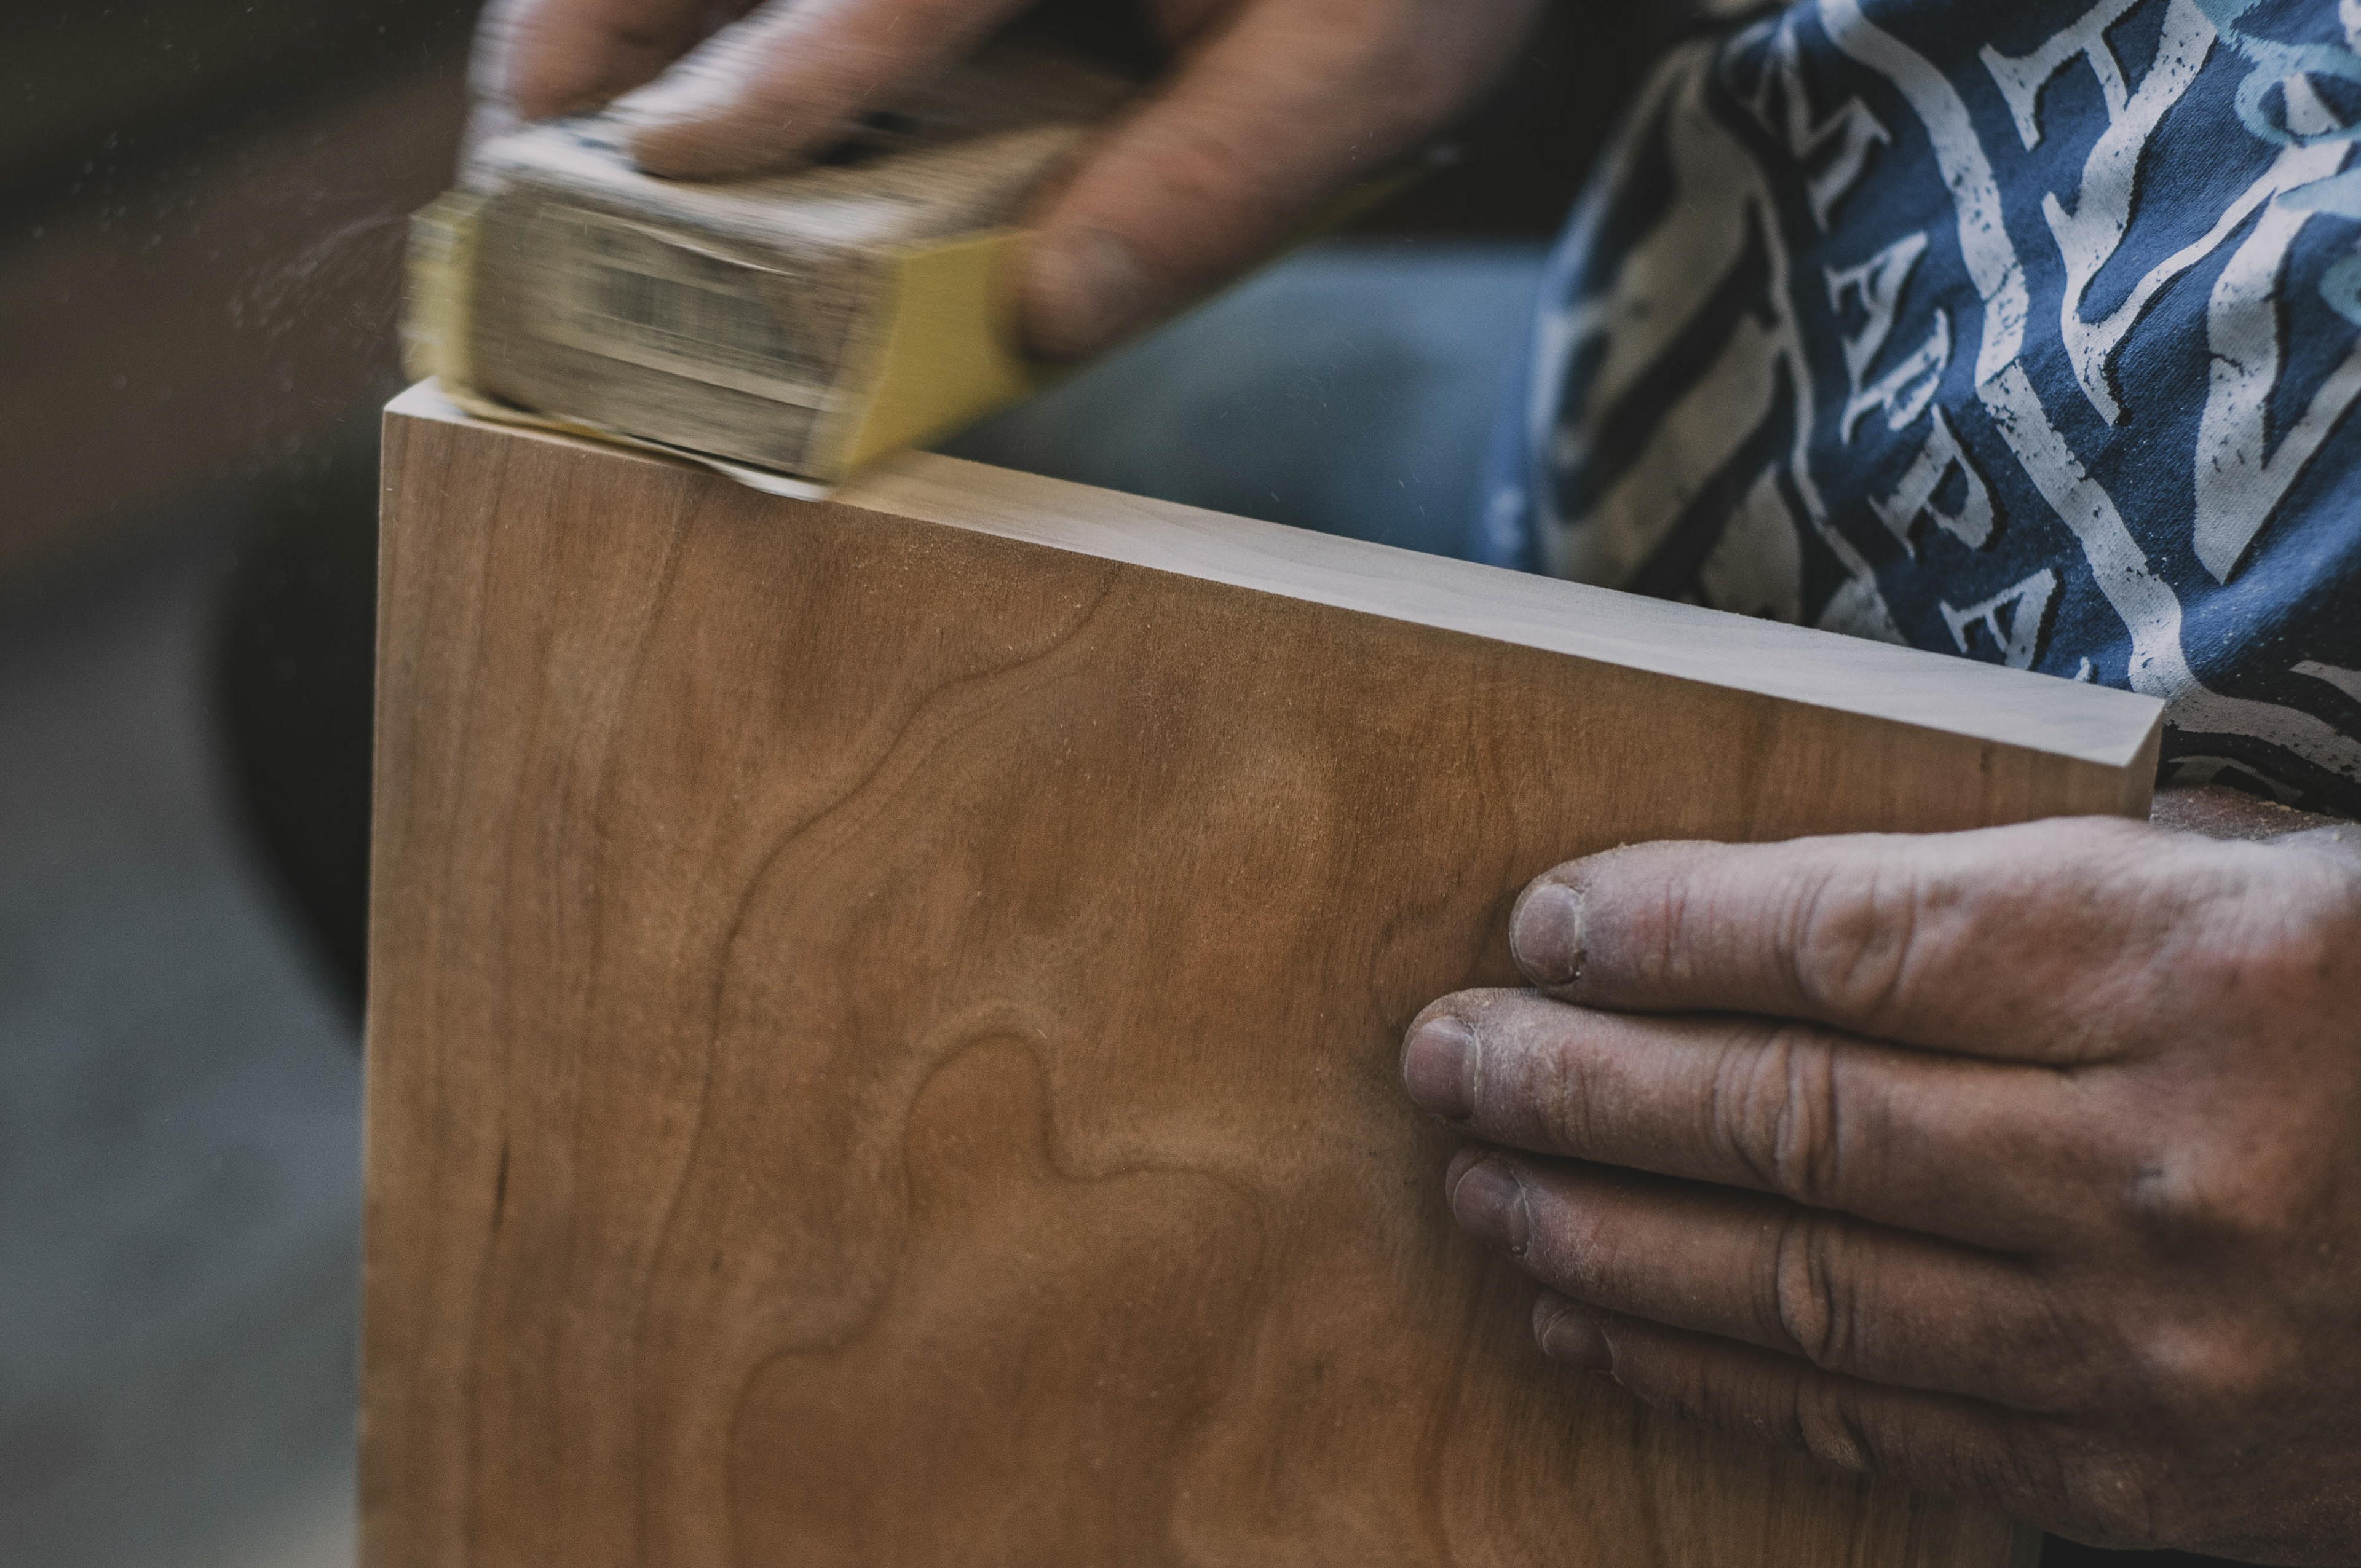
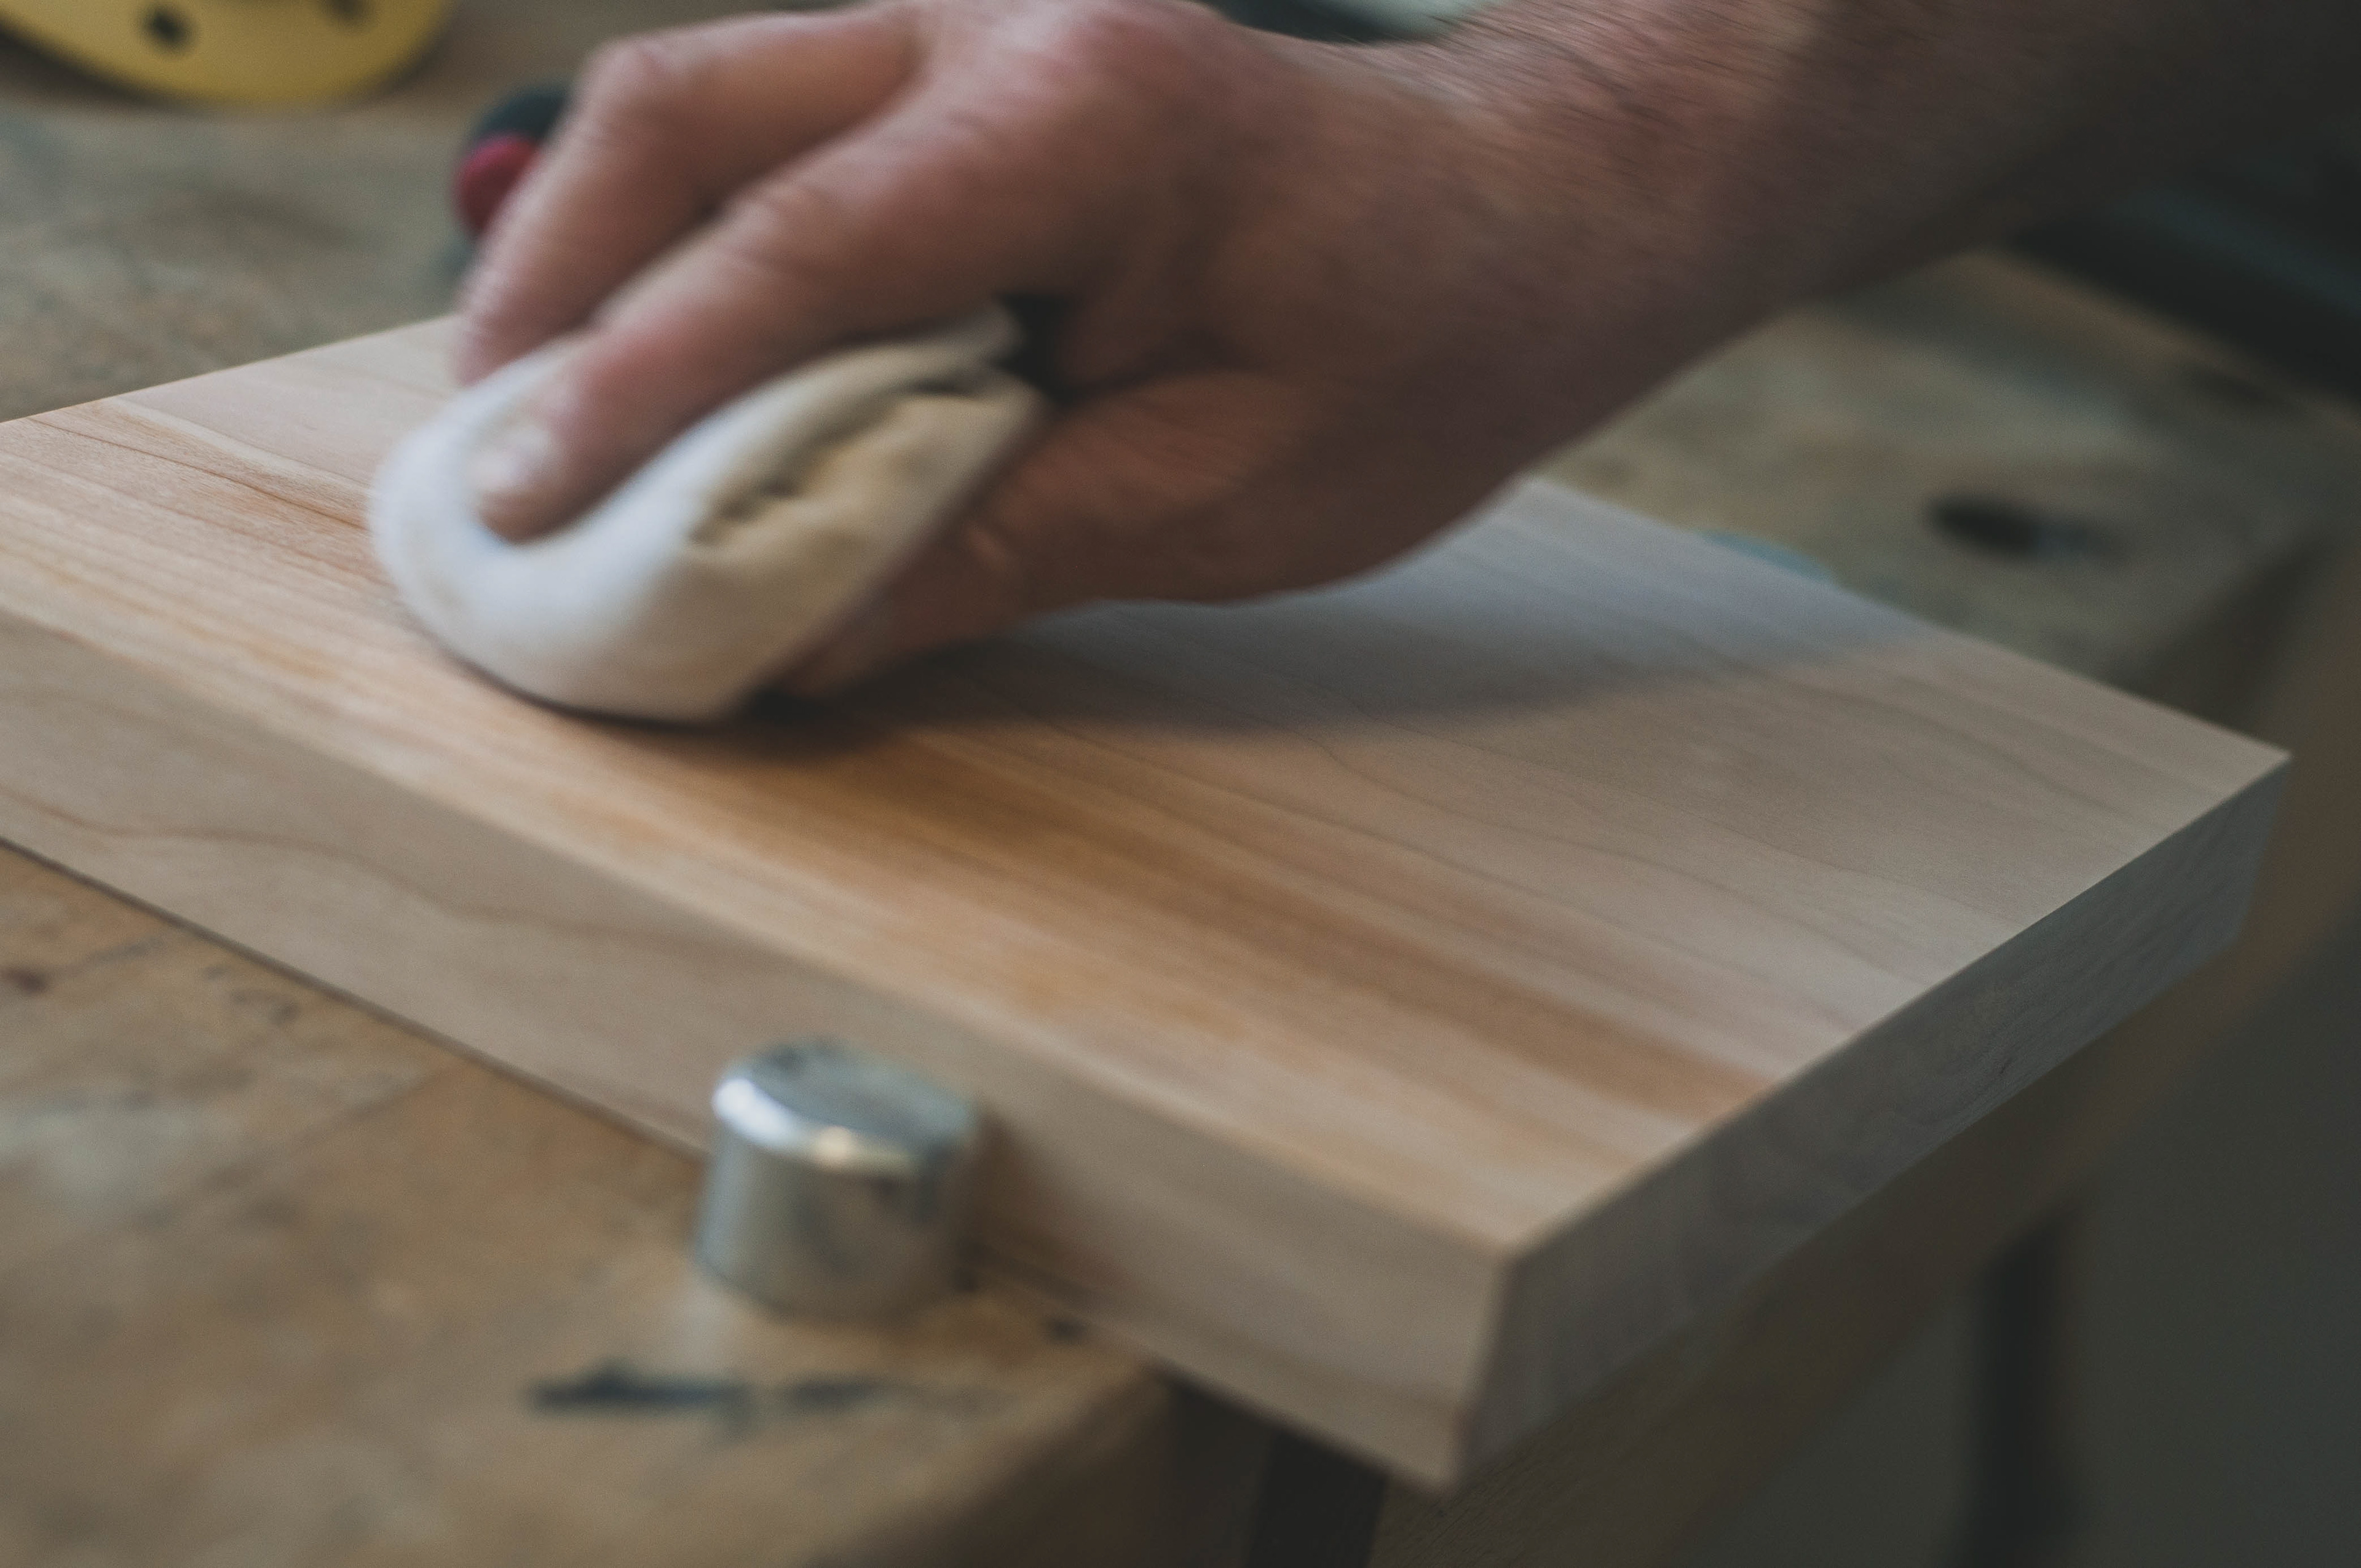
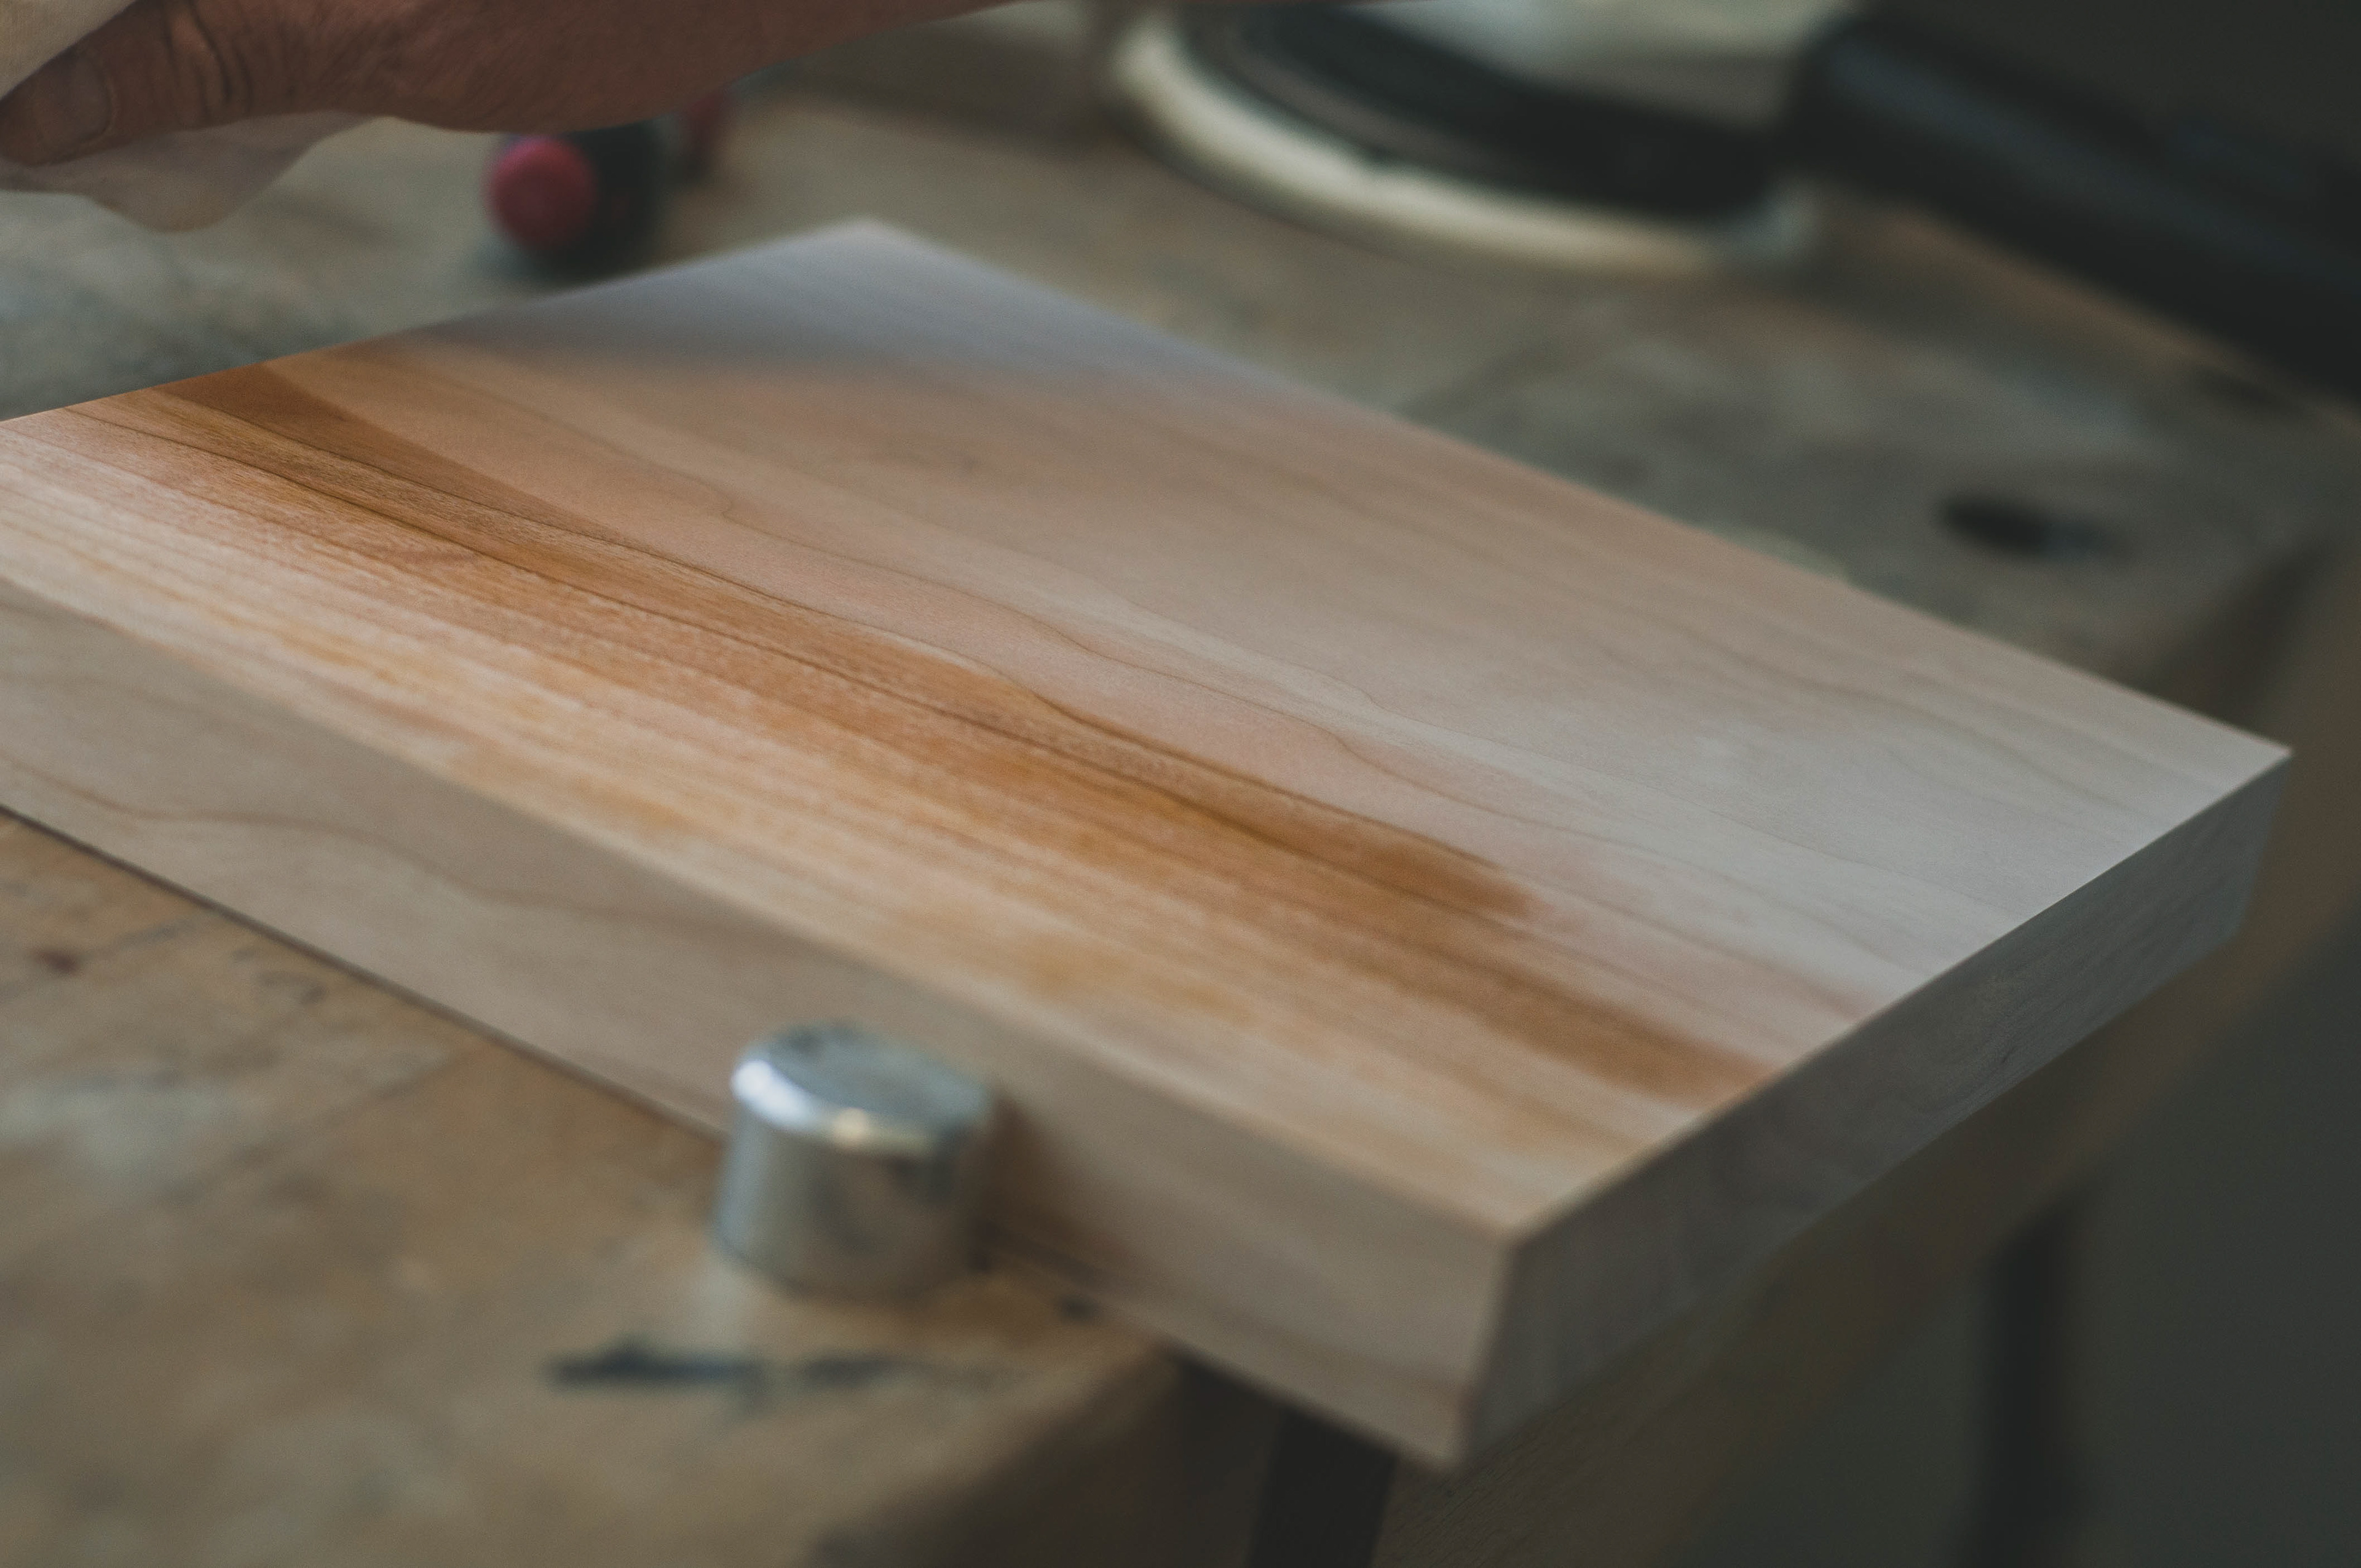
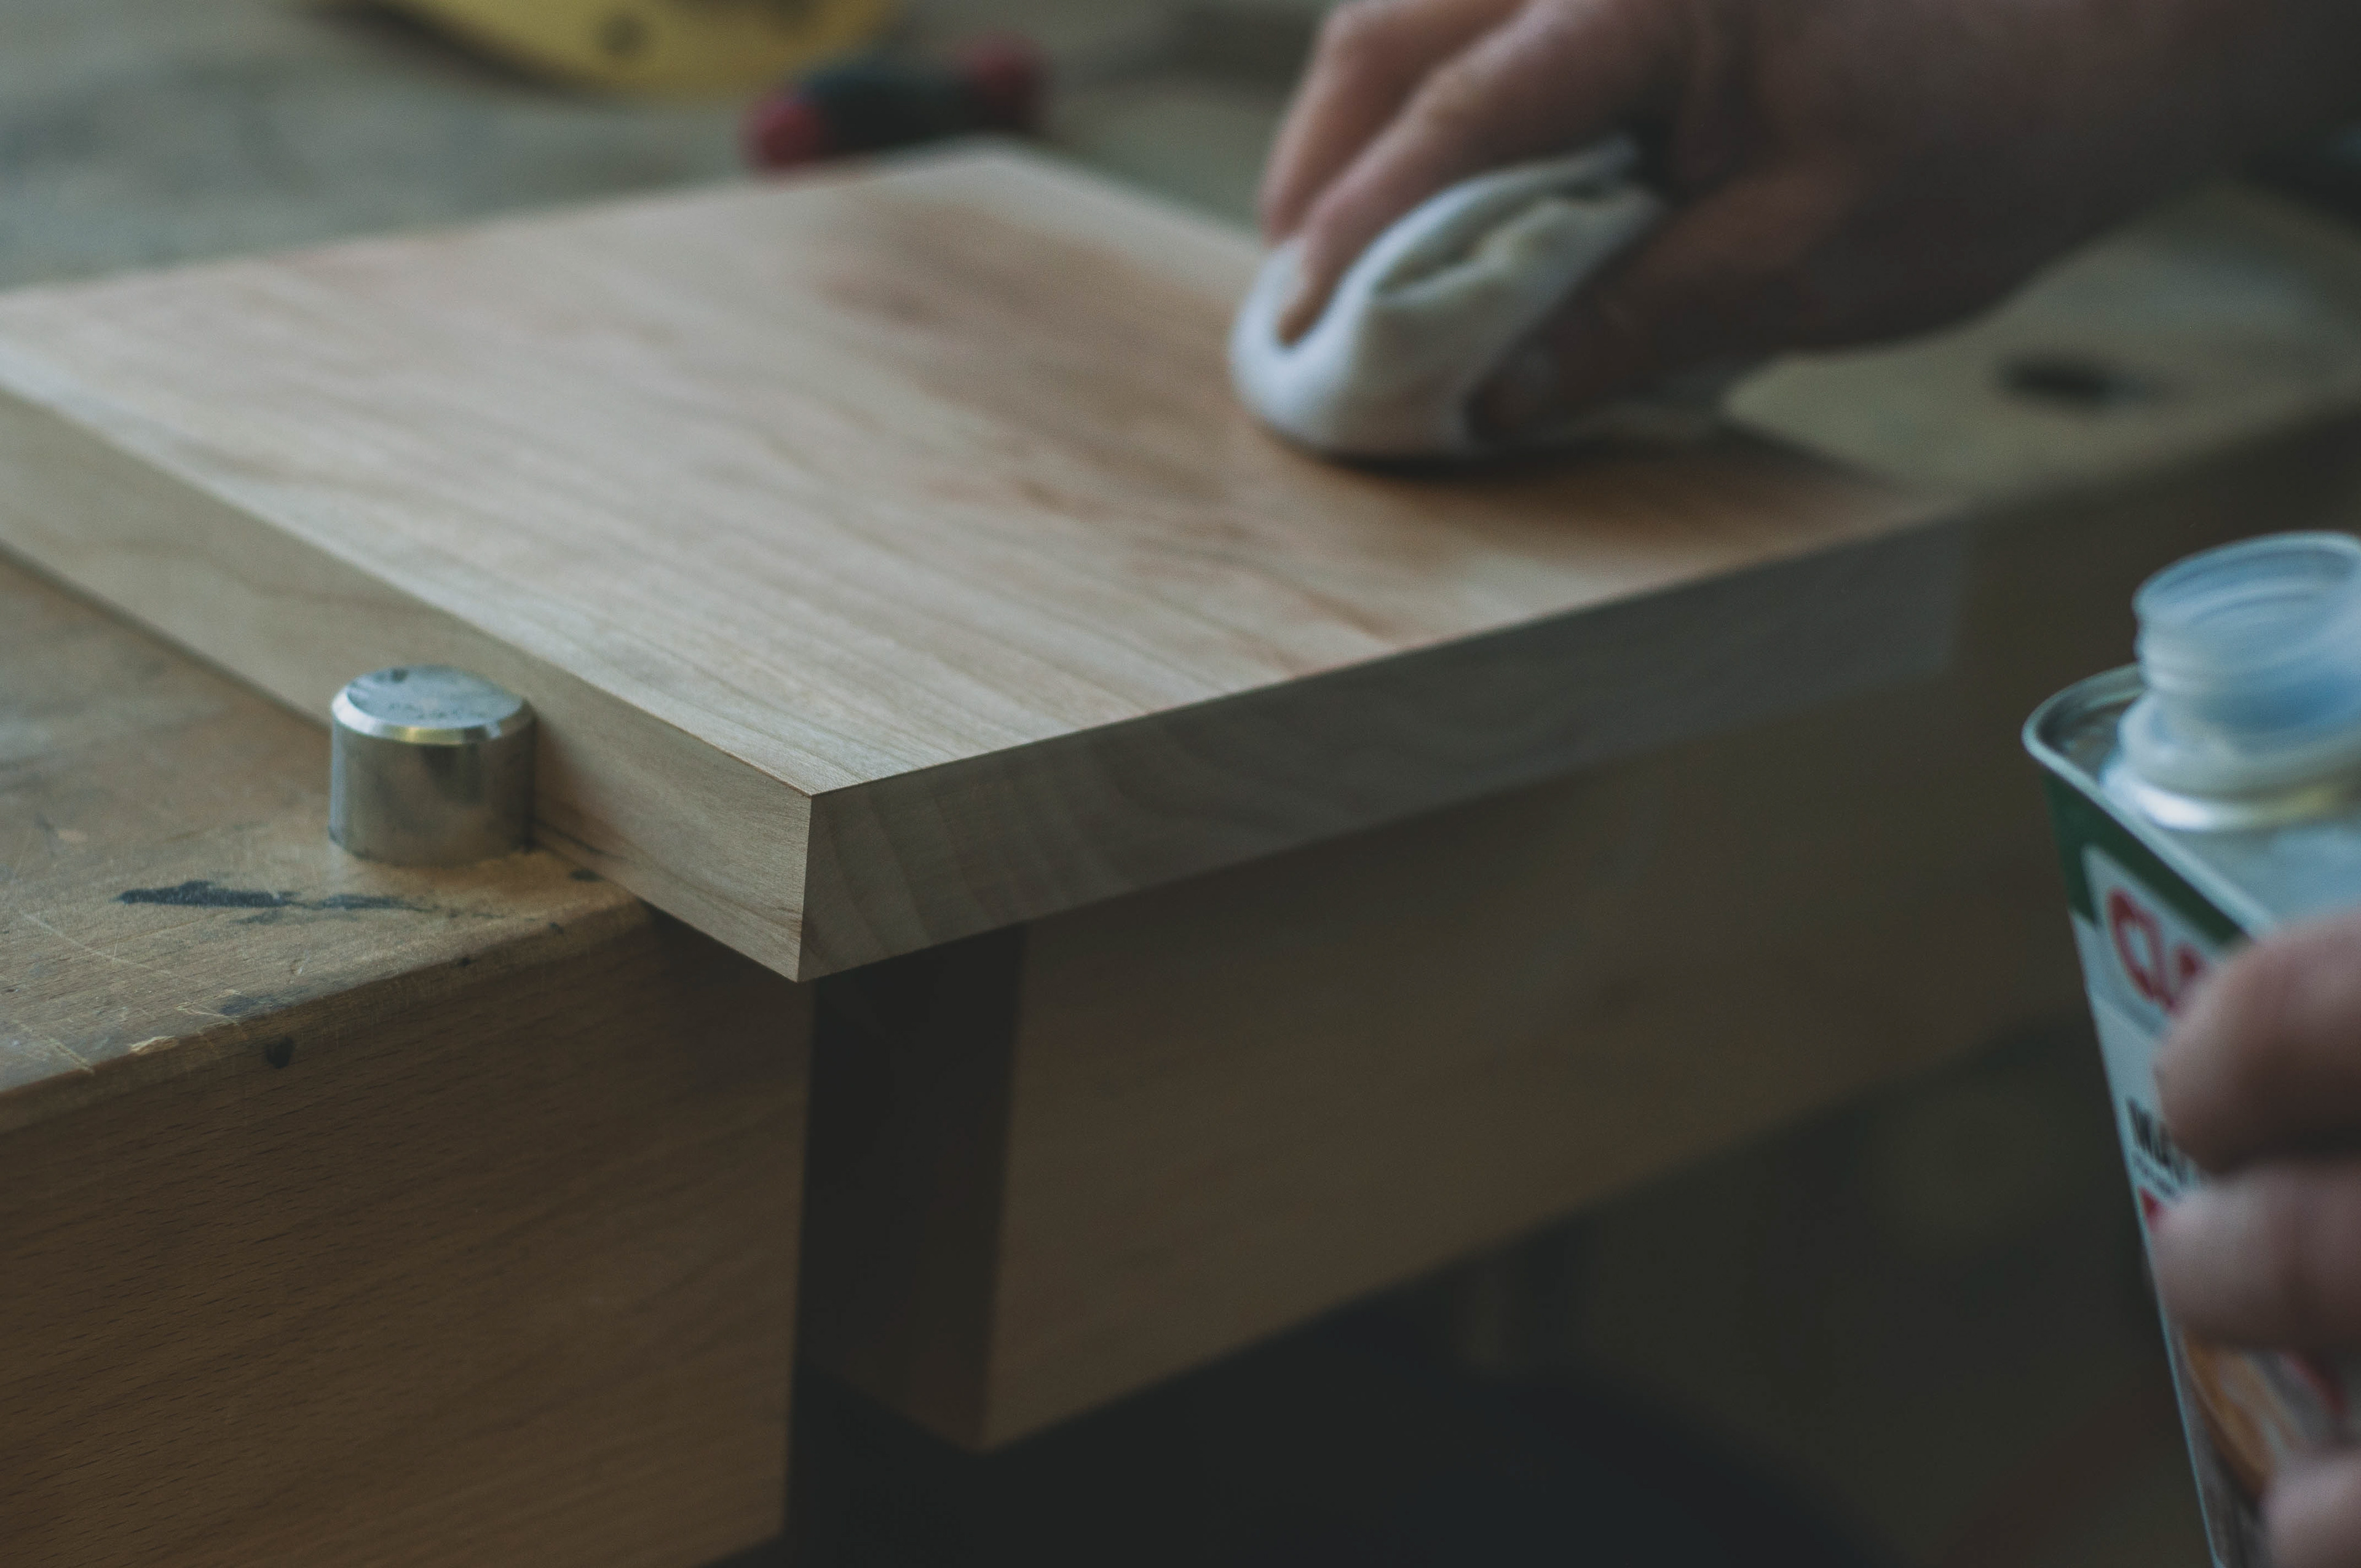
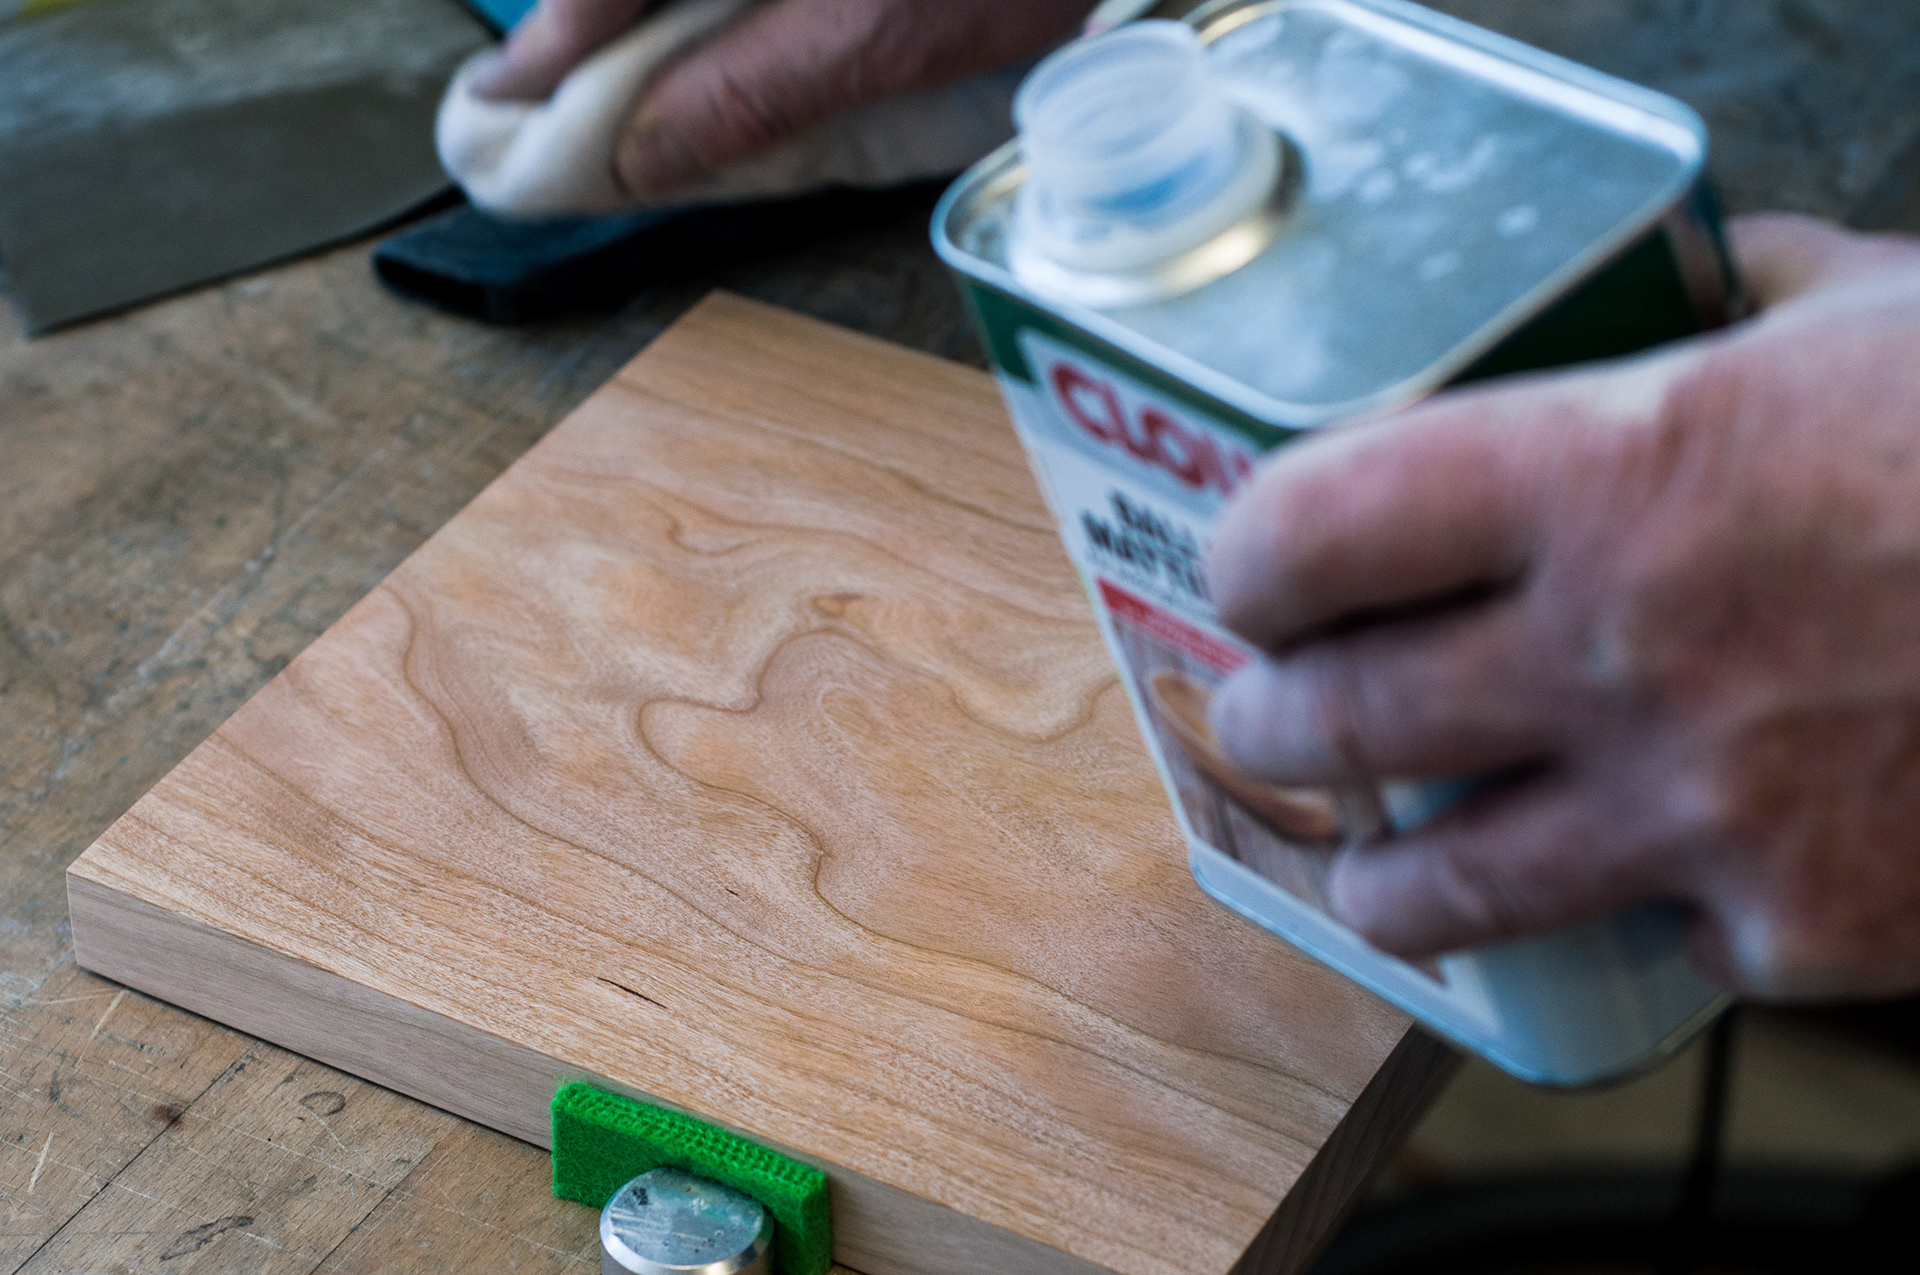
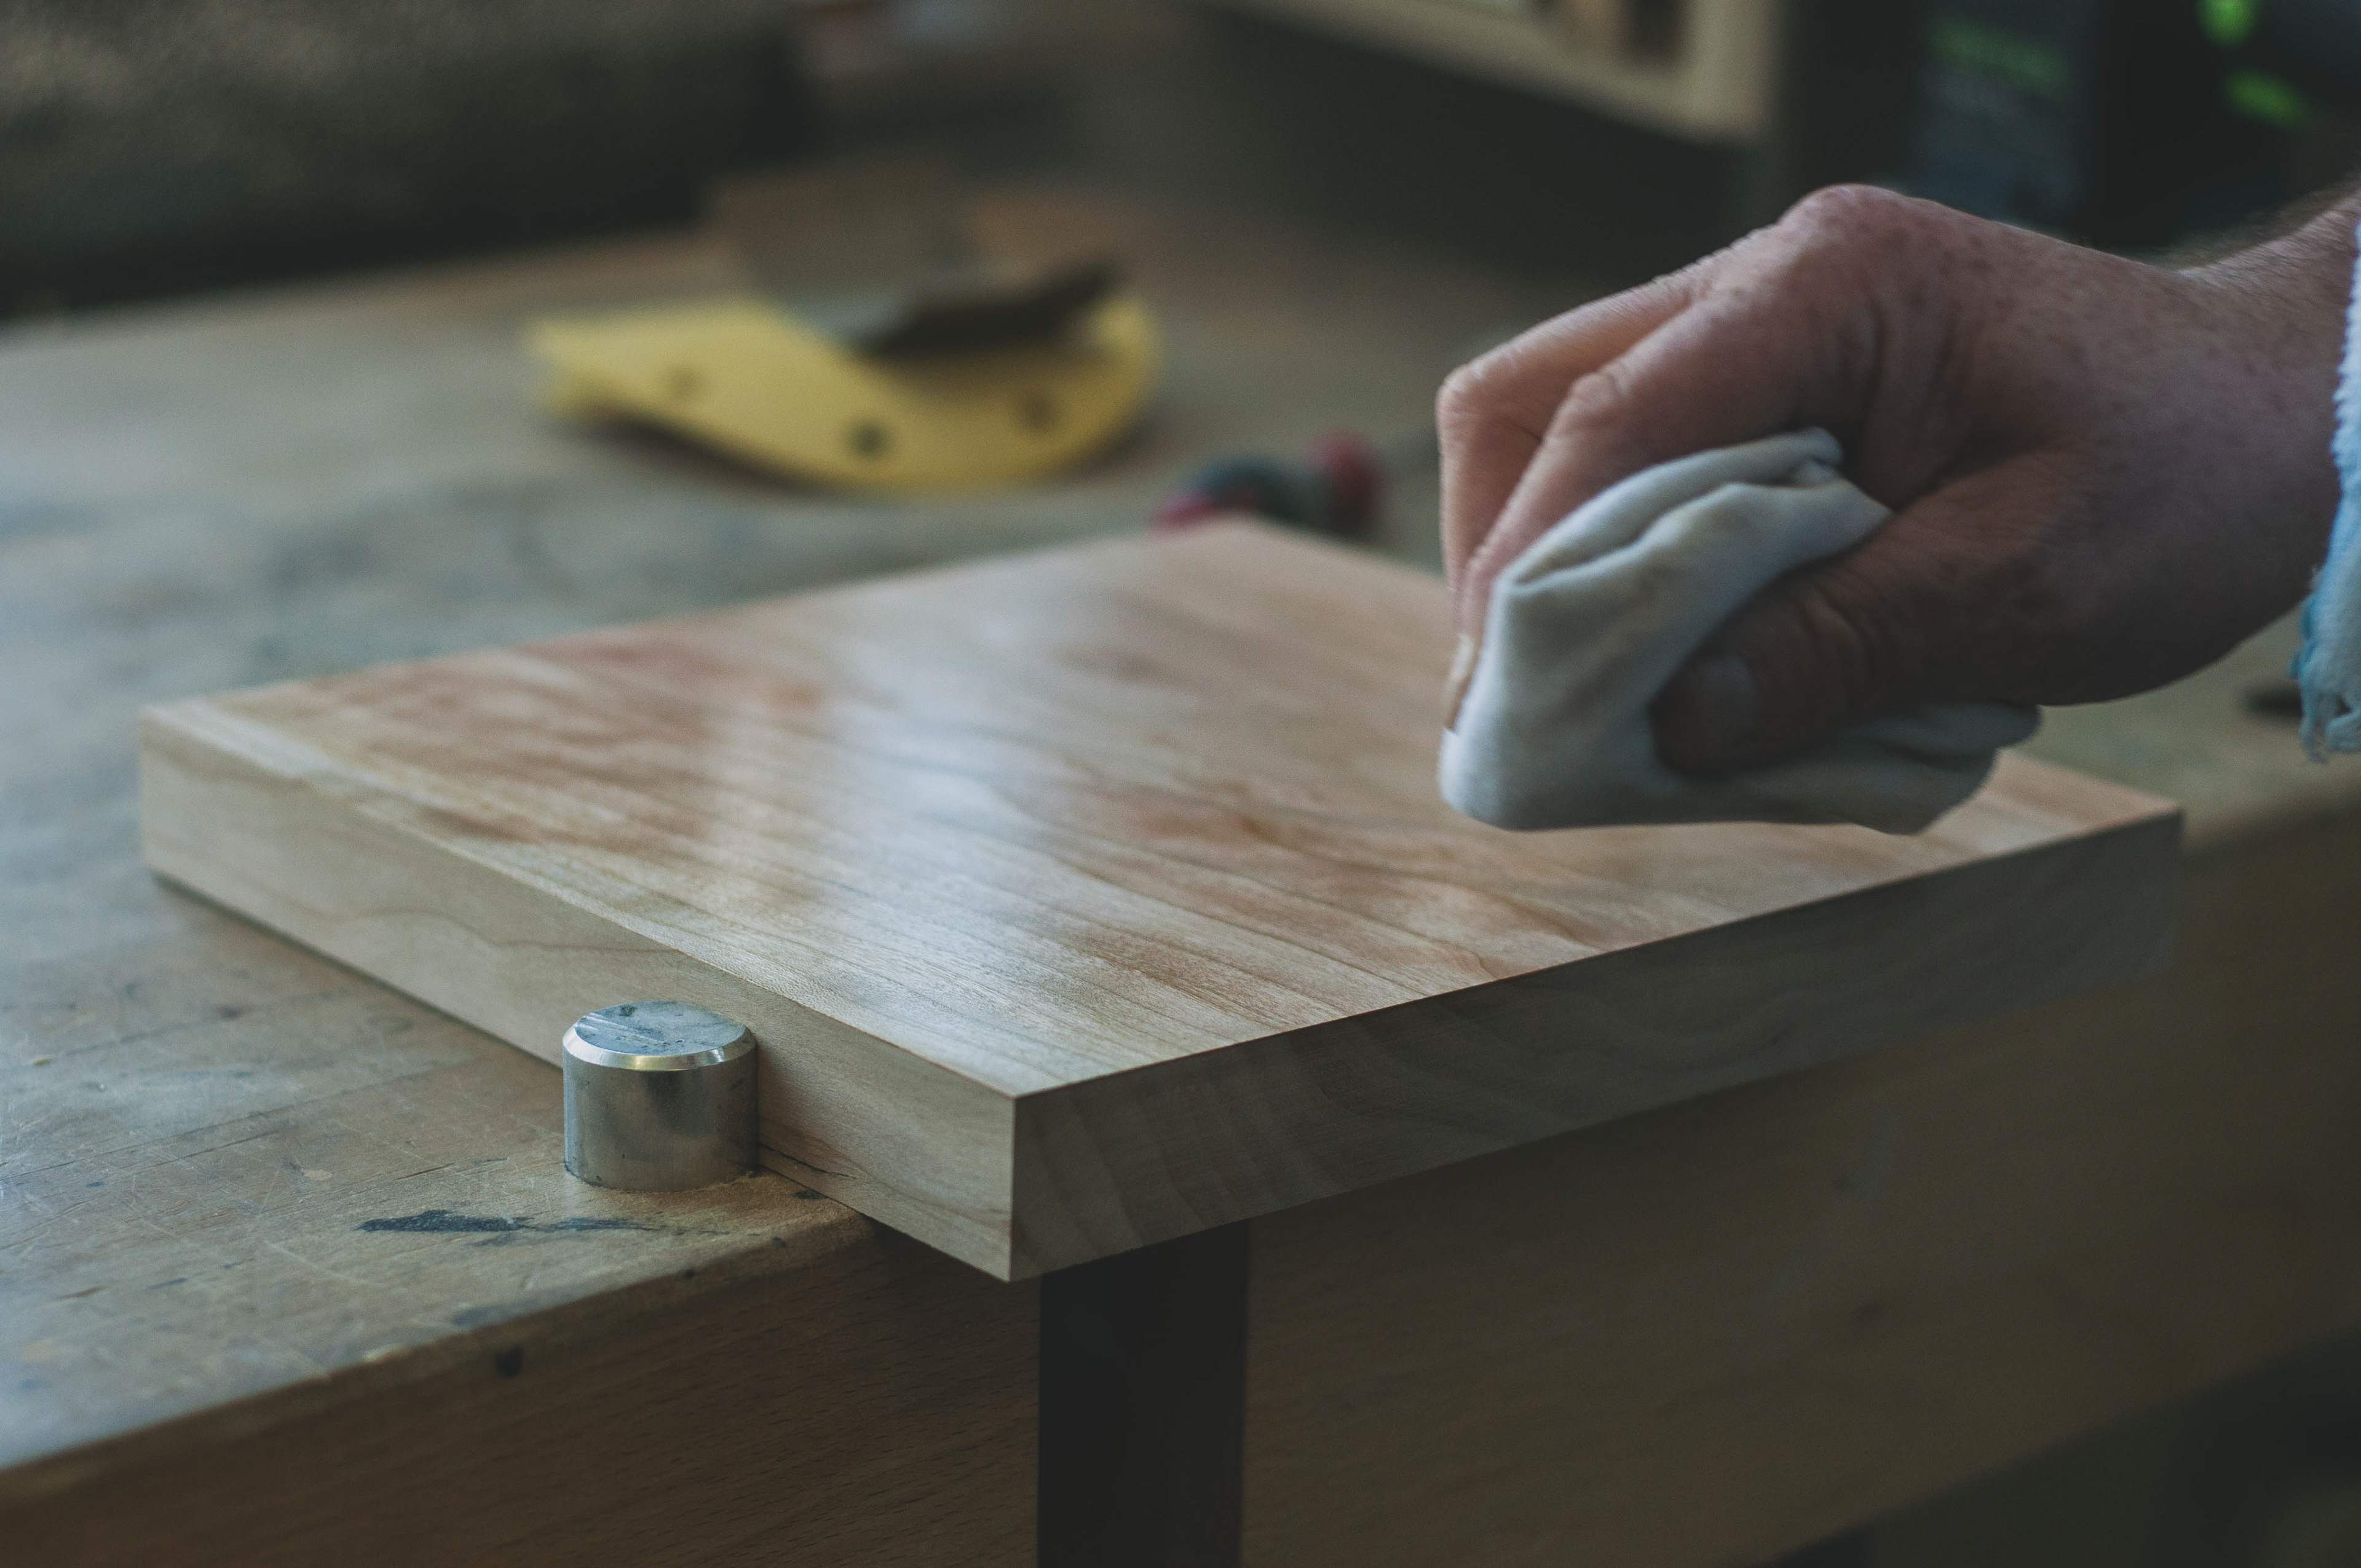
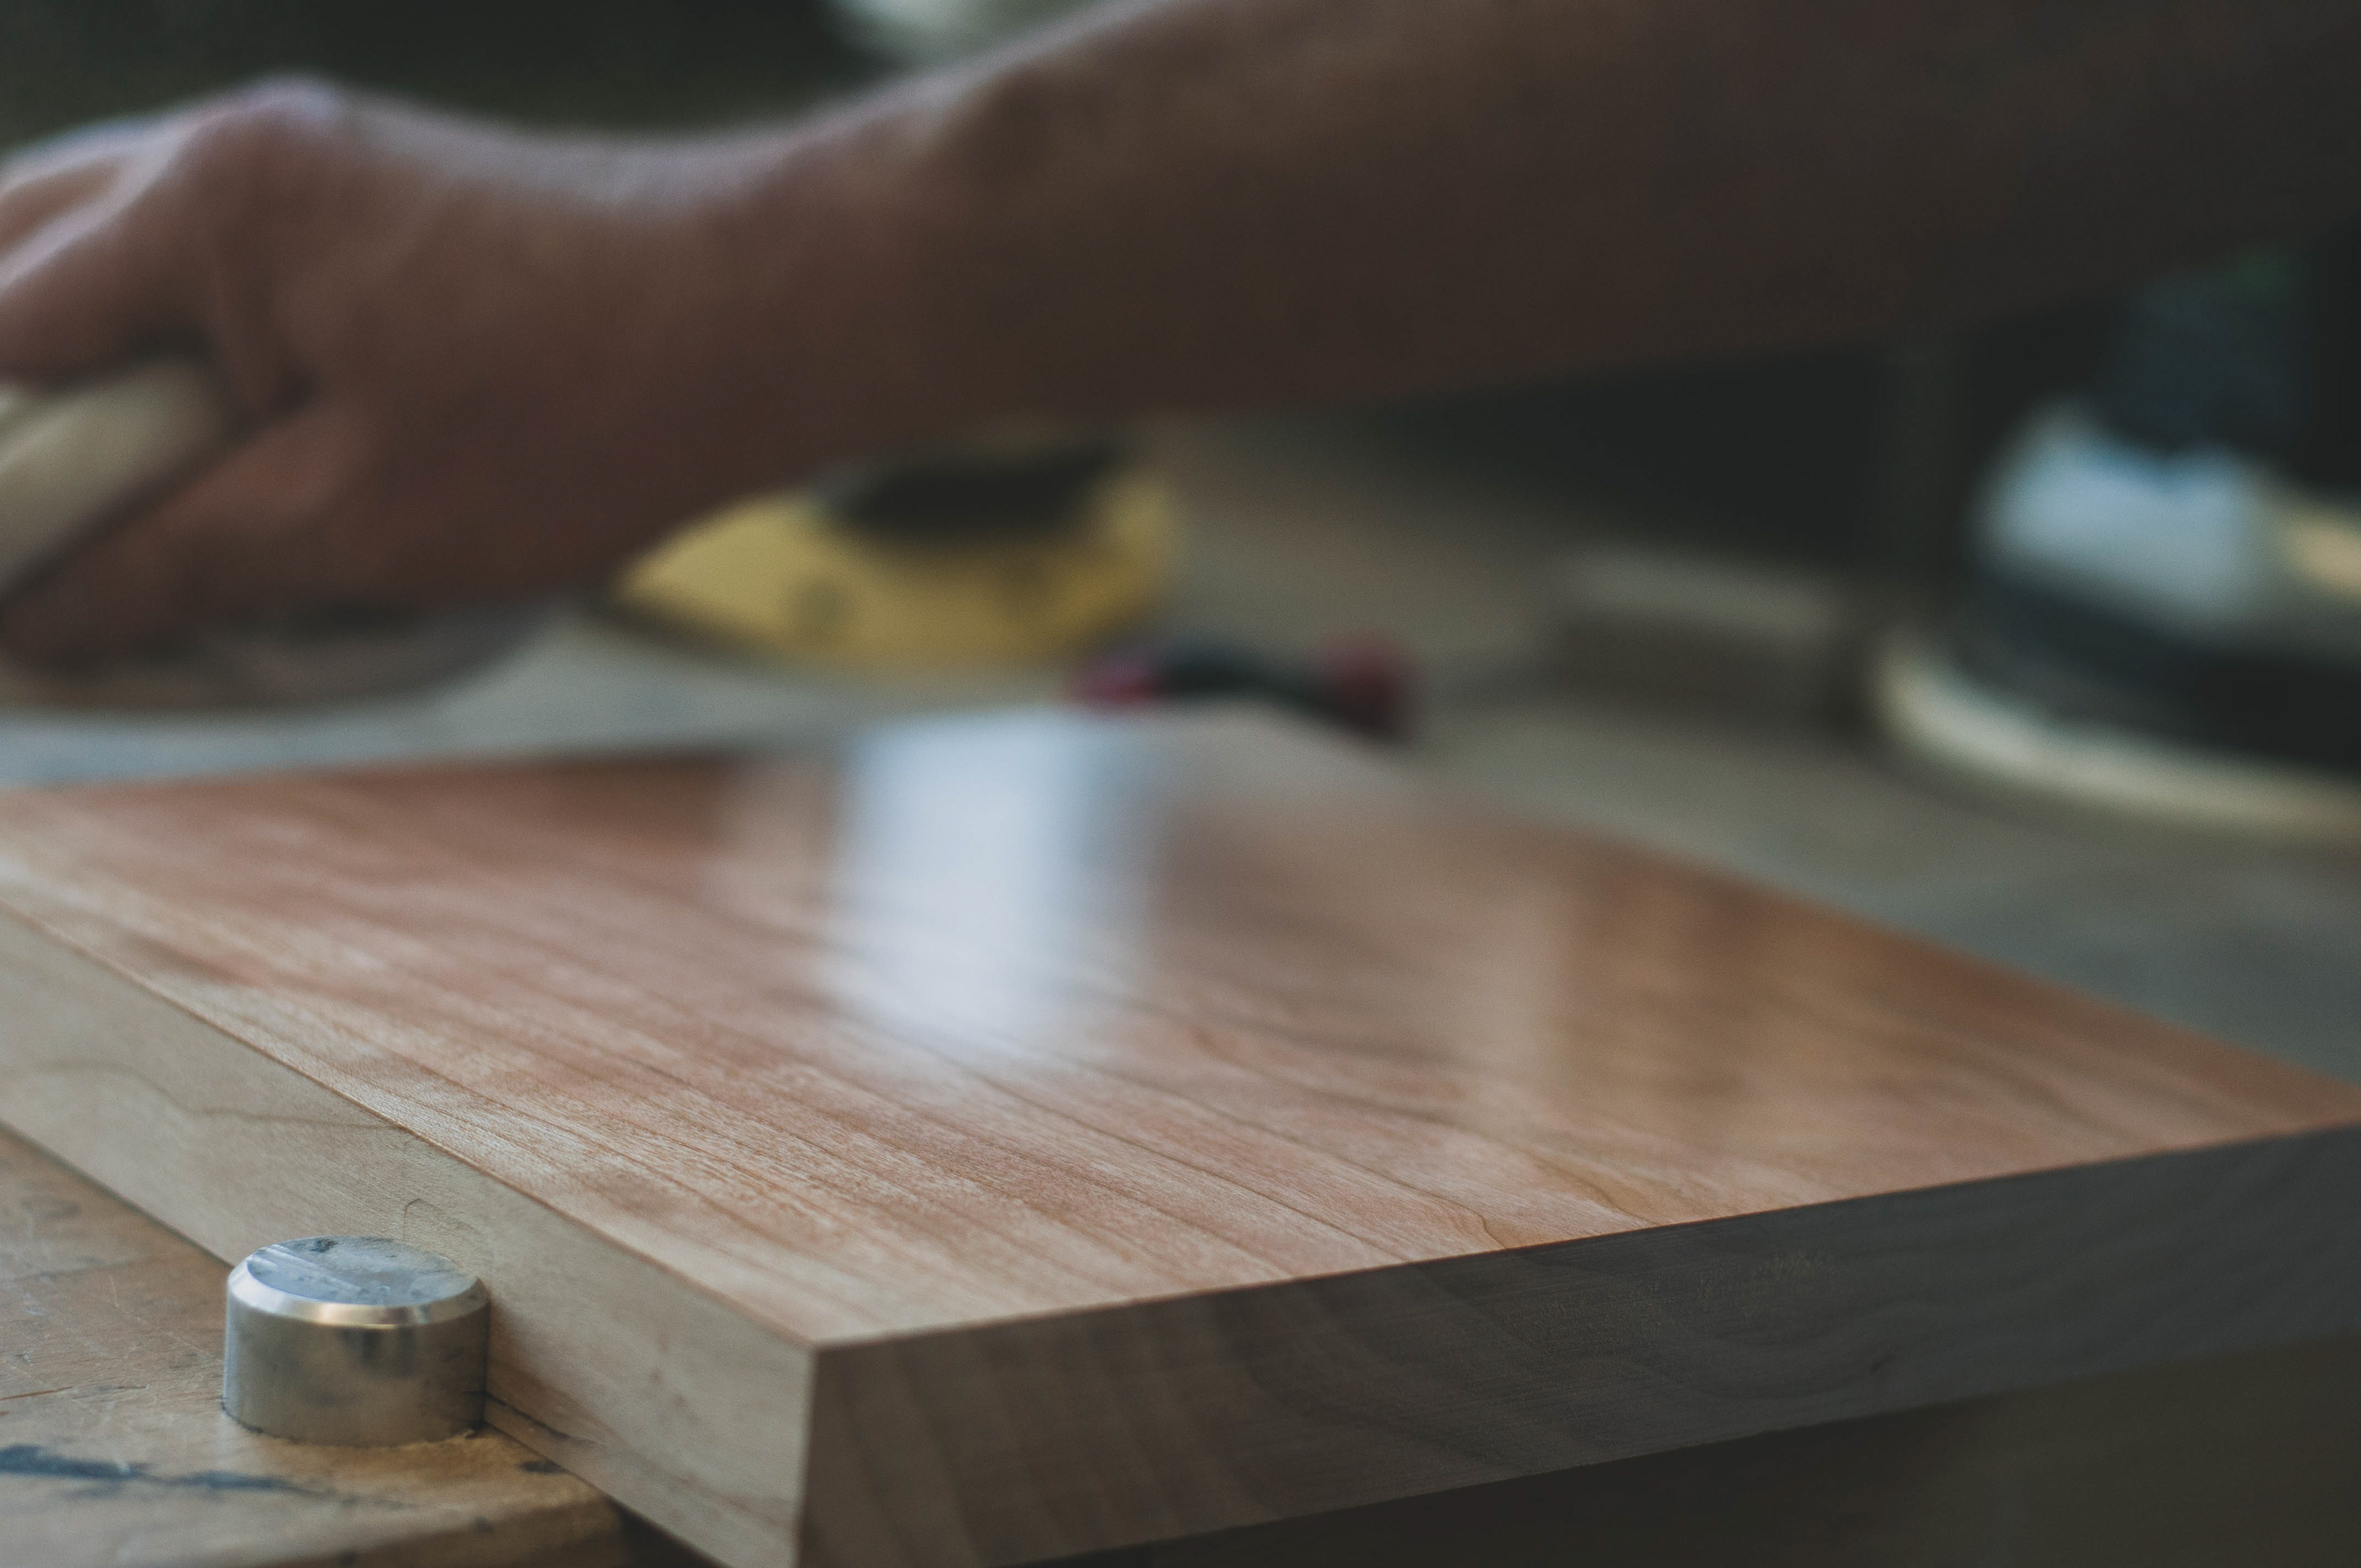
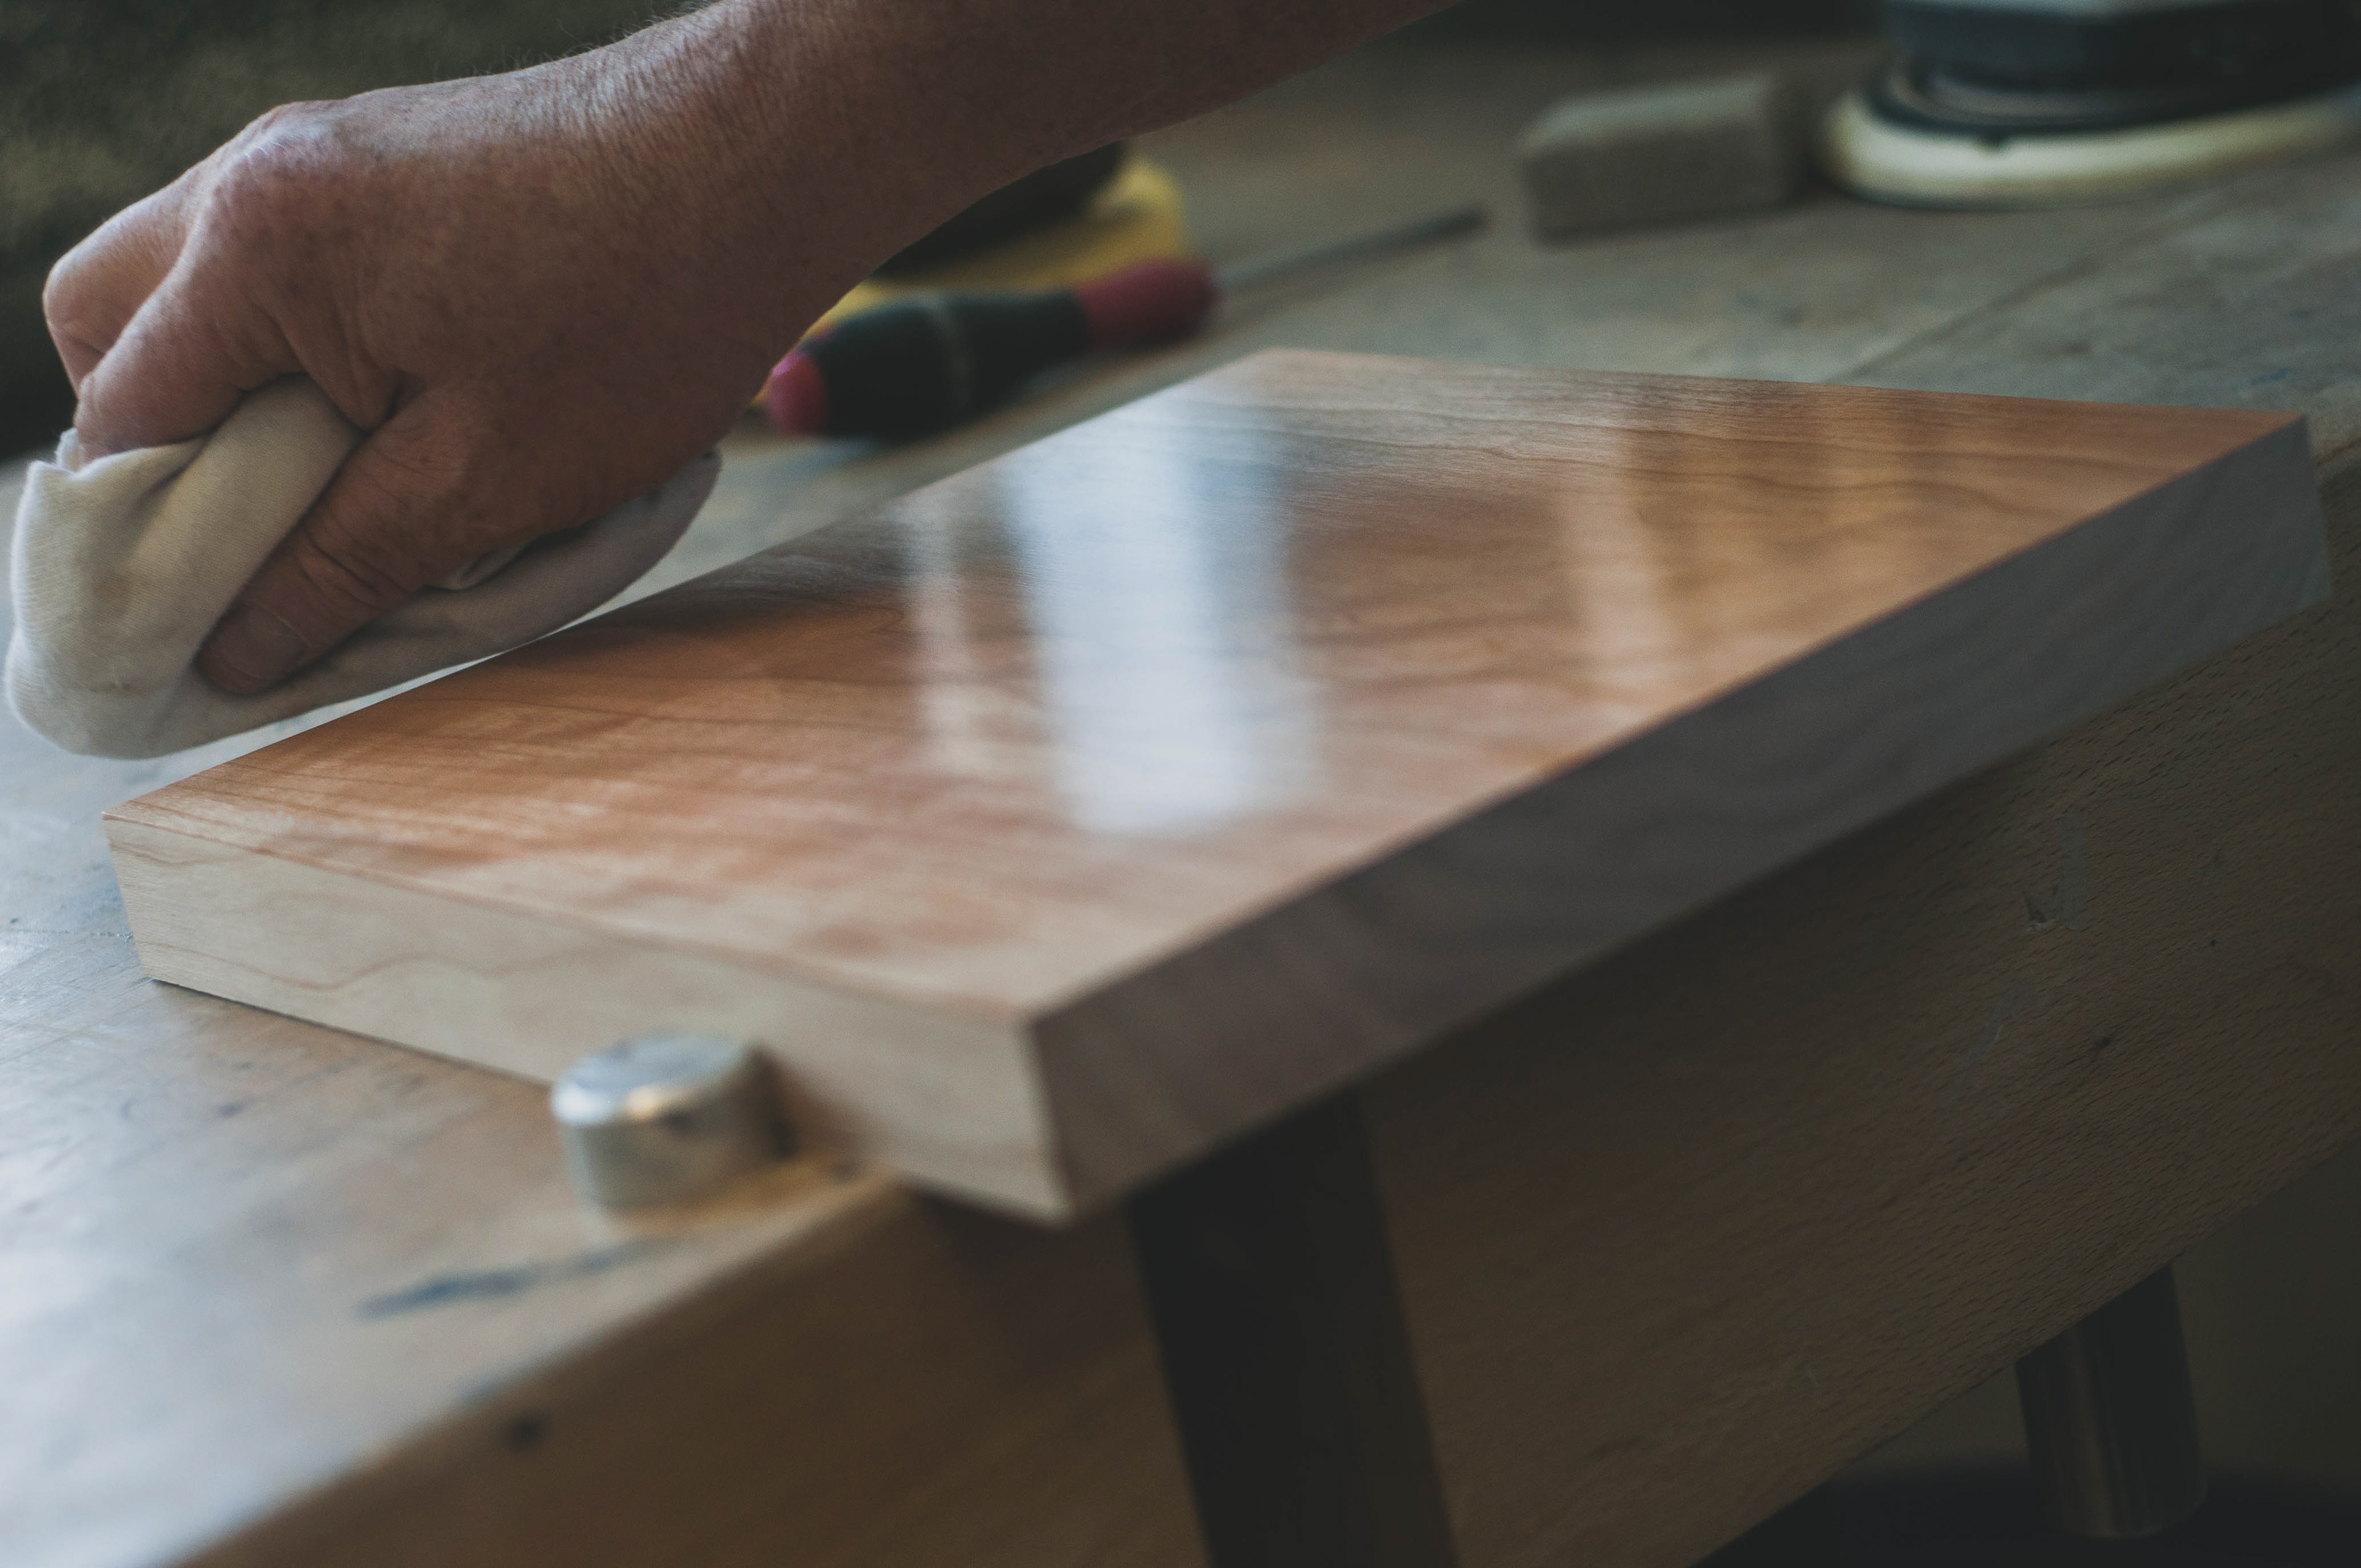
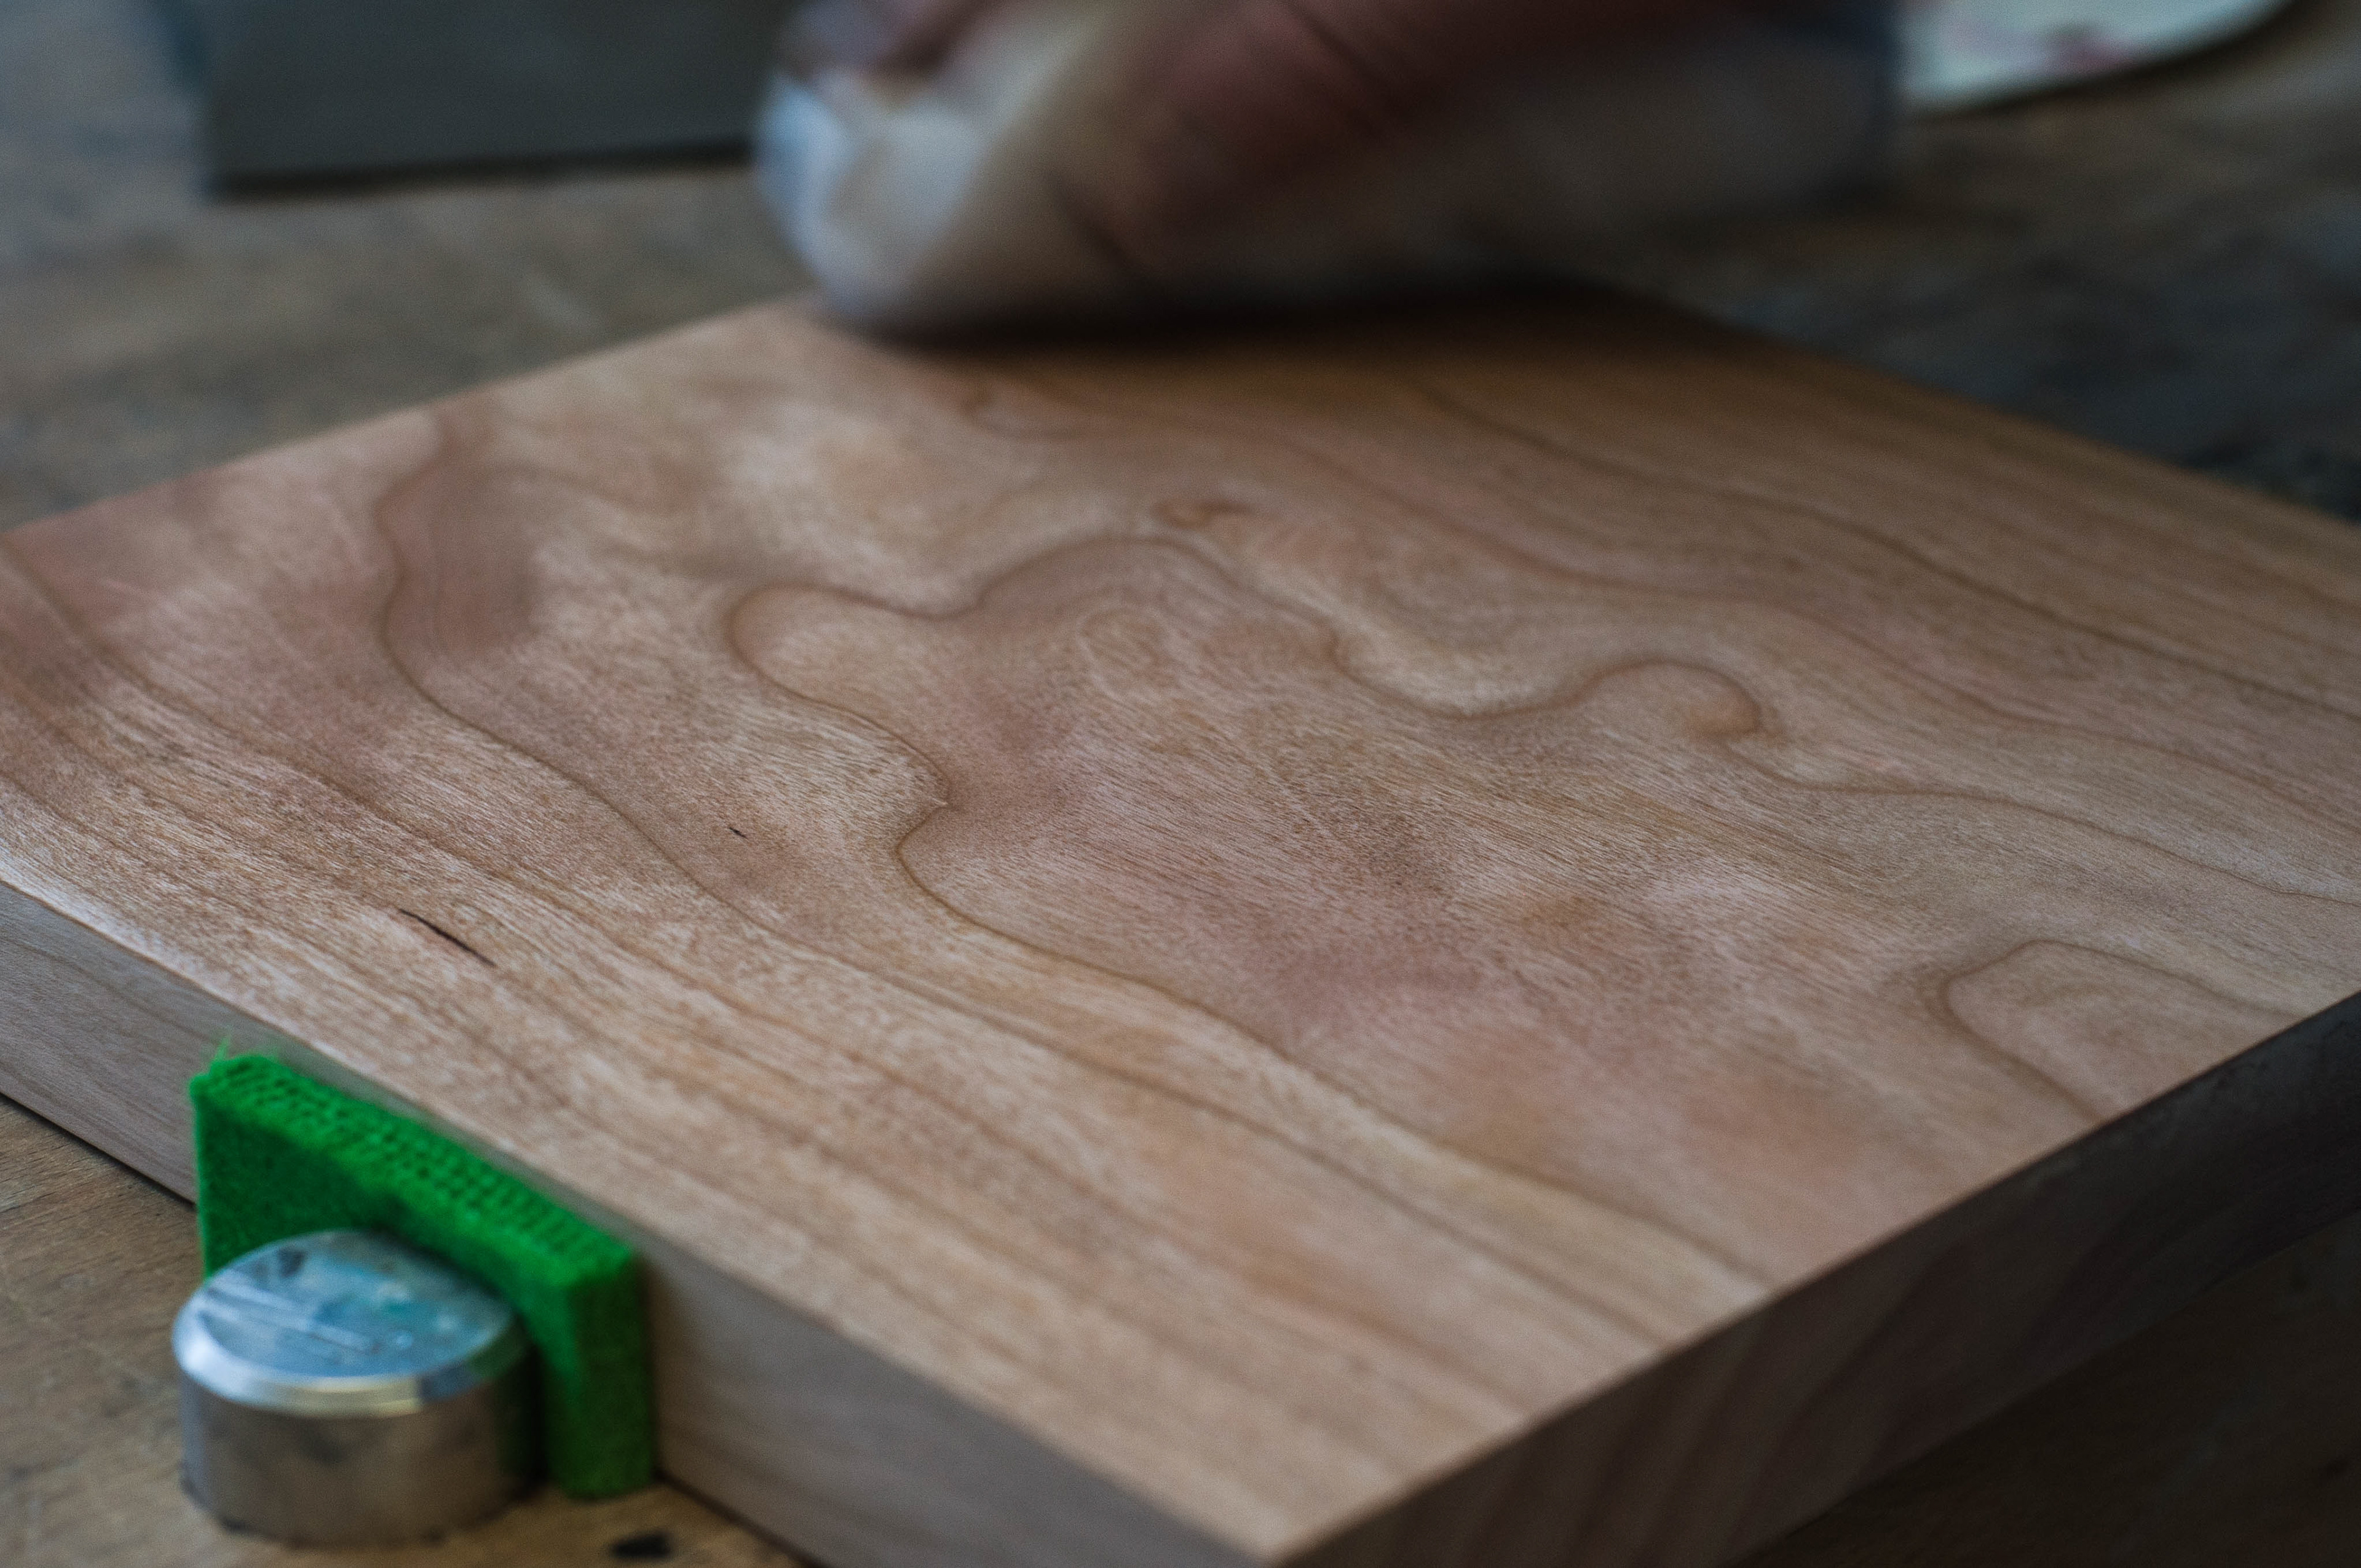
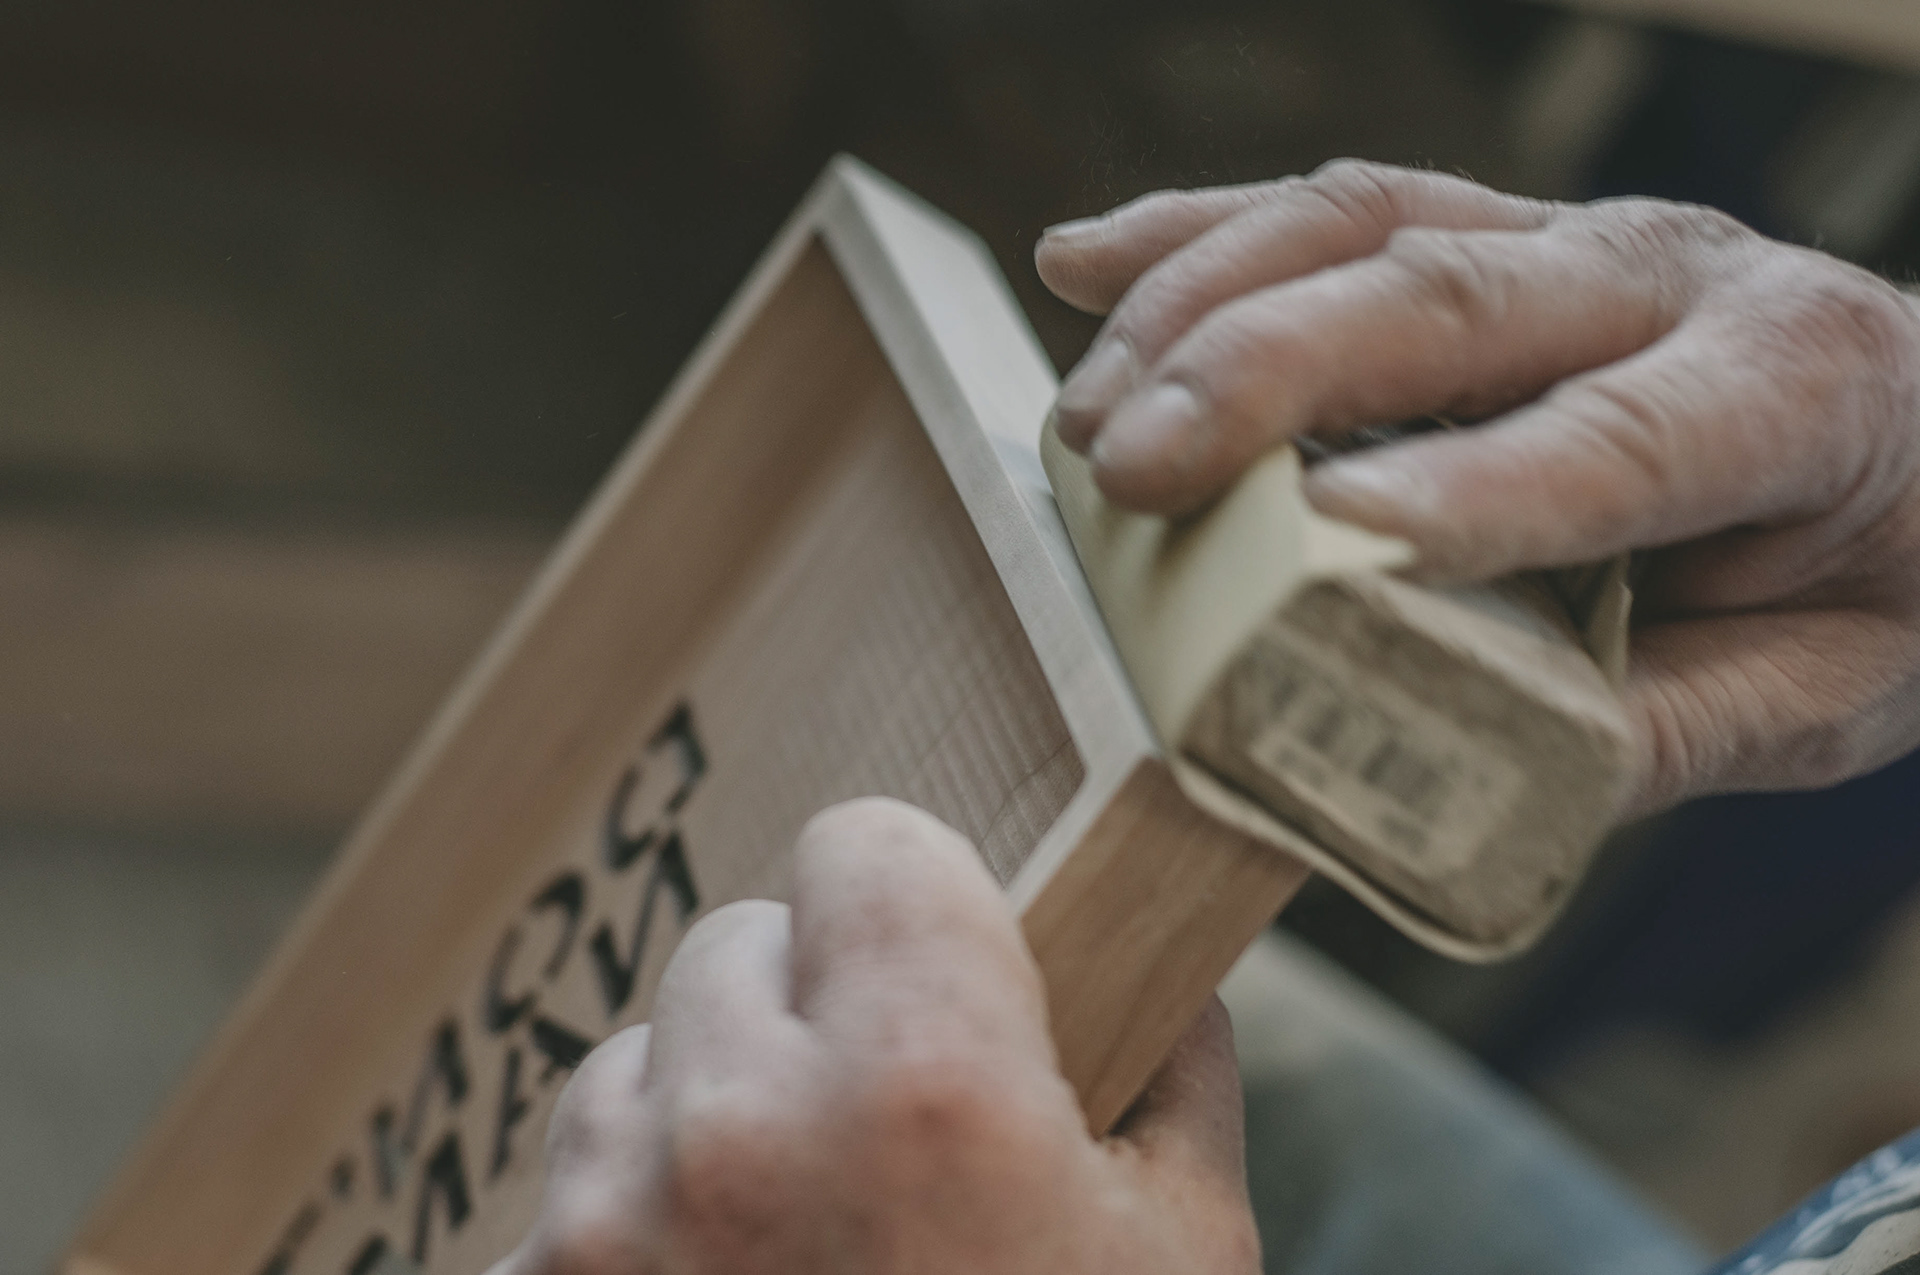
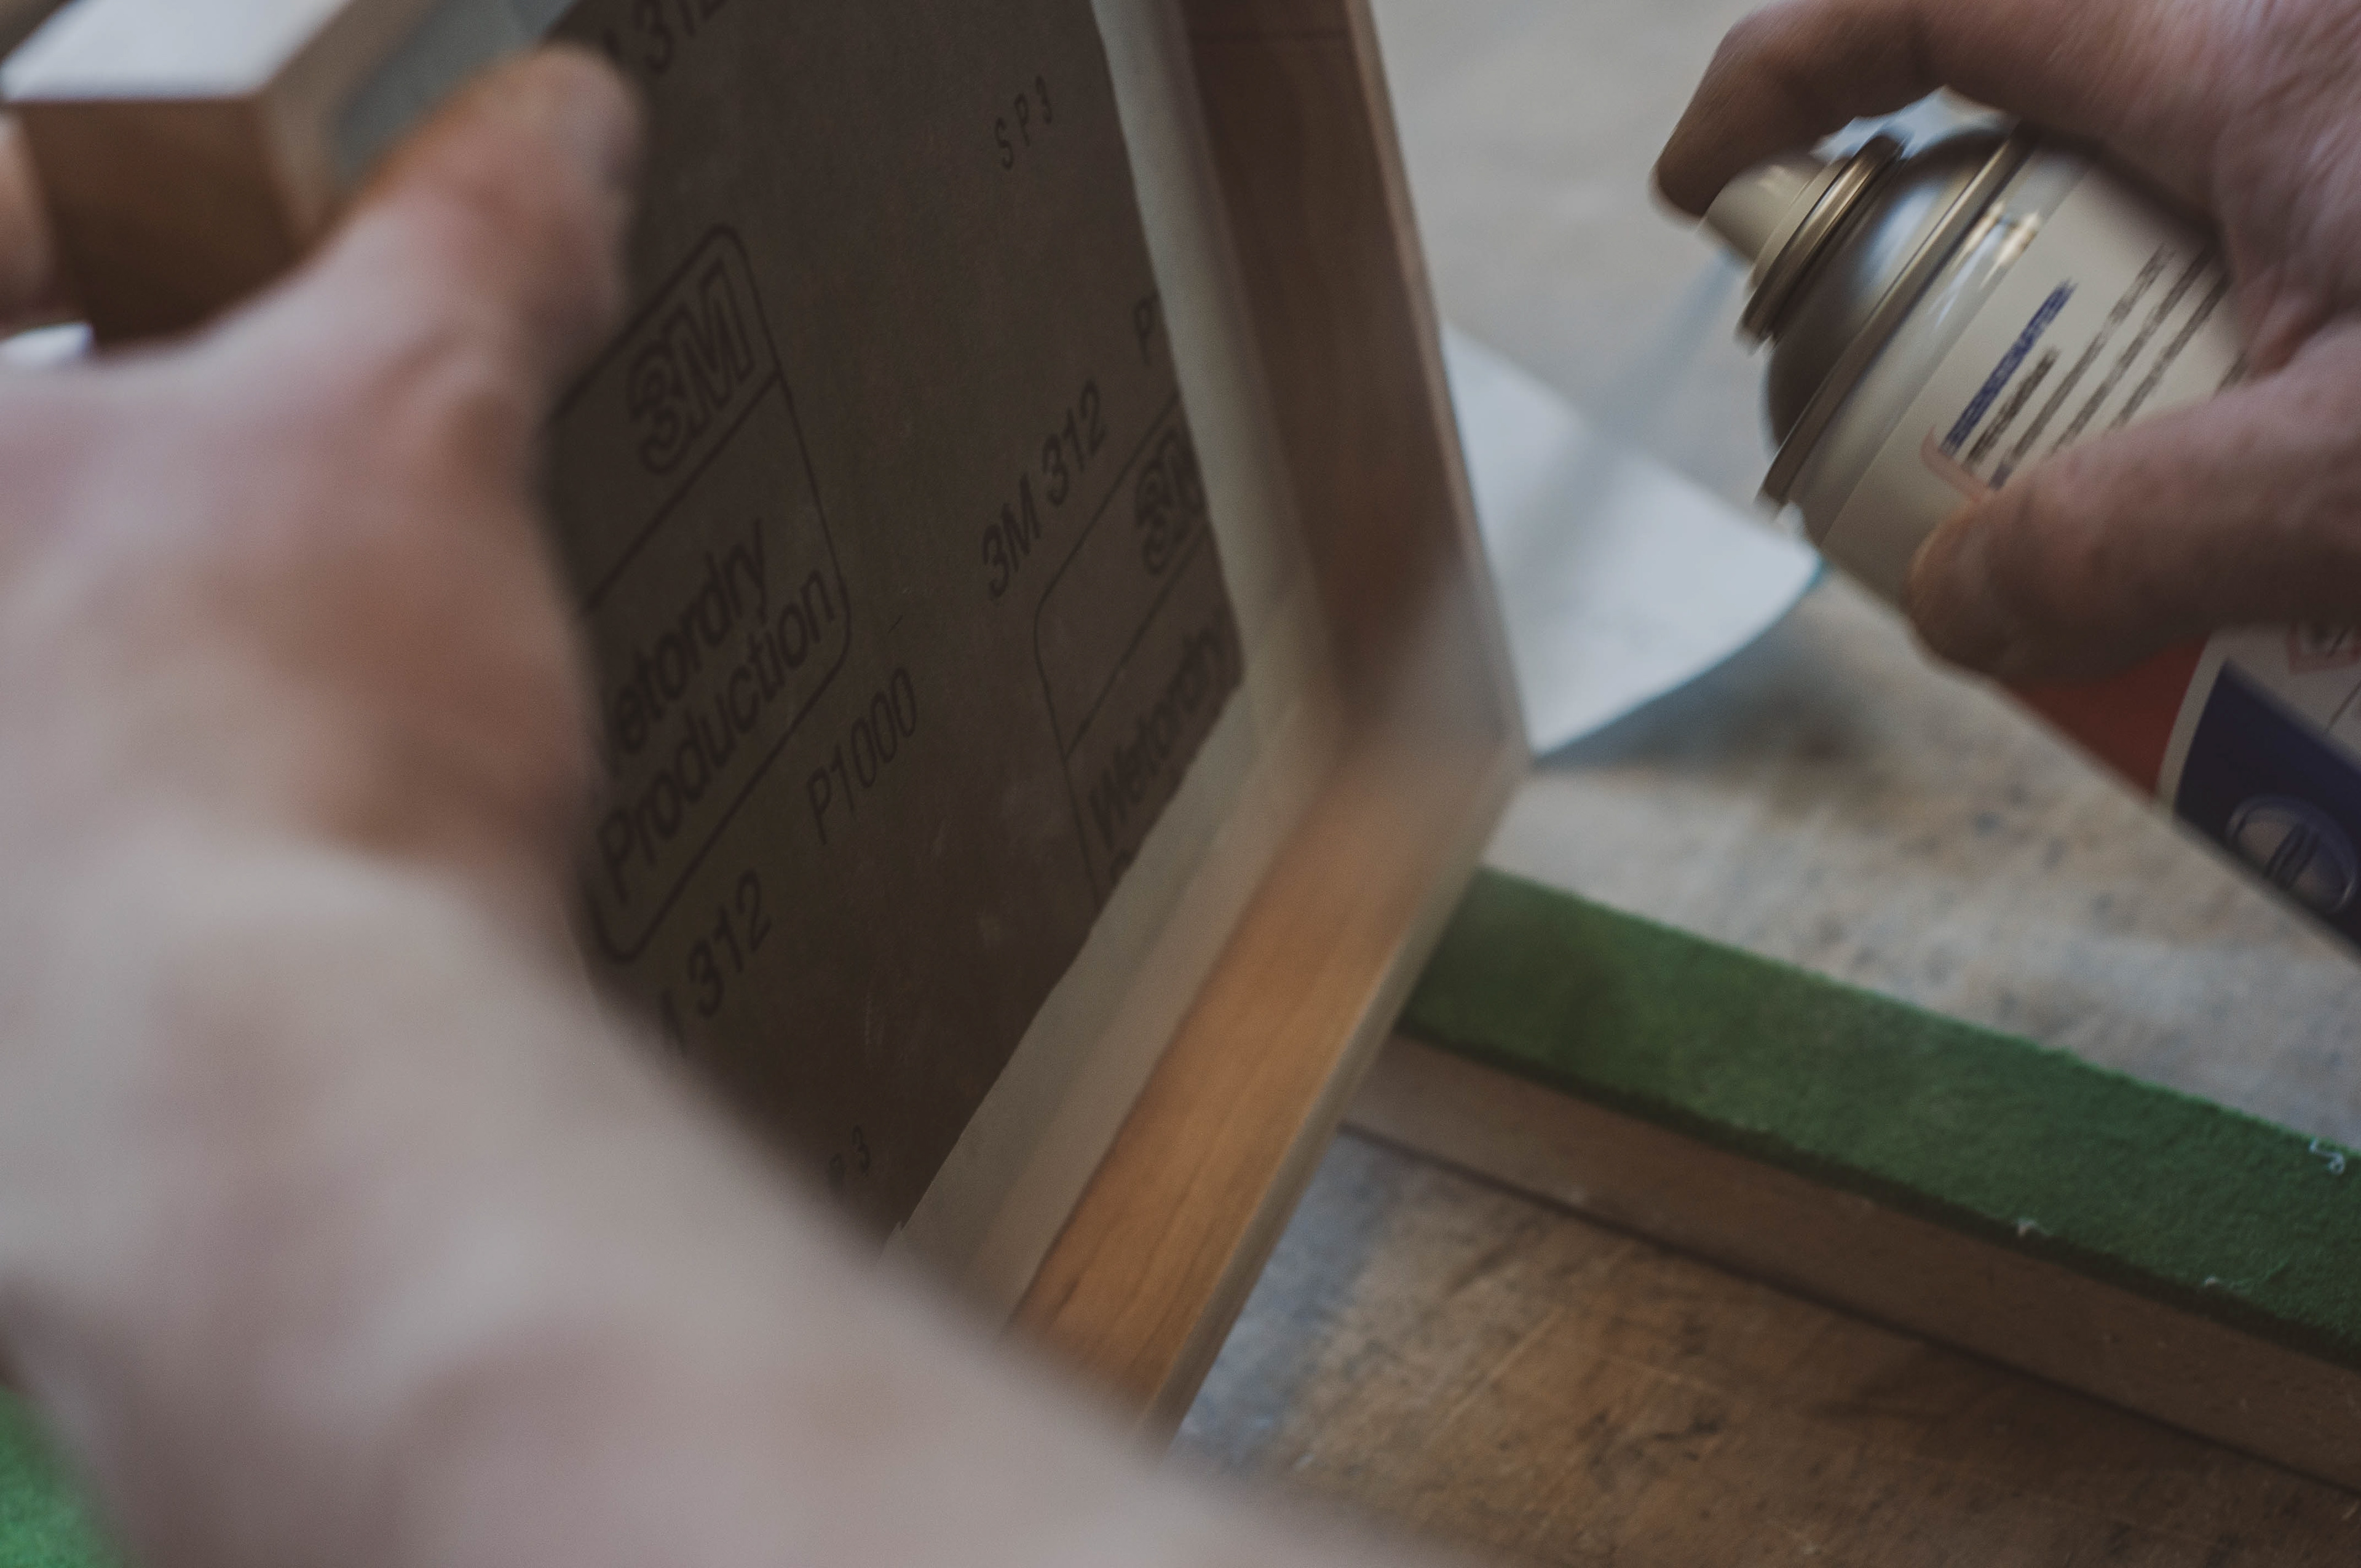
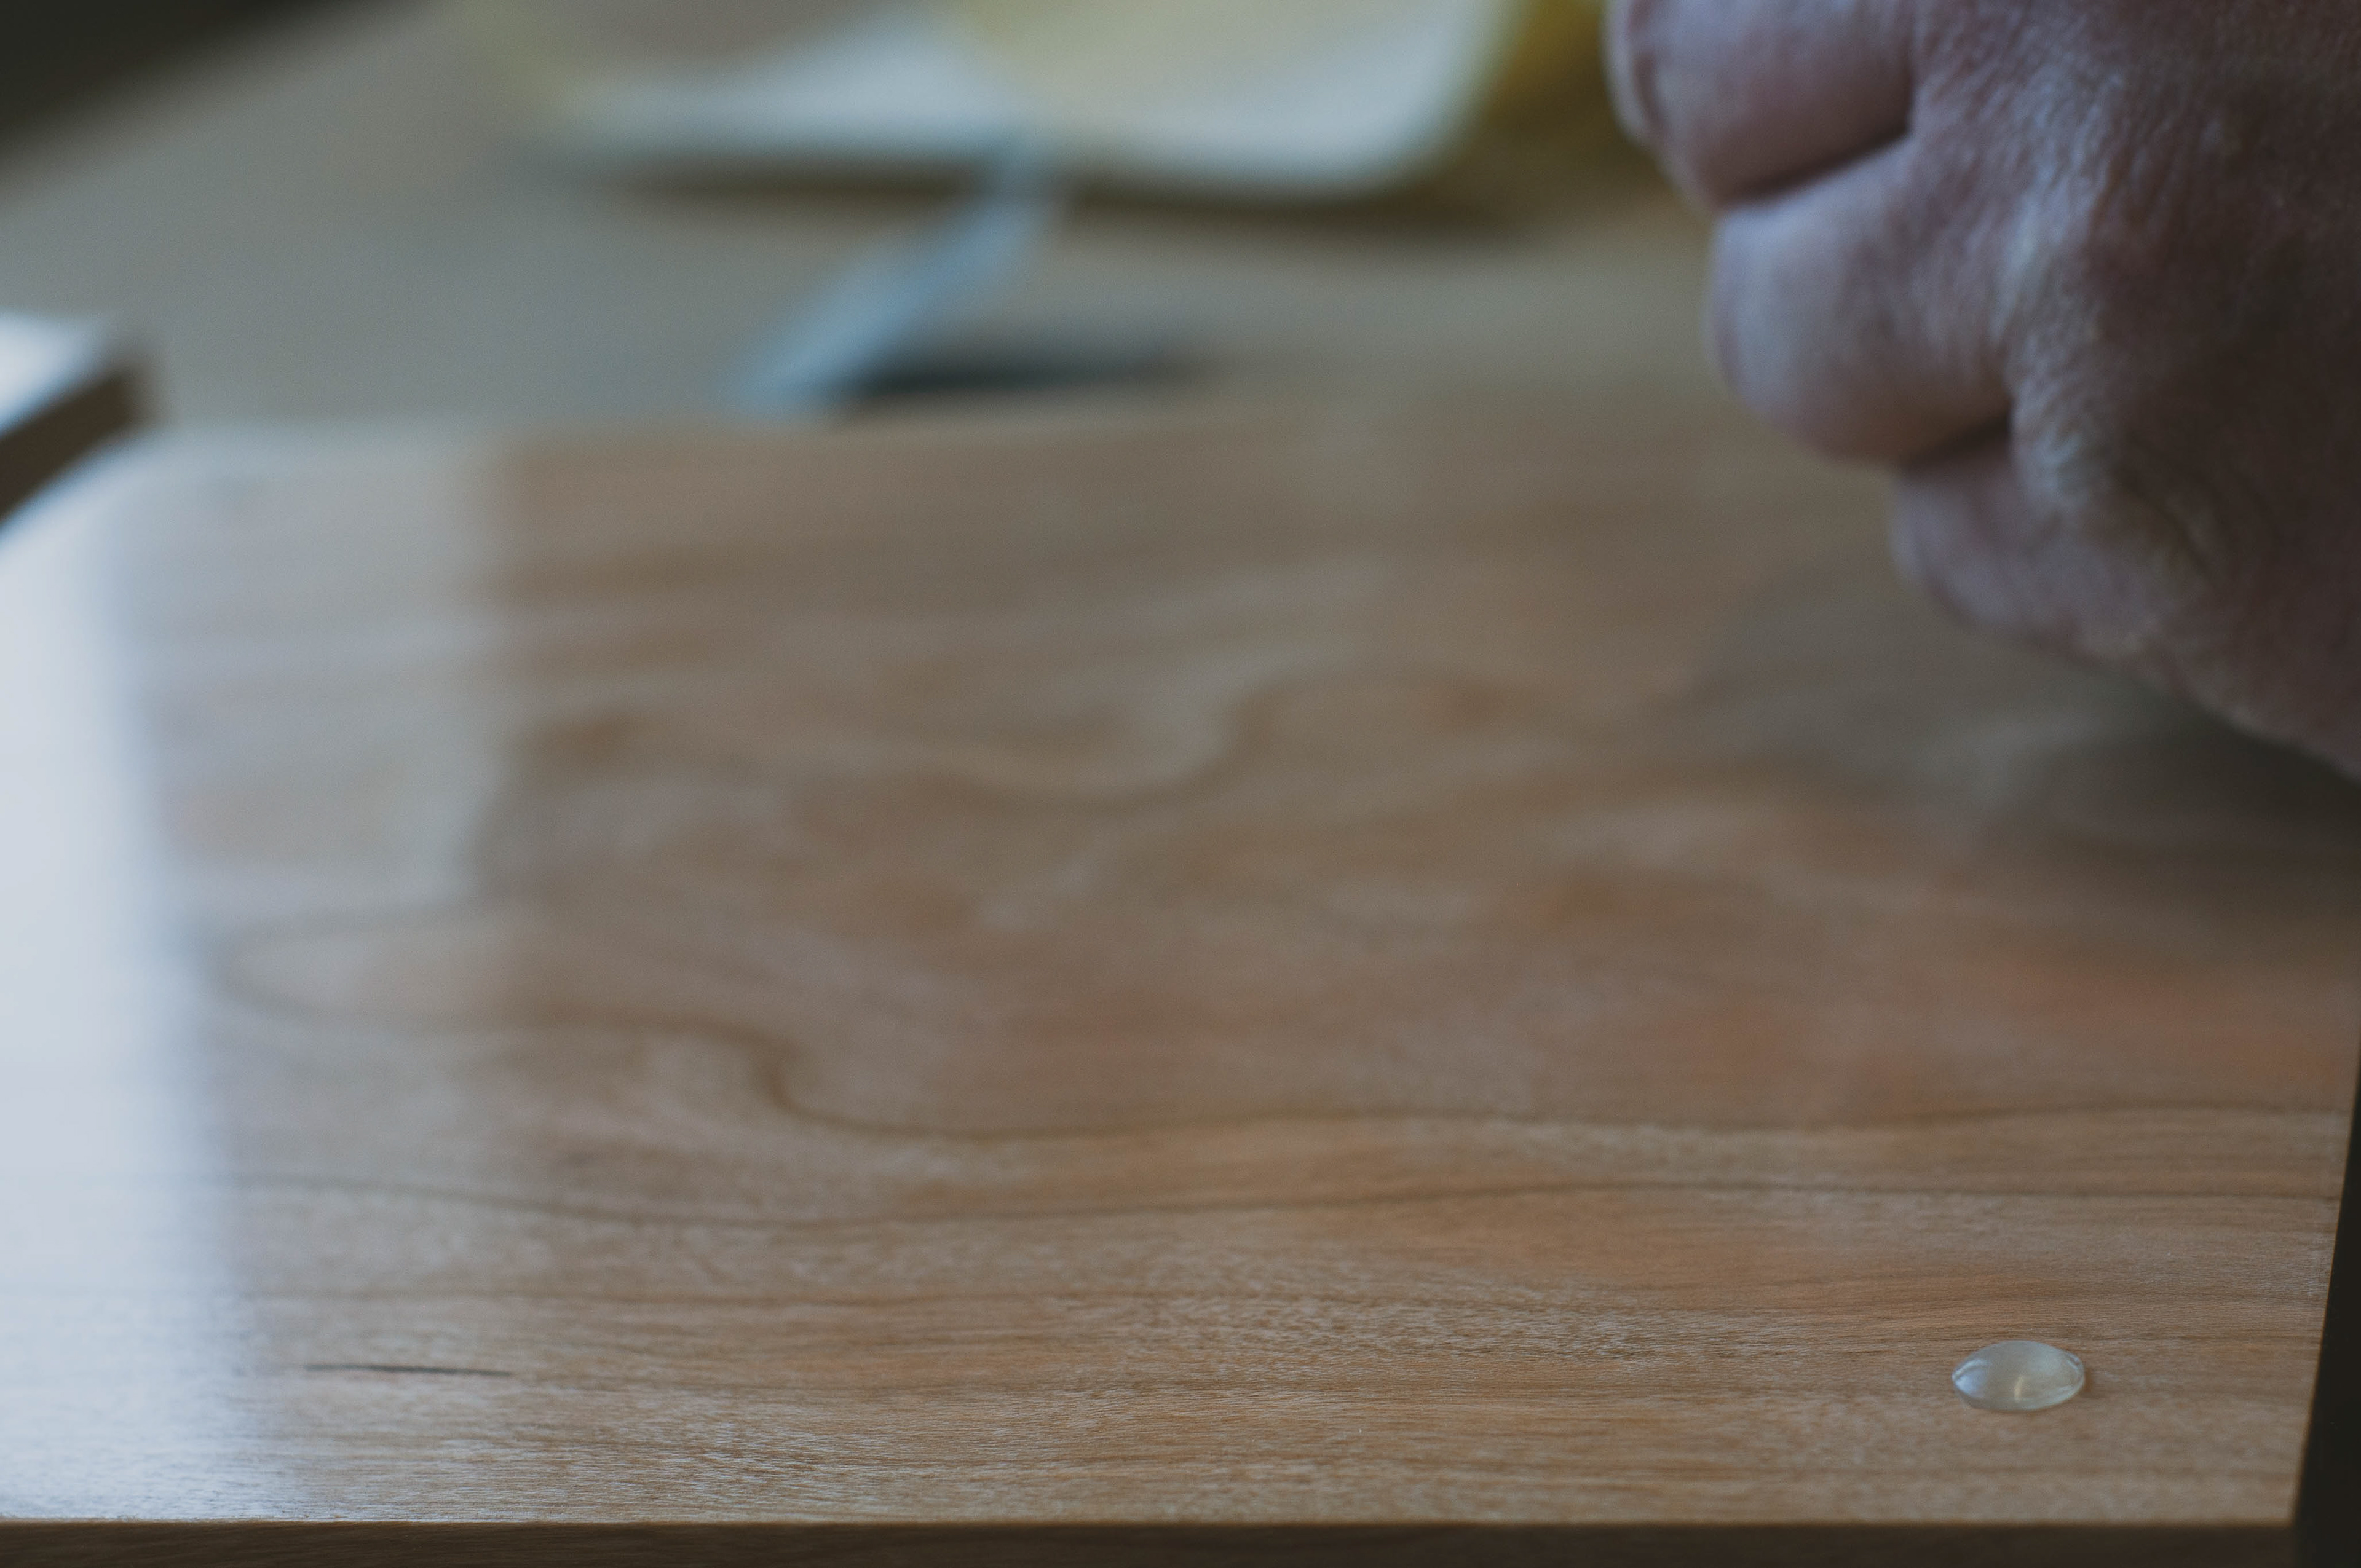
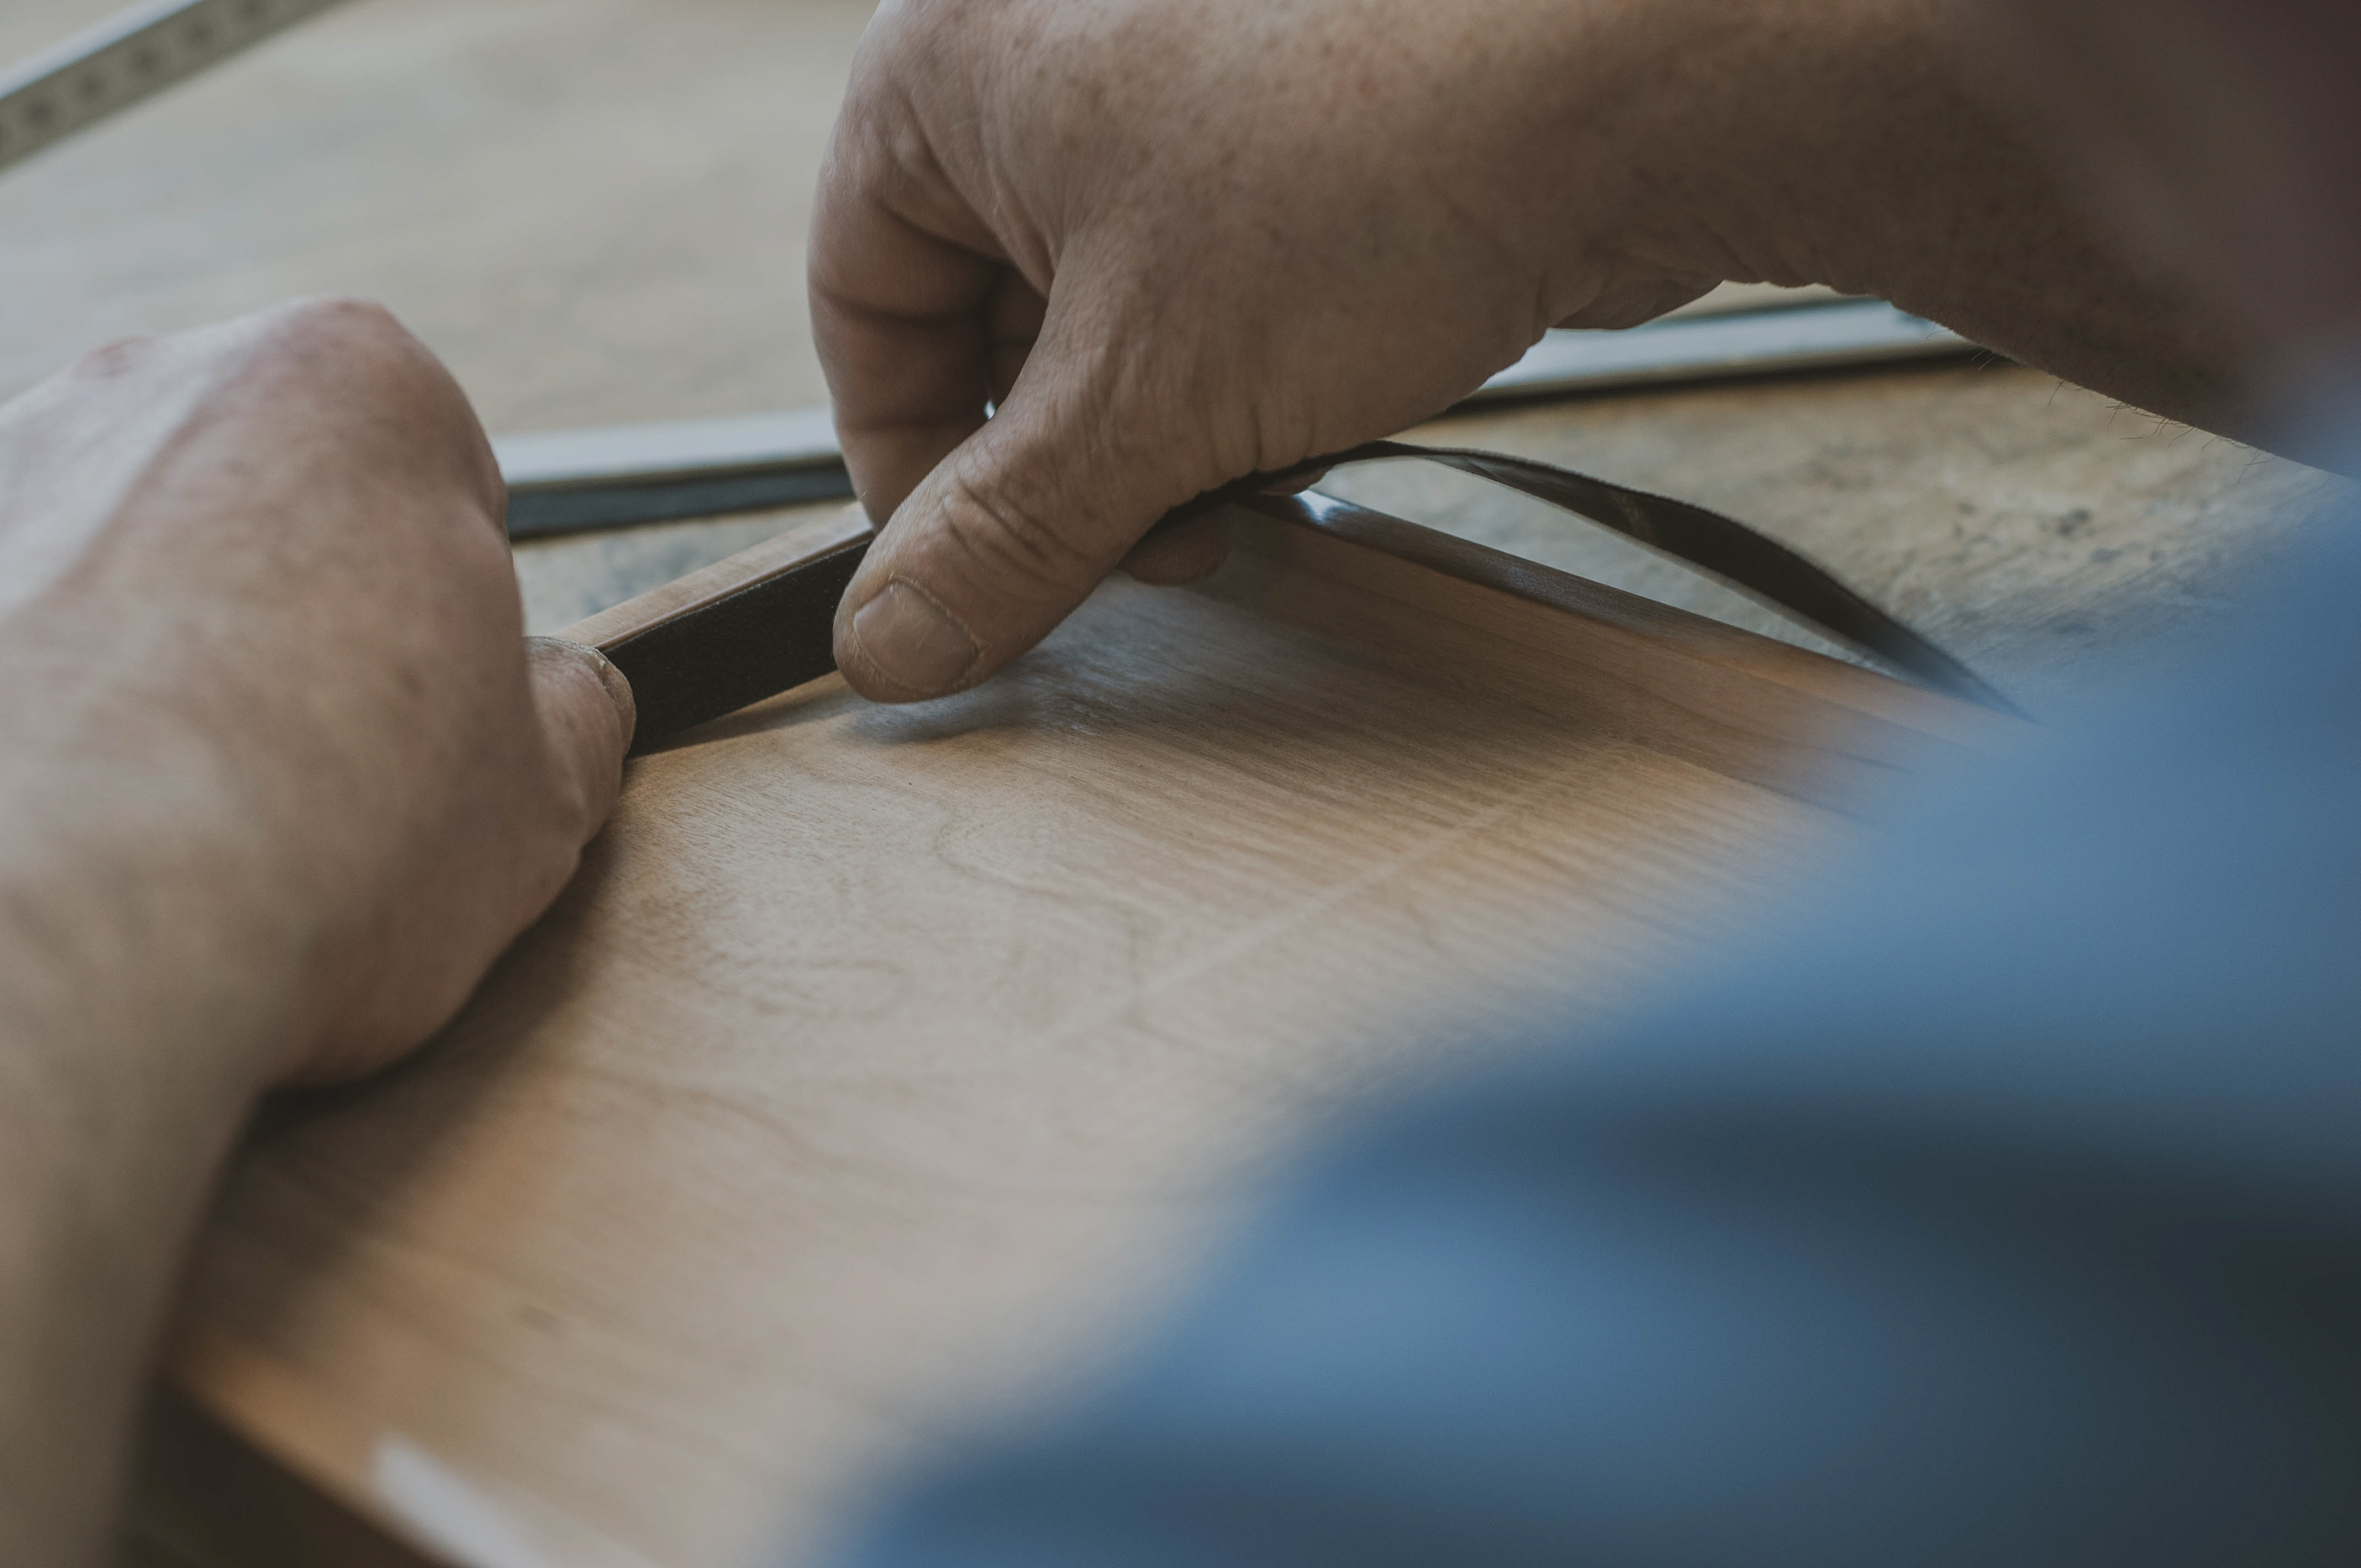
I contacted a carpenter and former friend of mine, telling him about the project and the thoughts I have come up with till here, where I need some professional and approved knowledge. We made some more testing on getting this thin wood looking more first-class. I learned a new technic of polishing, which the more often I did it, turned out more and more shiny.
And yes I did it about five or six times to achieve the results below.

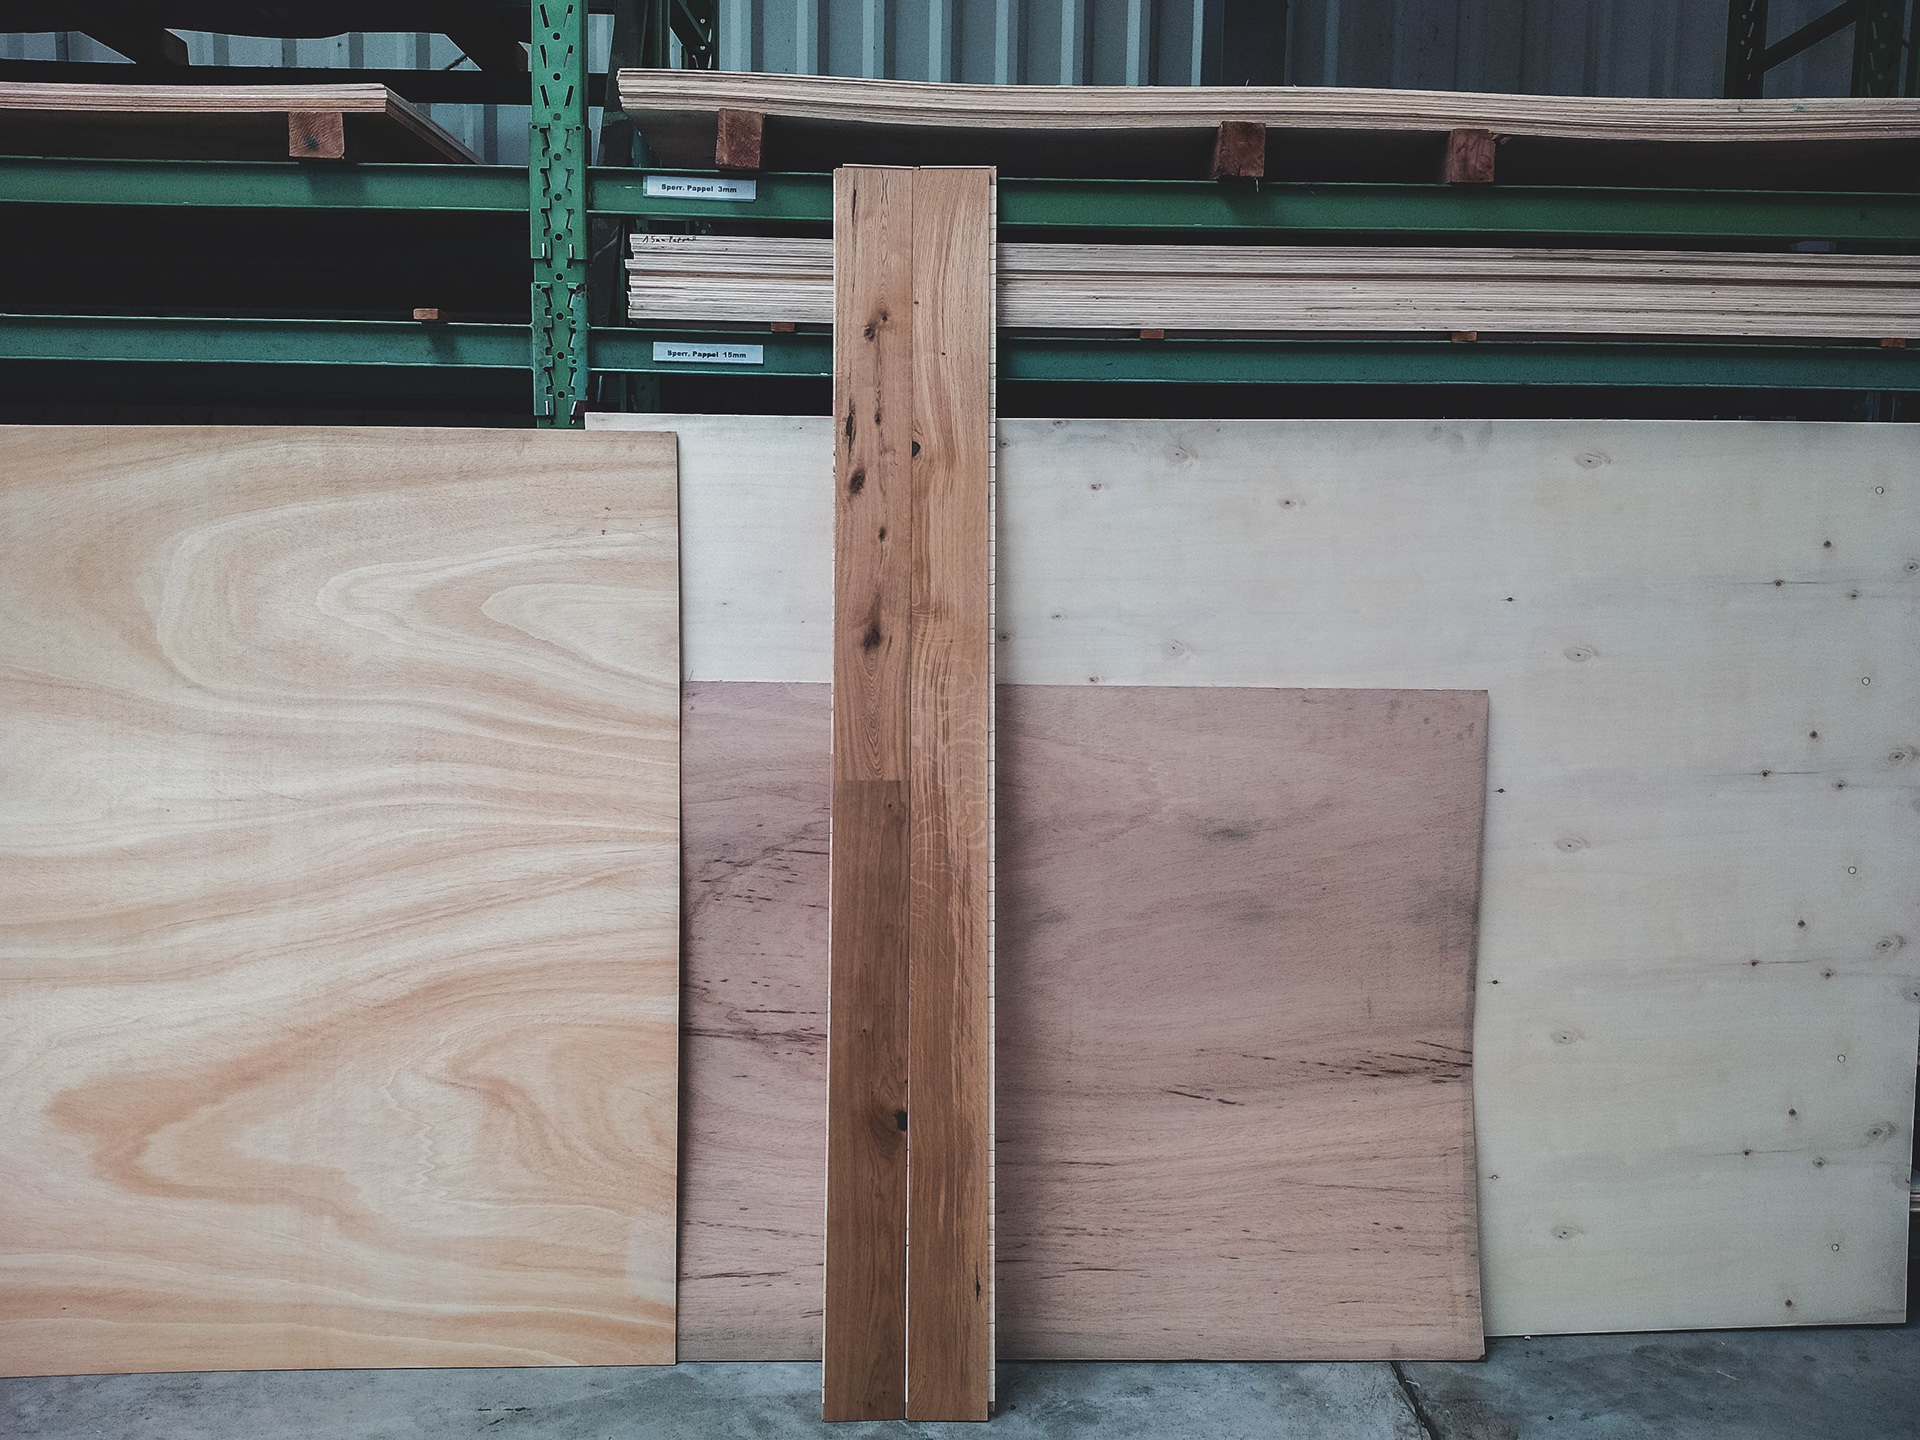
At this time I already had the idea – I wanted cherry tree wood.
After the call, I decided visiting a timber trader I knew from other projects, to obtain an overview of the wood they could get delivered very soon, as the deadline was close.
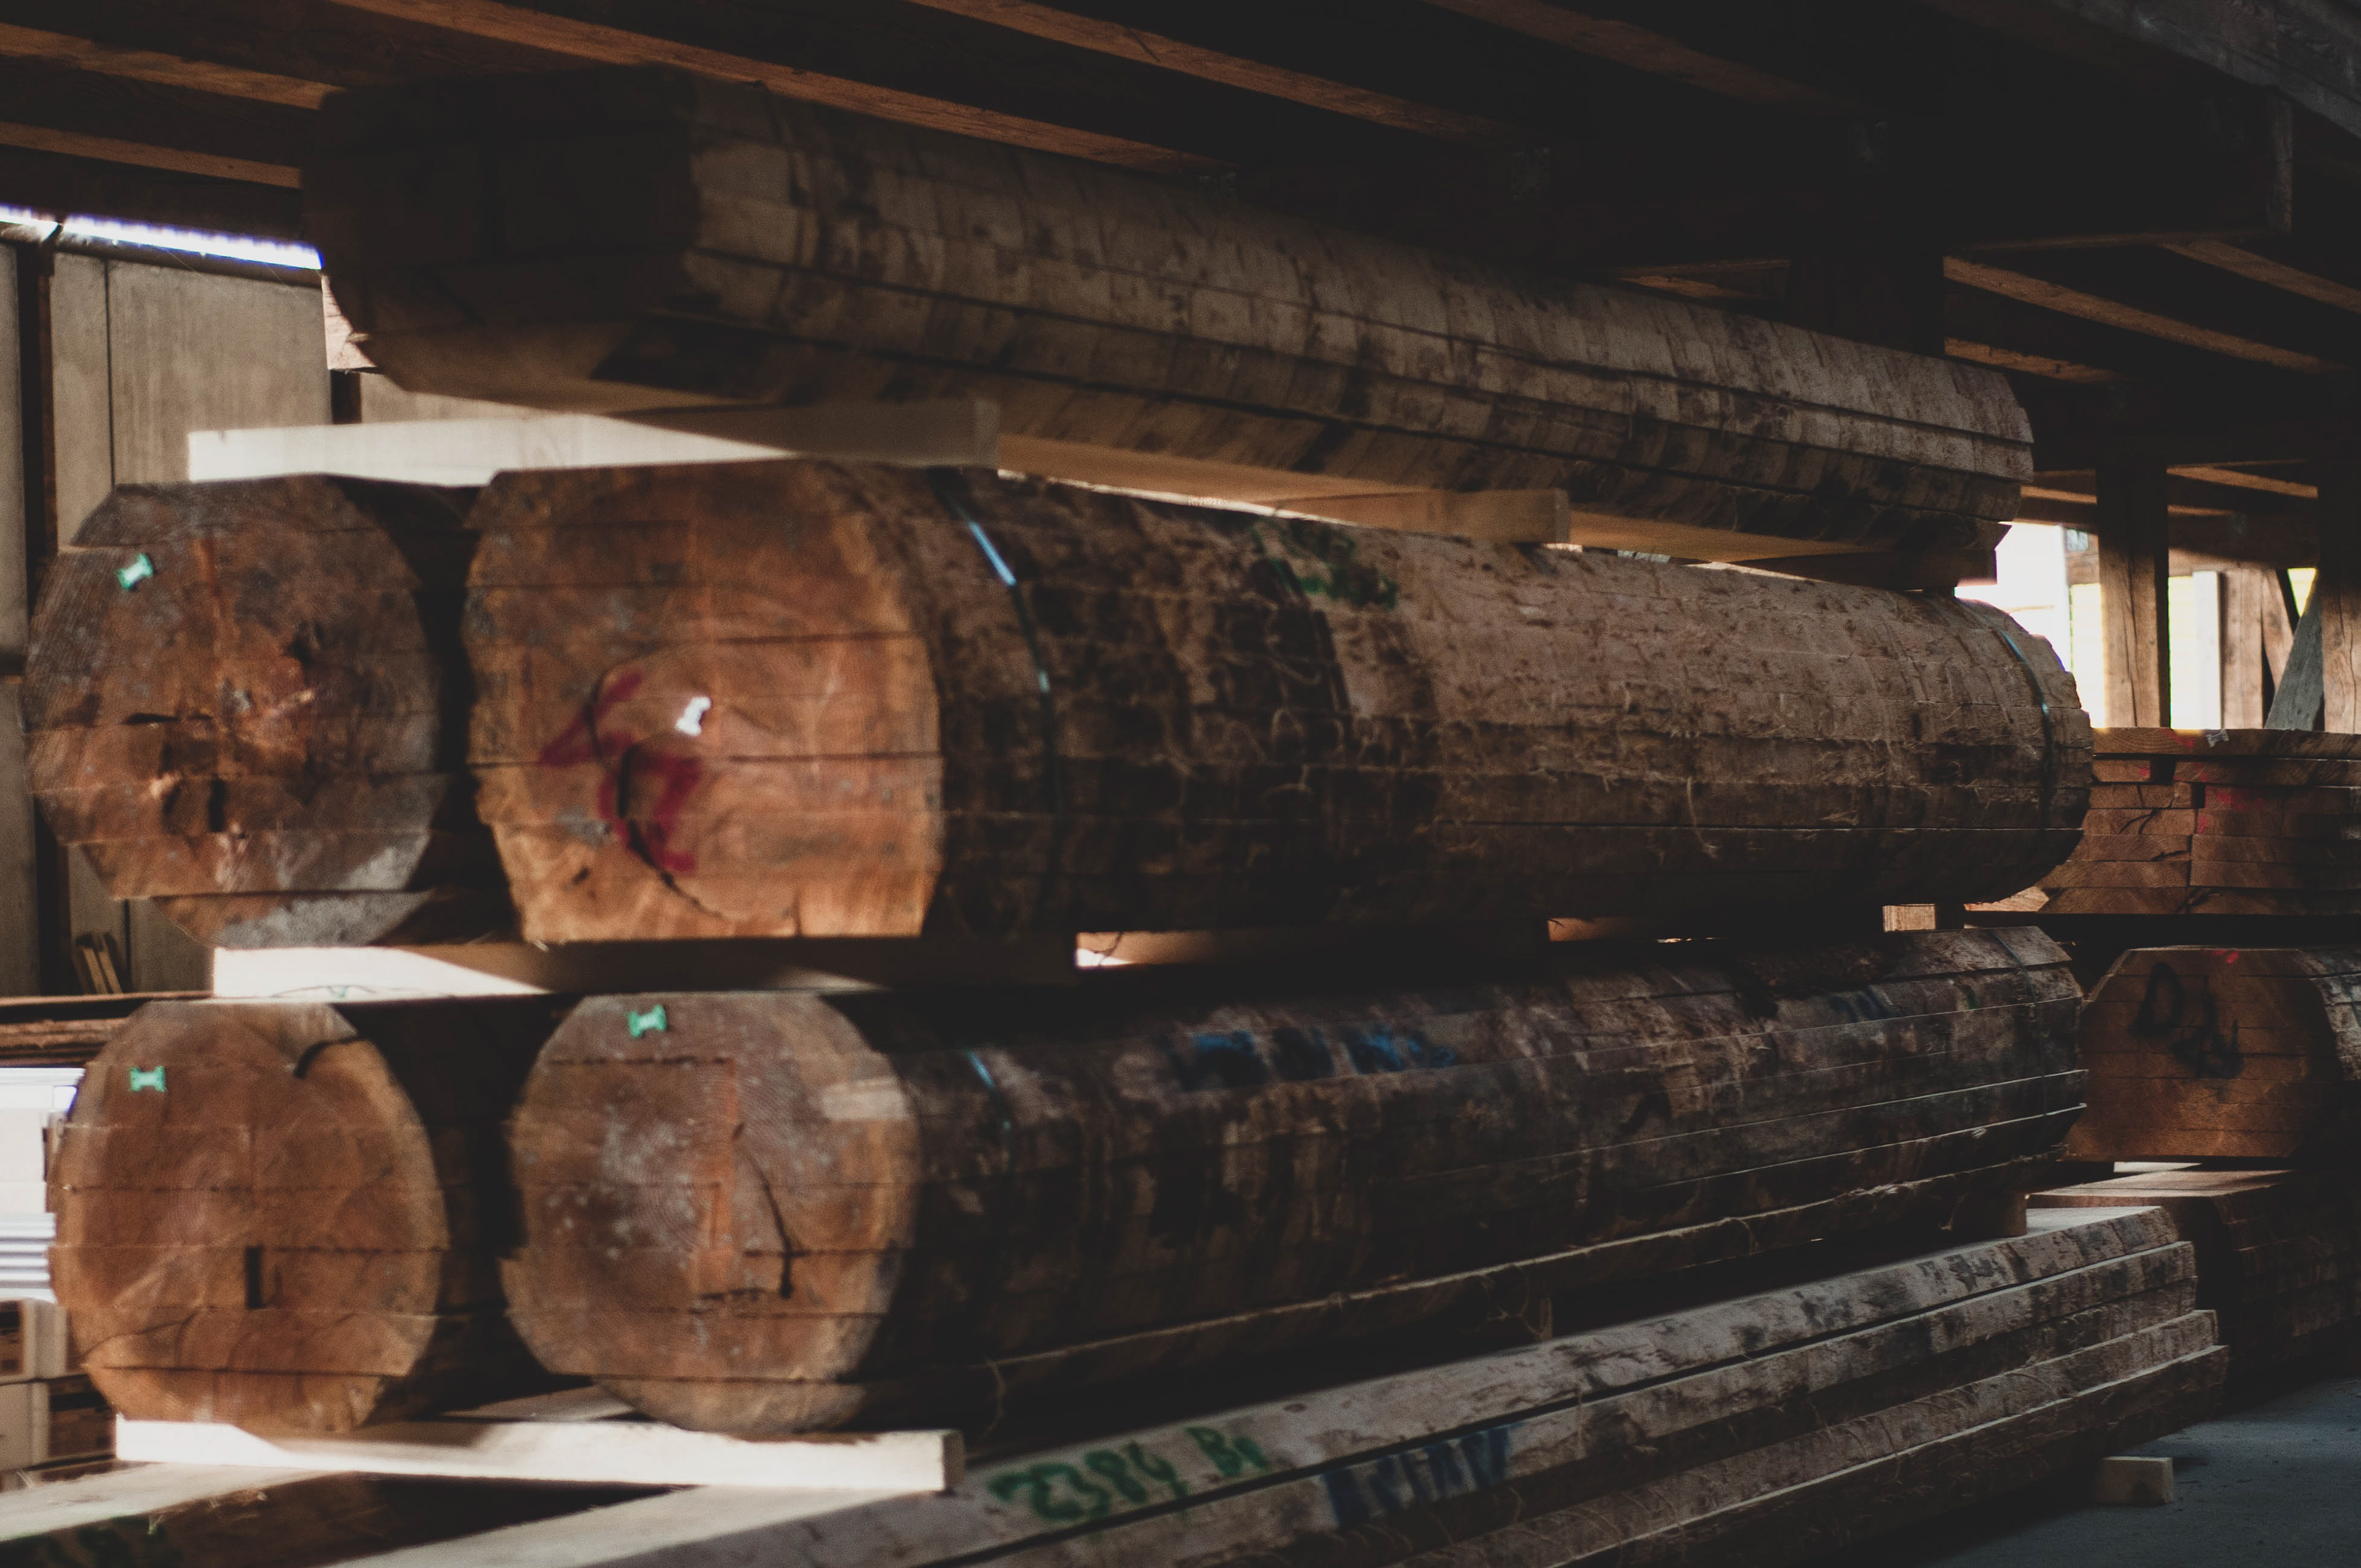
I wanted cherry tree wood – I got it
Yes, I got my cherry tree wood. But it ain't finished here. Actually, this is where it just started.
Indeed it was the best decision getting on site by myself, having a look at what I desired.
A really big and heavy beauty of 300 x 47 x 12 cm
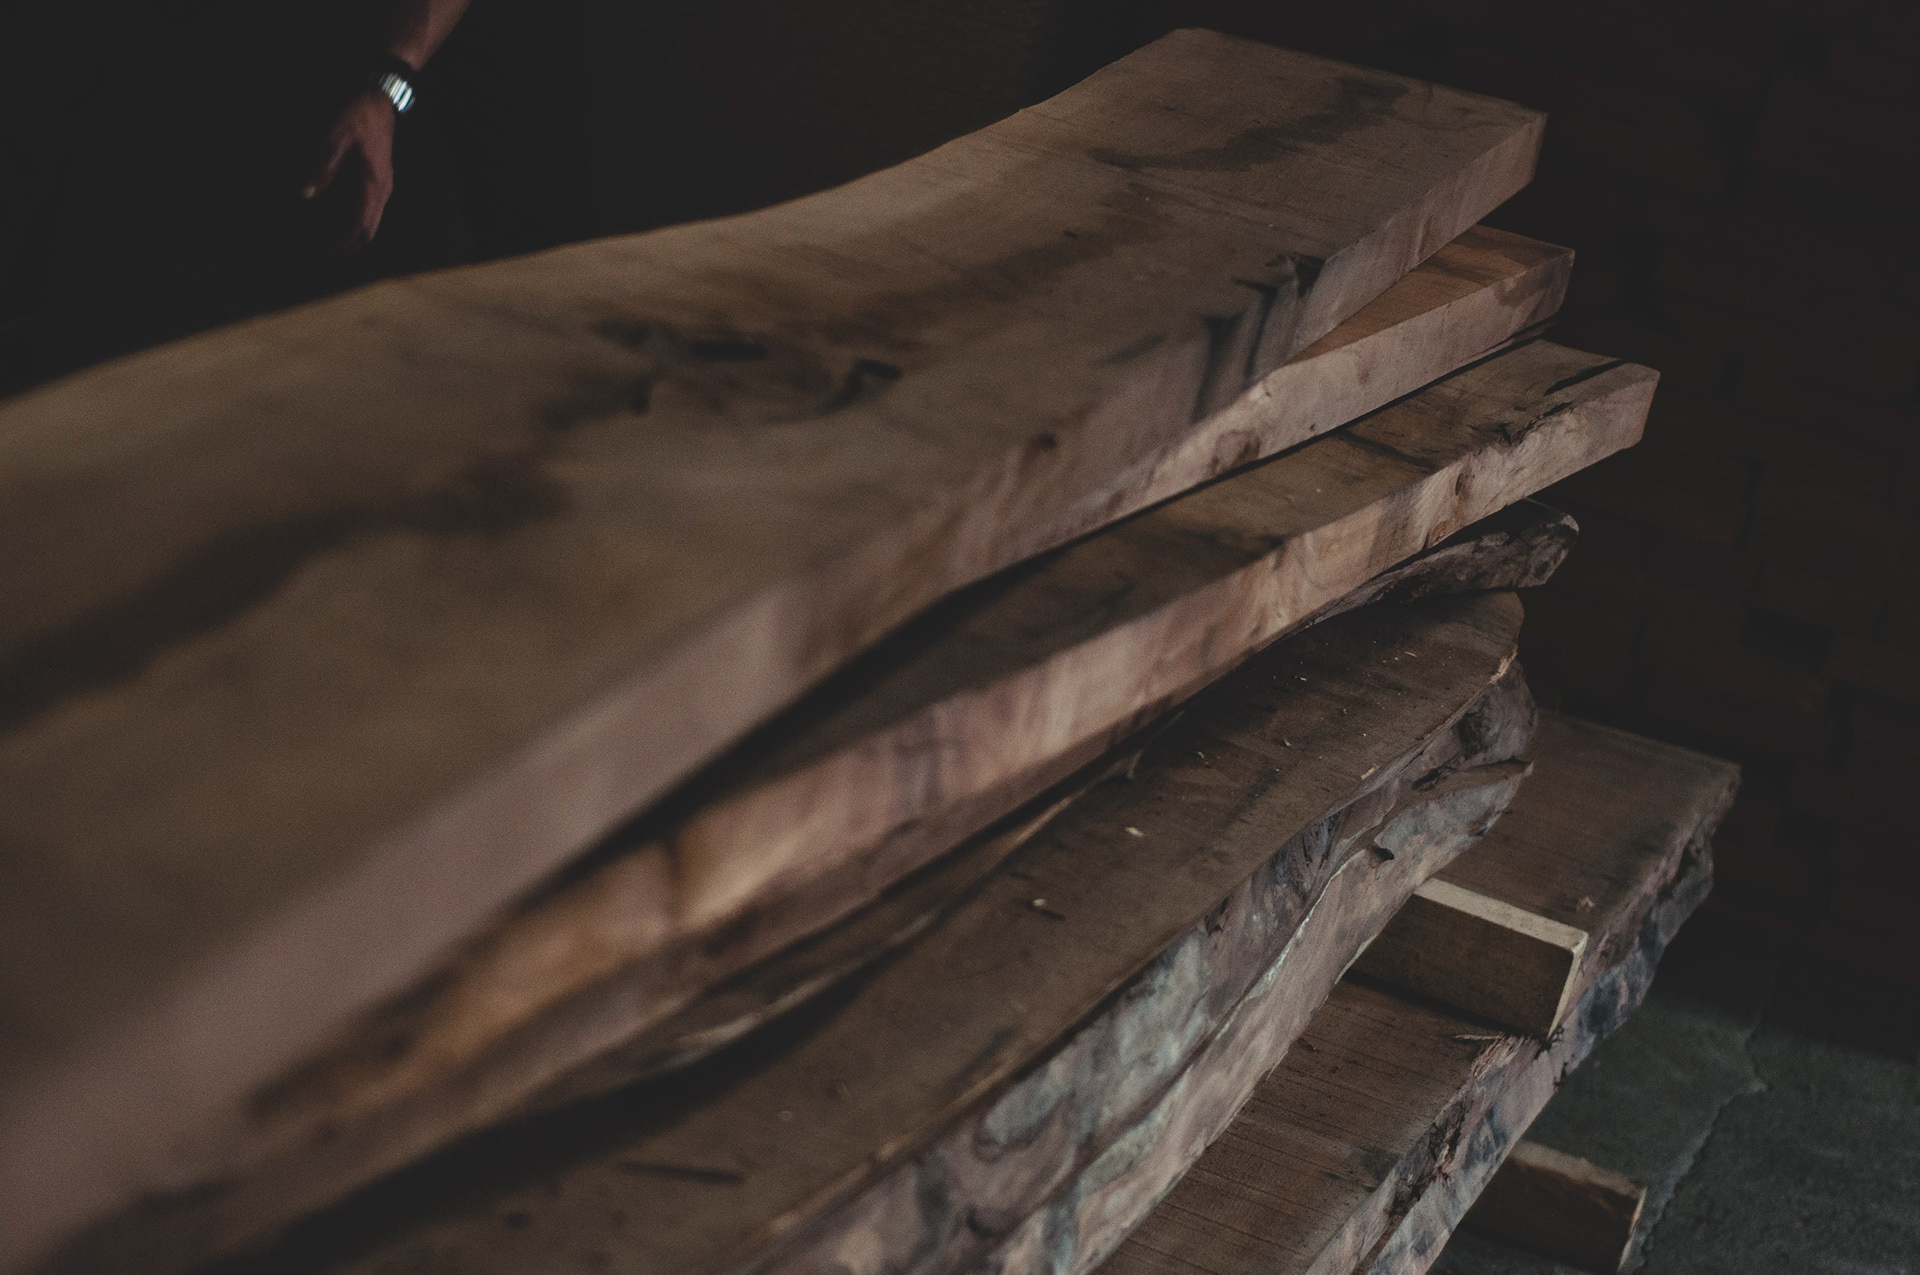
GET IT ROUGH
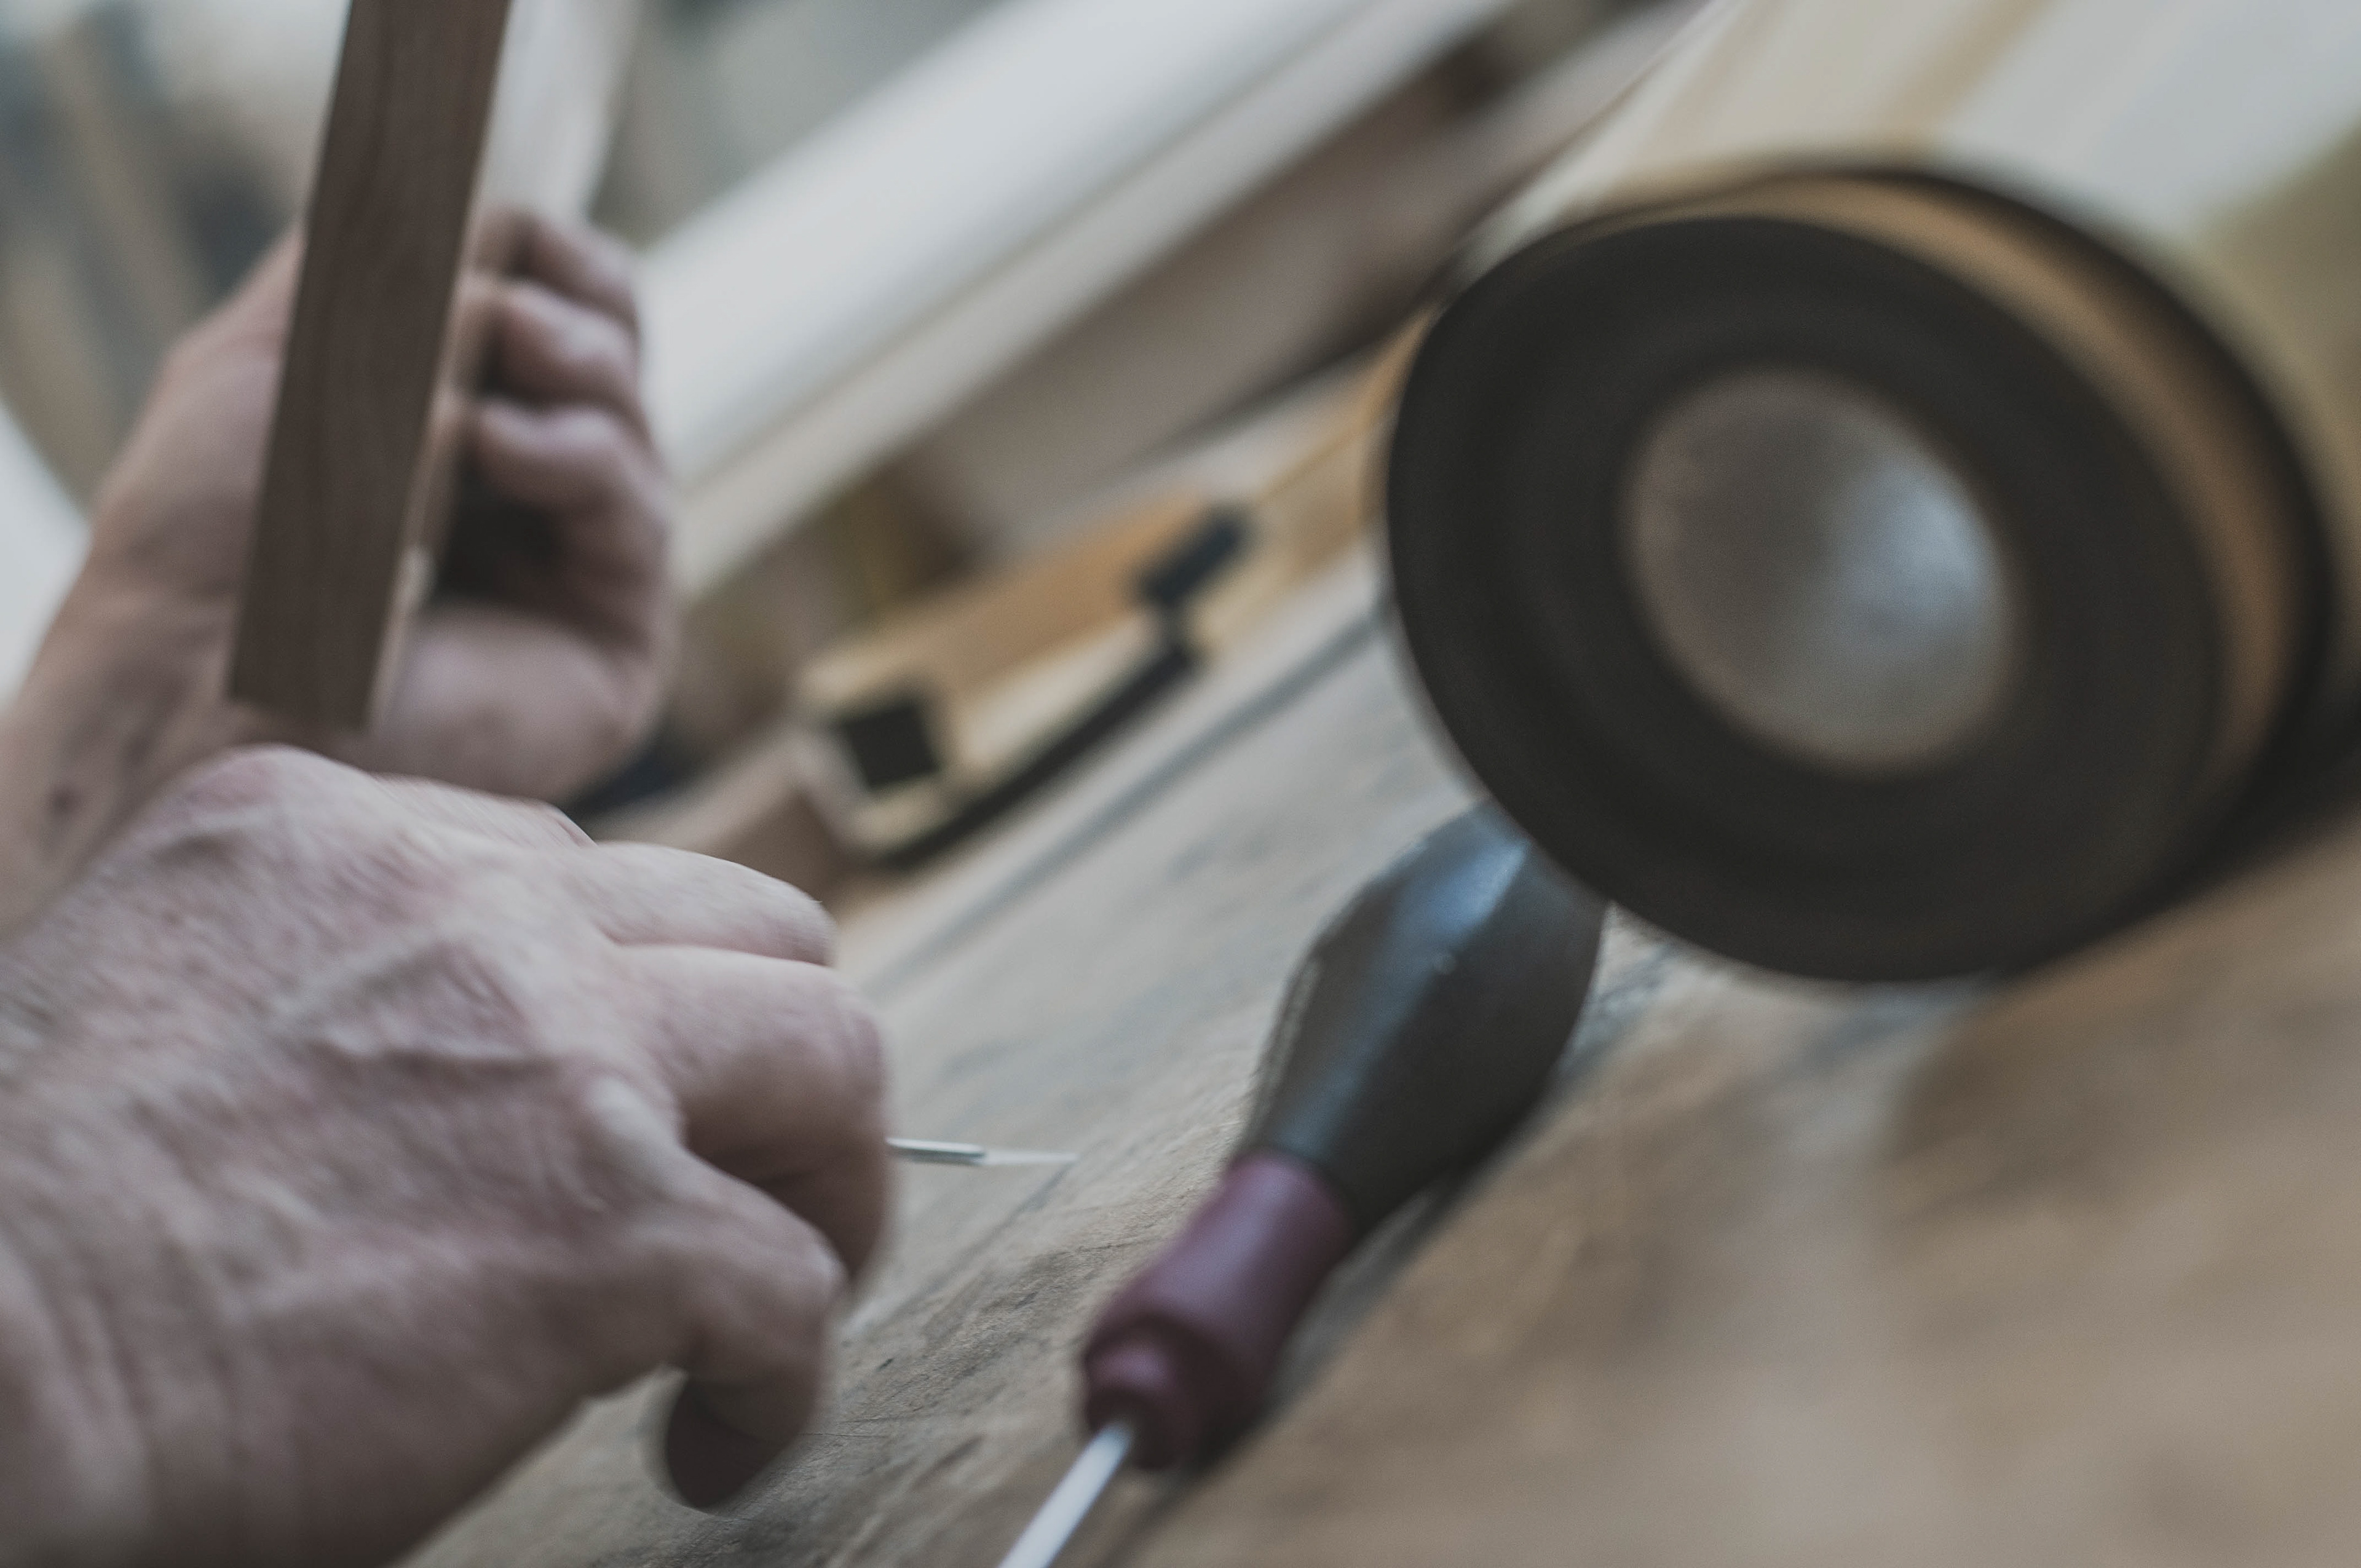
I contacted another carpenter close to place I used to live in earlier days (this one was more into making sculptures), which I knew had the appropriate tools and machines I would need to plane, saw and flatten the piece of wood I just owned.
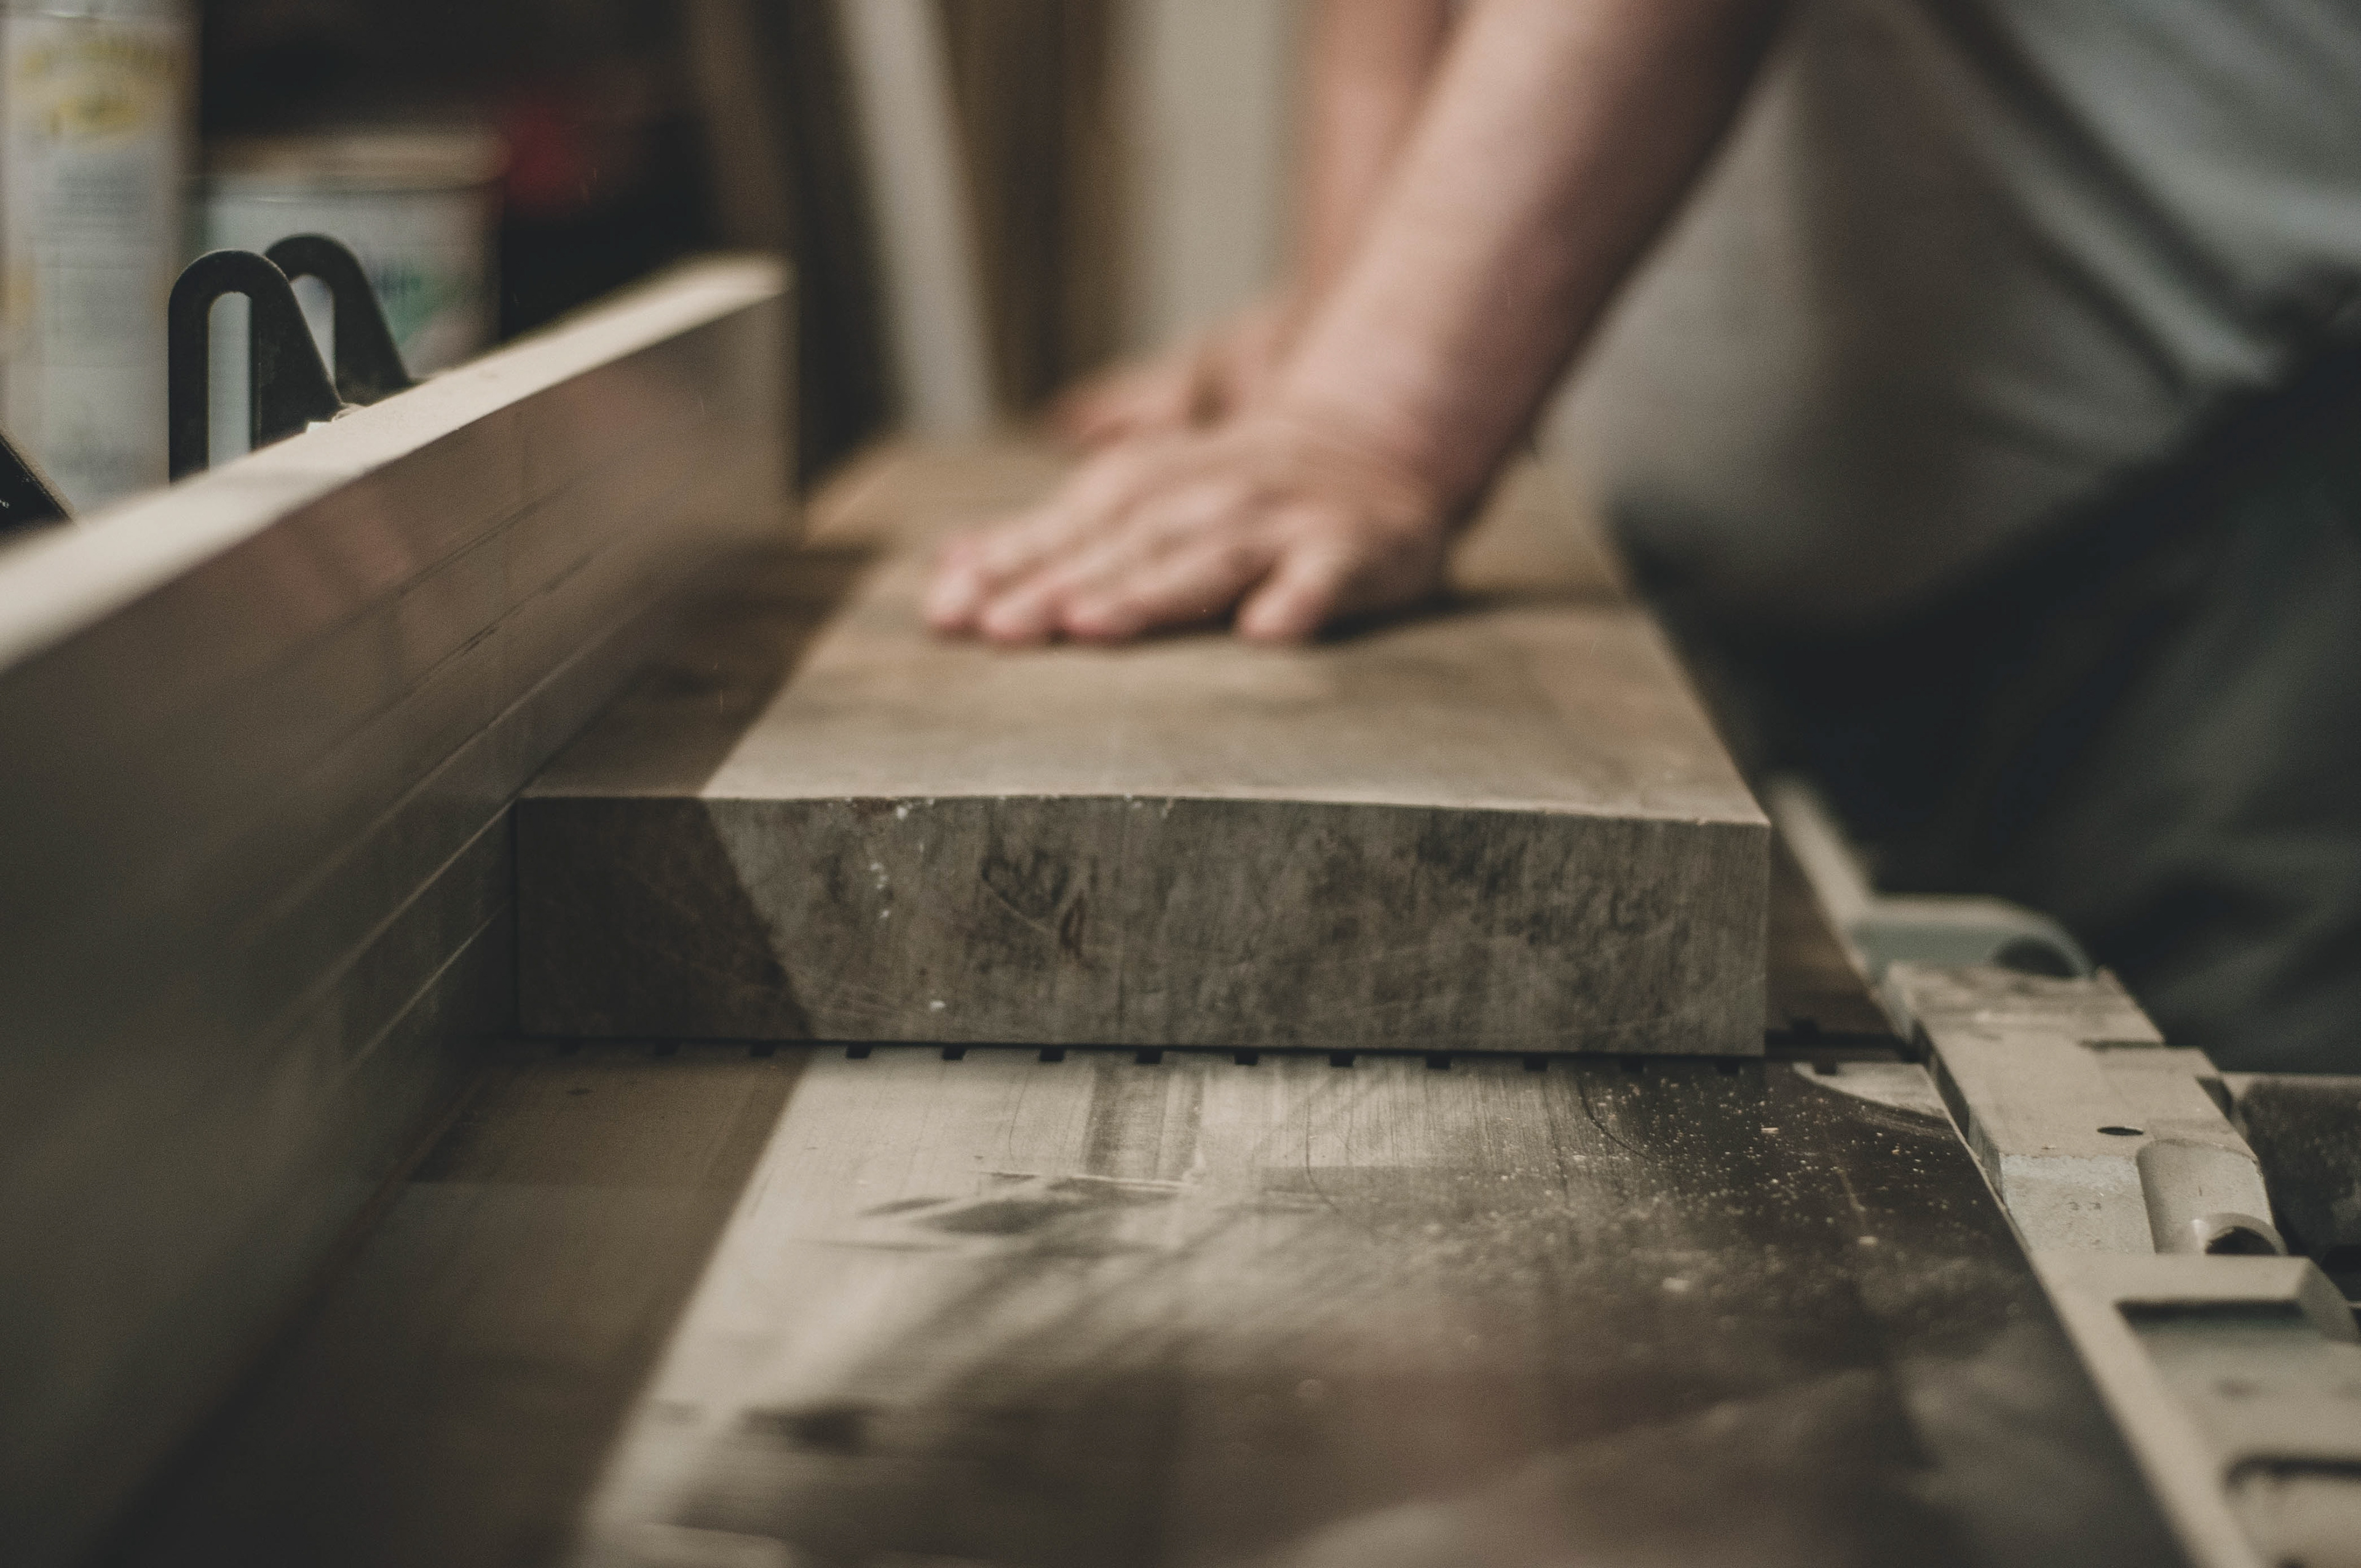
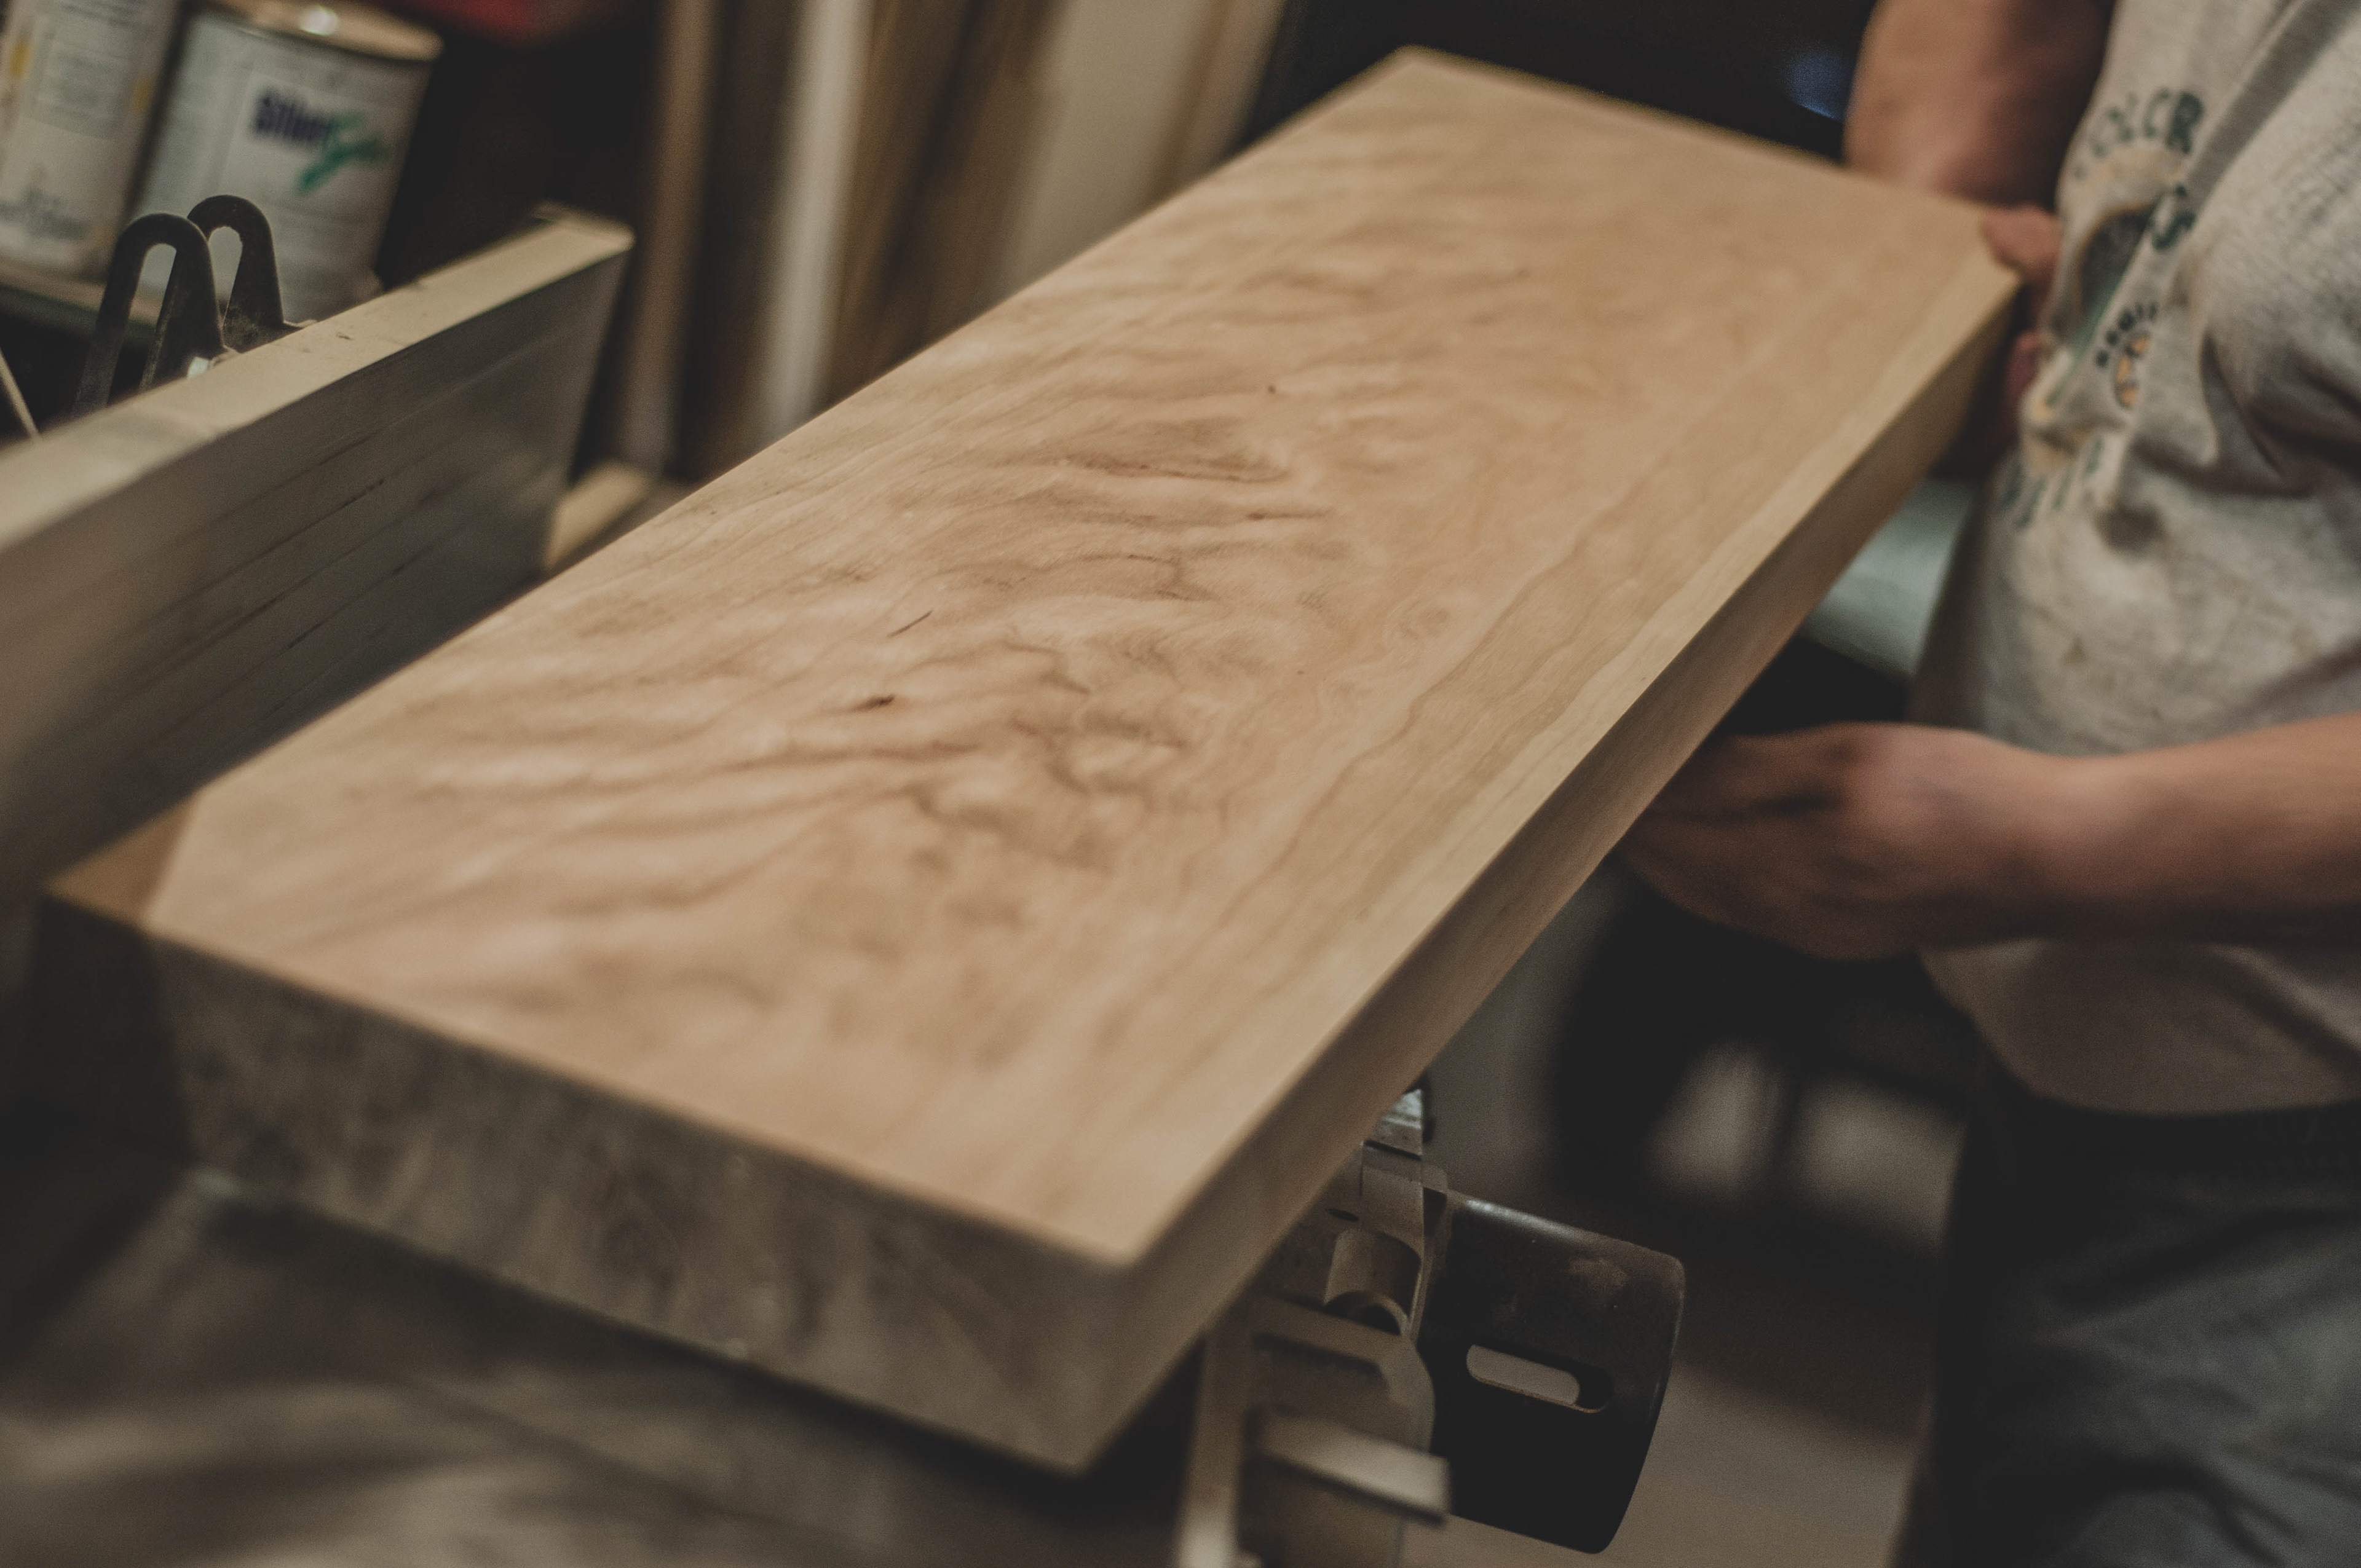
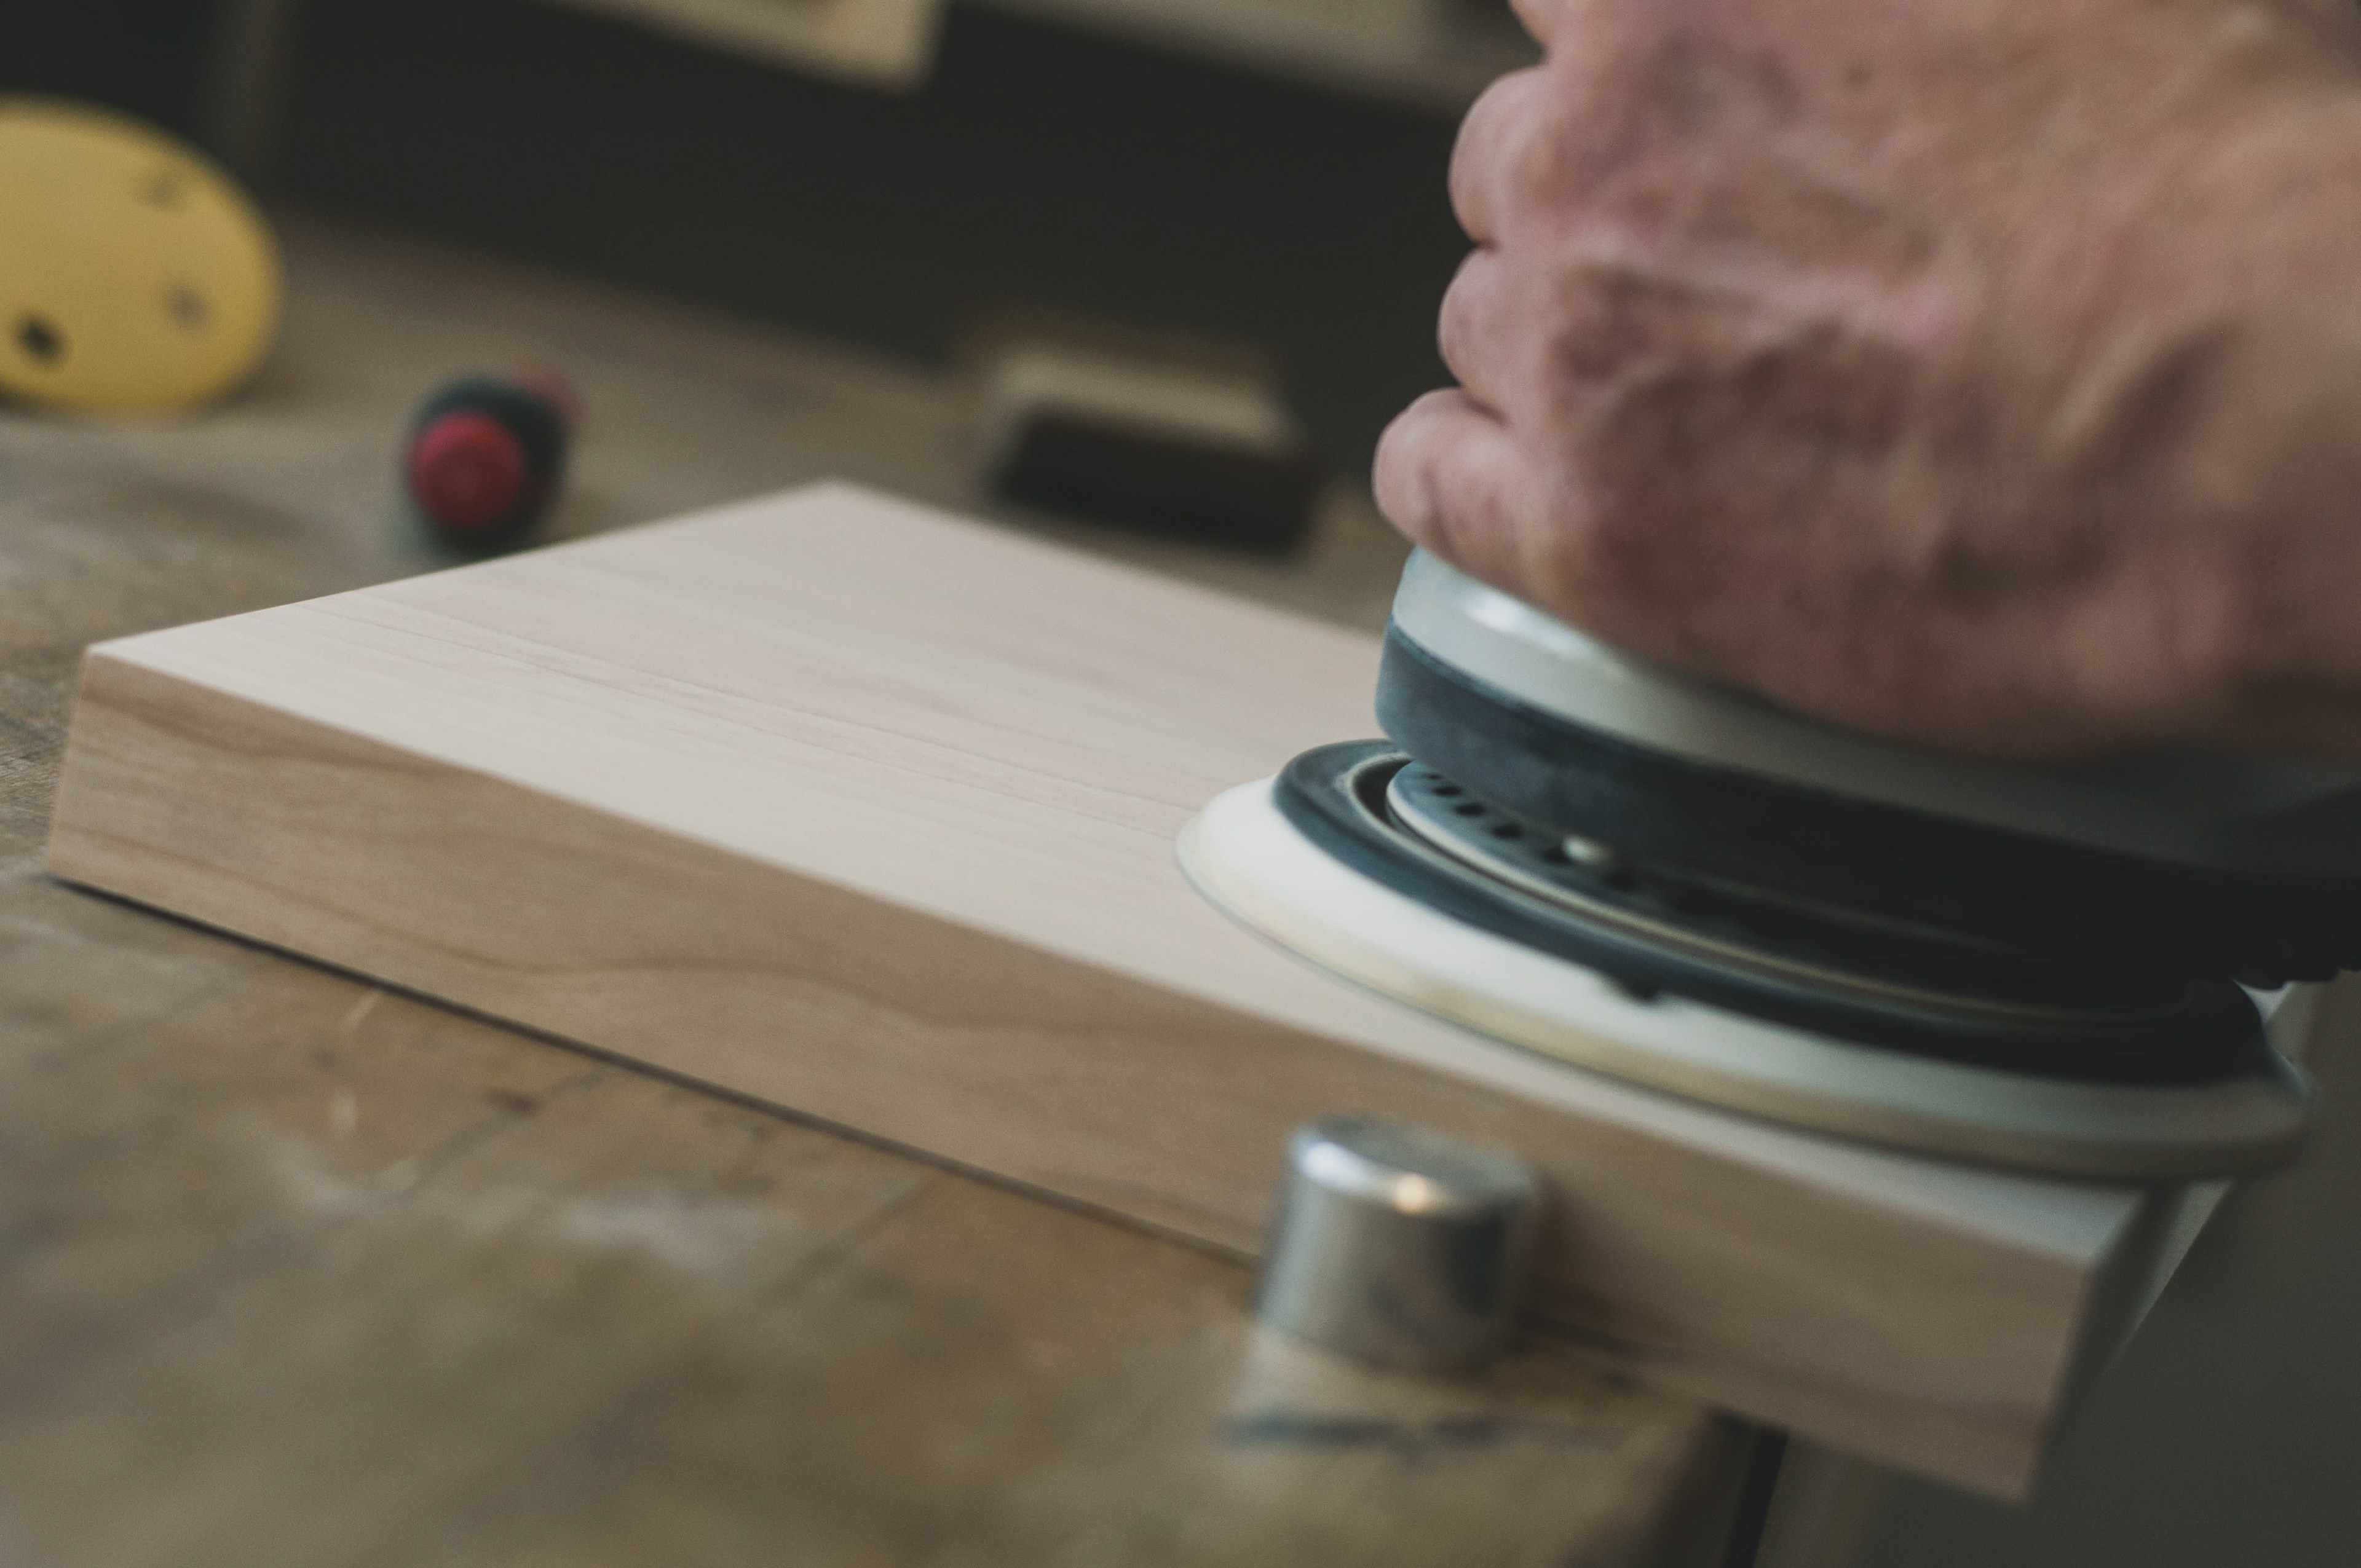
GET ON DIET
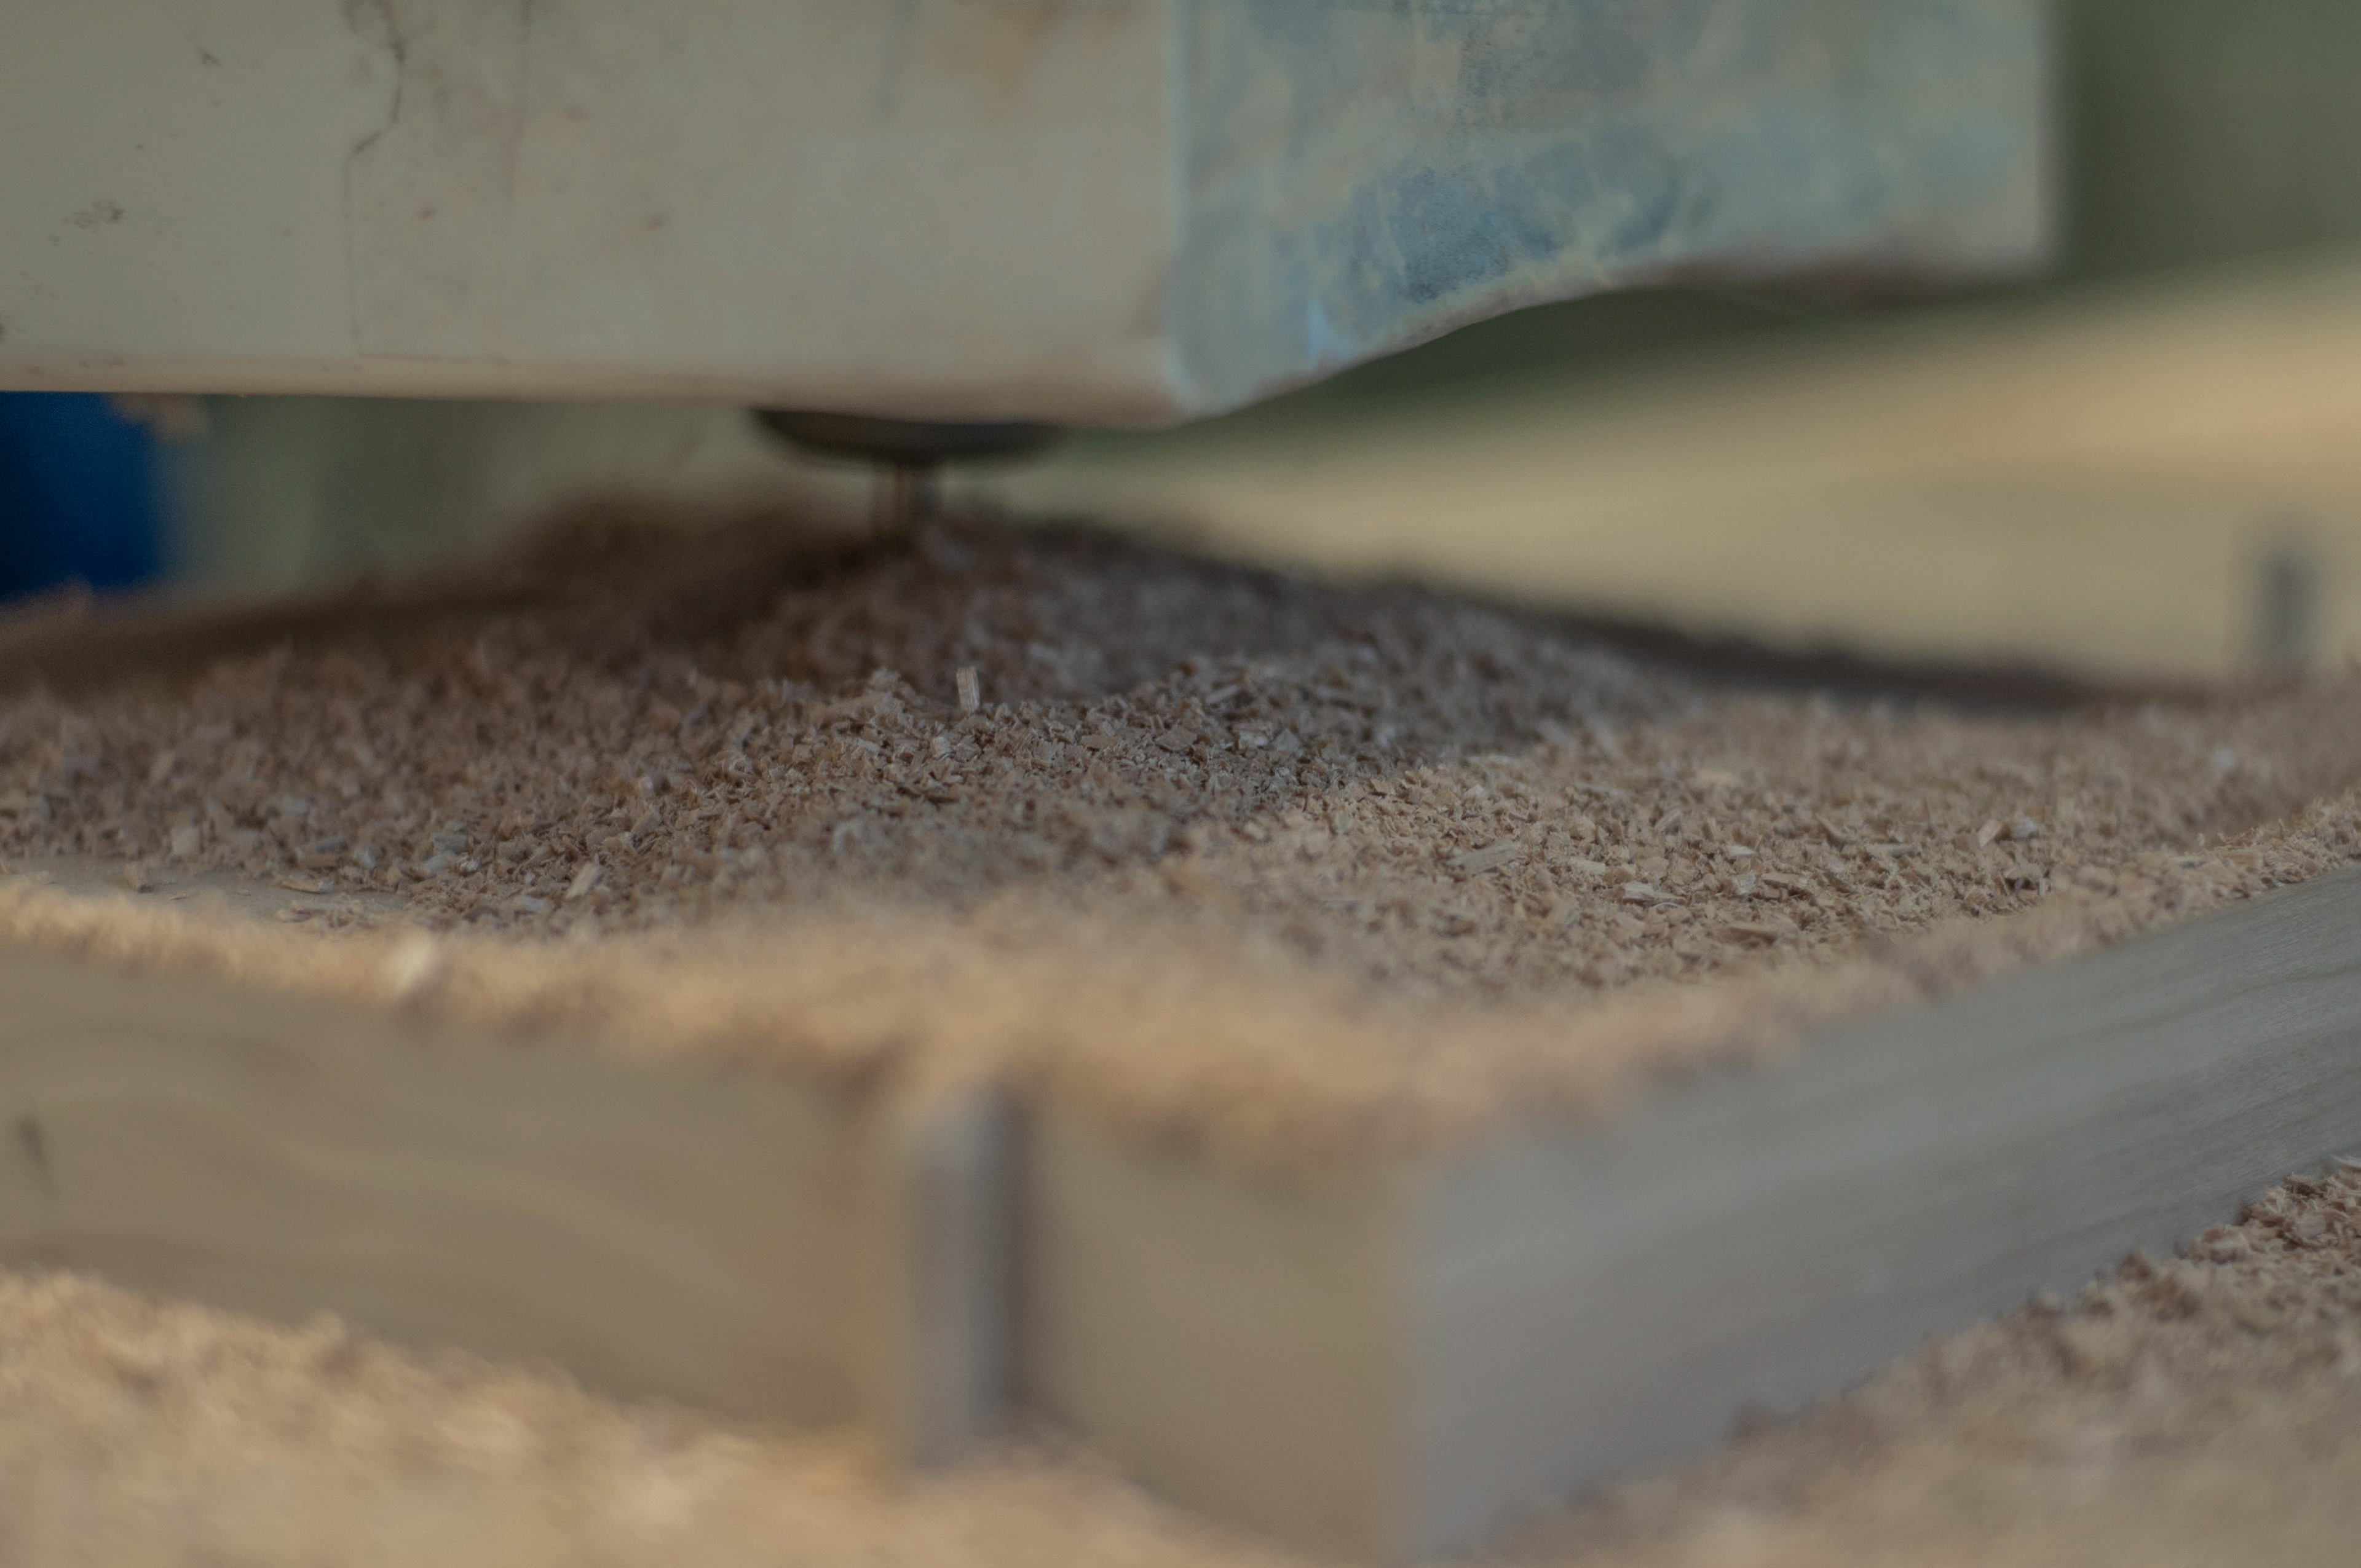
The next step was now, to get this beautiful looking and well smelling piece of wood thinner.
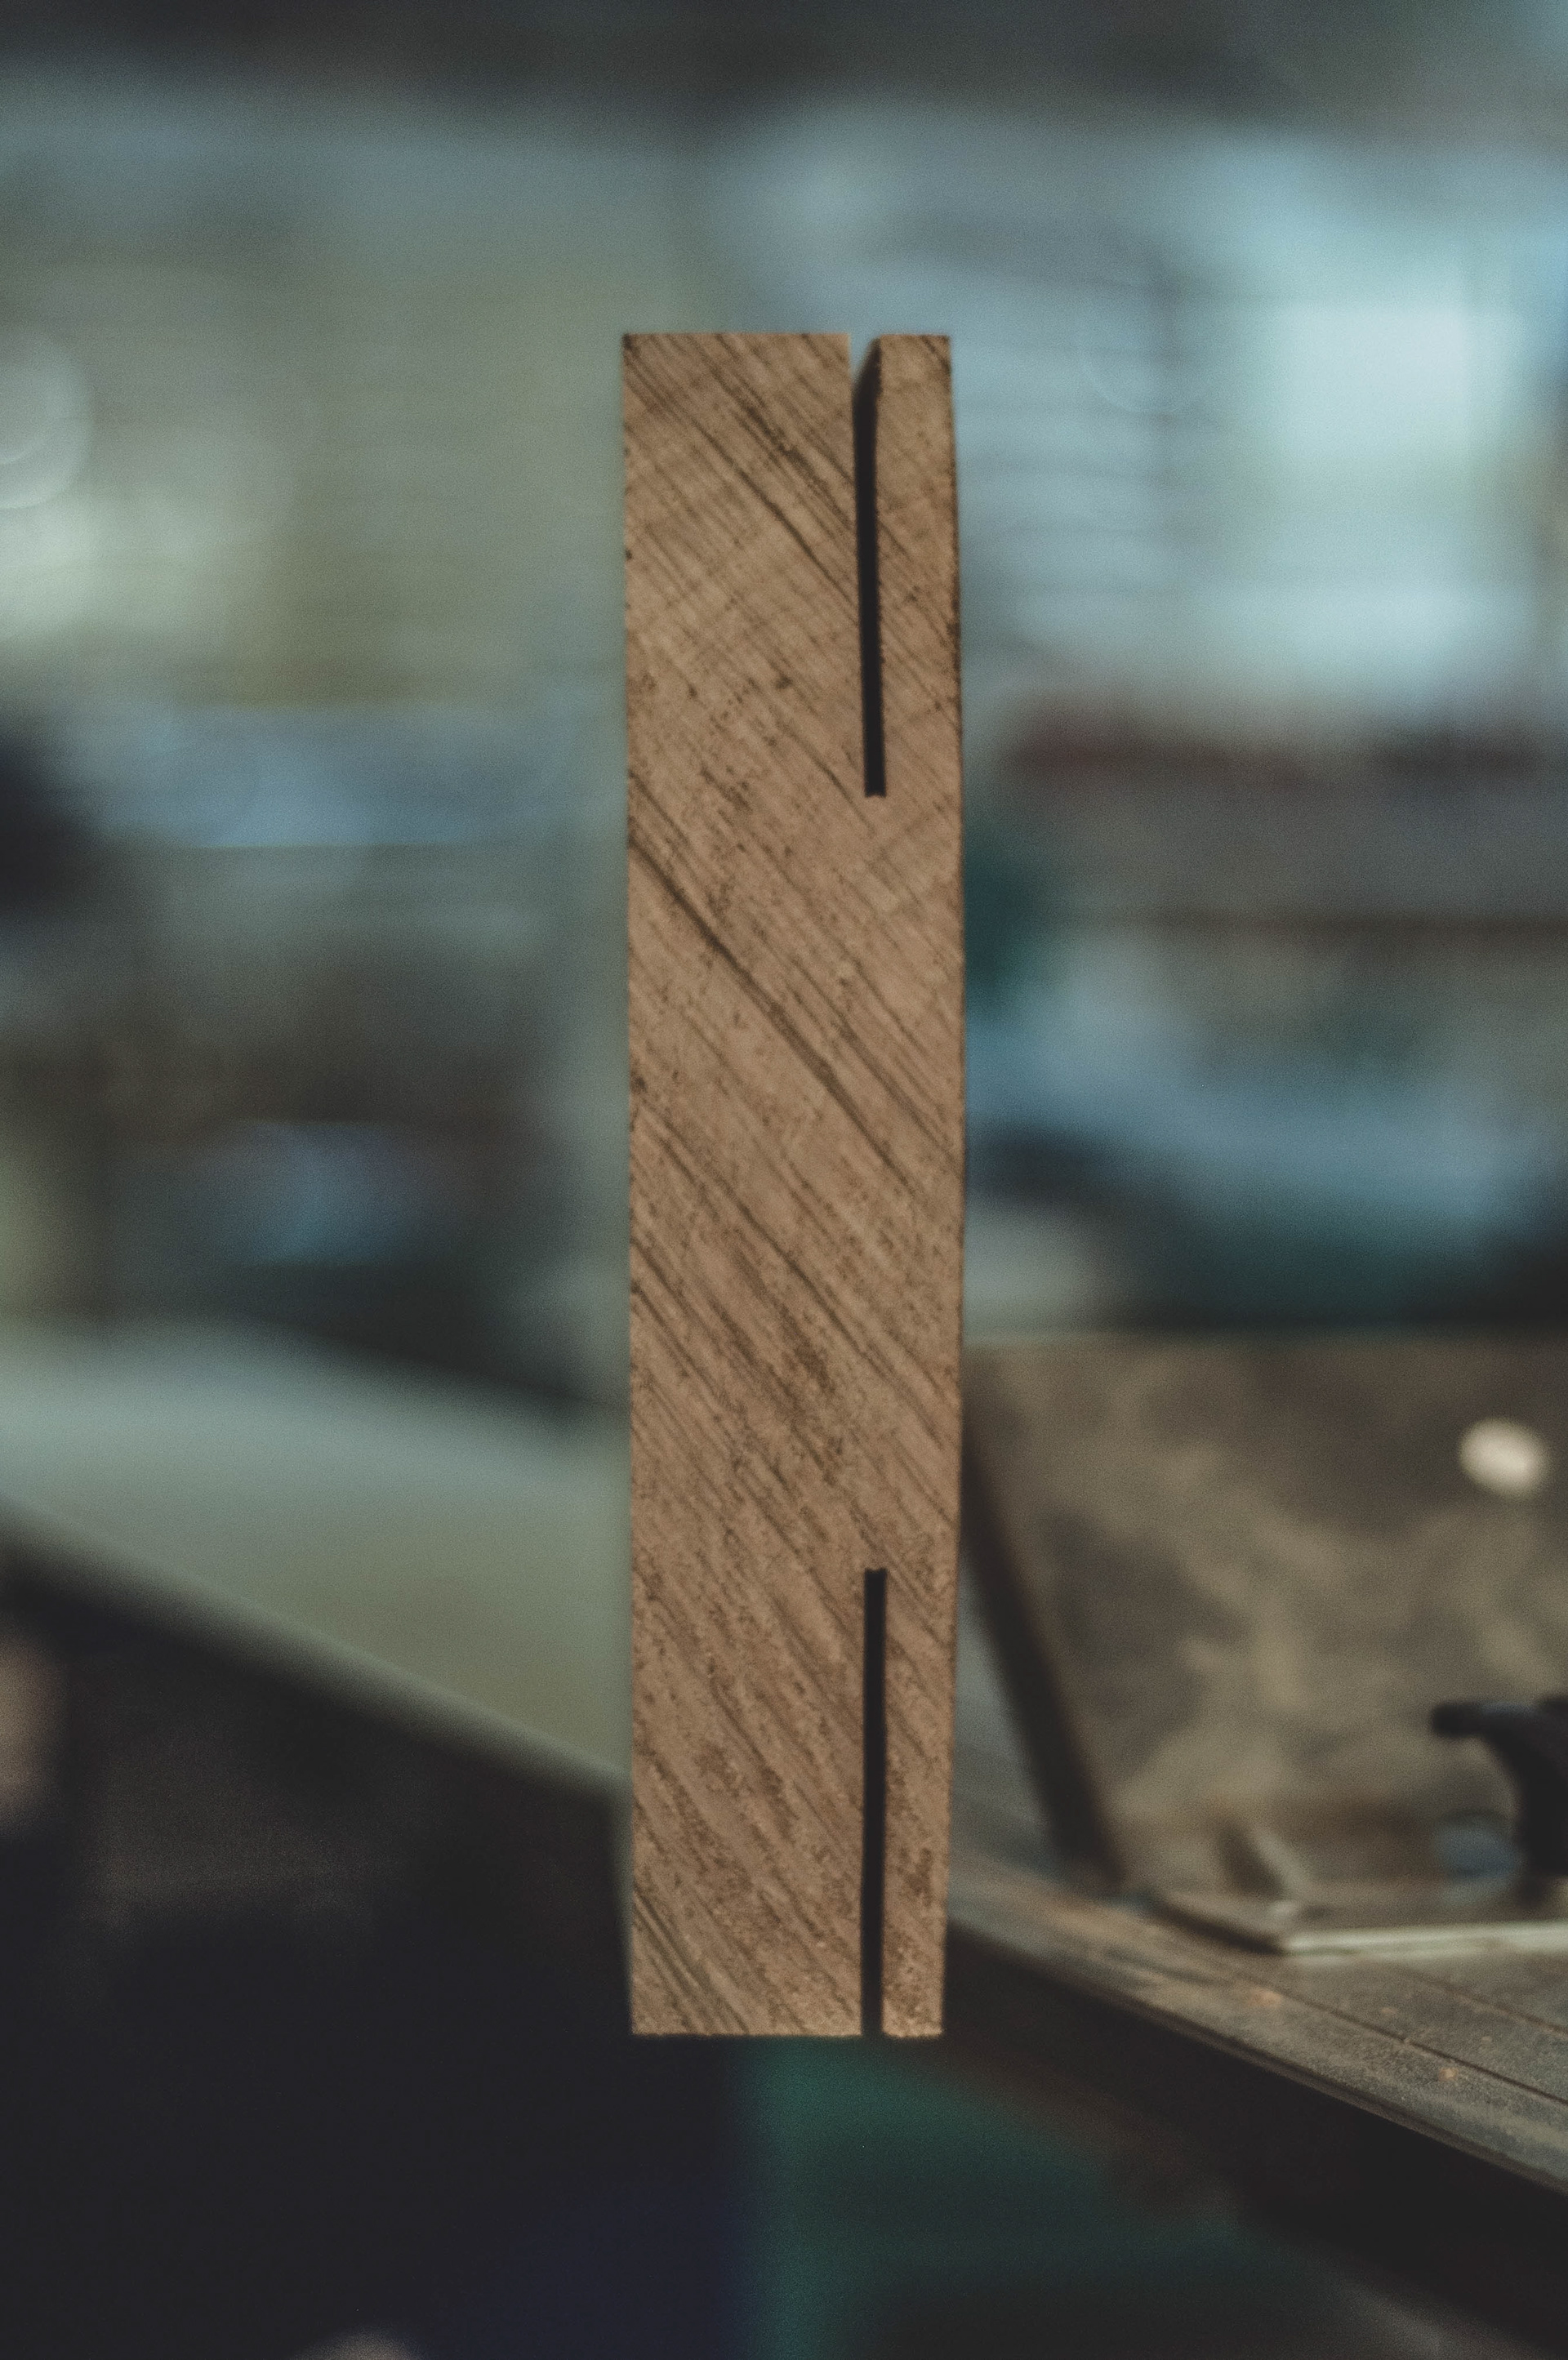
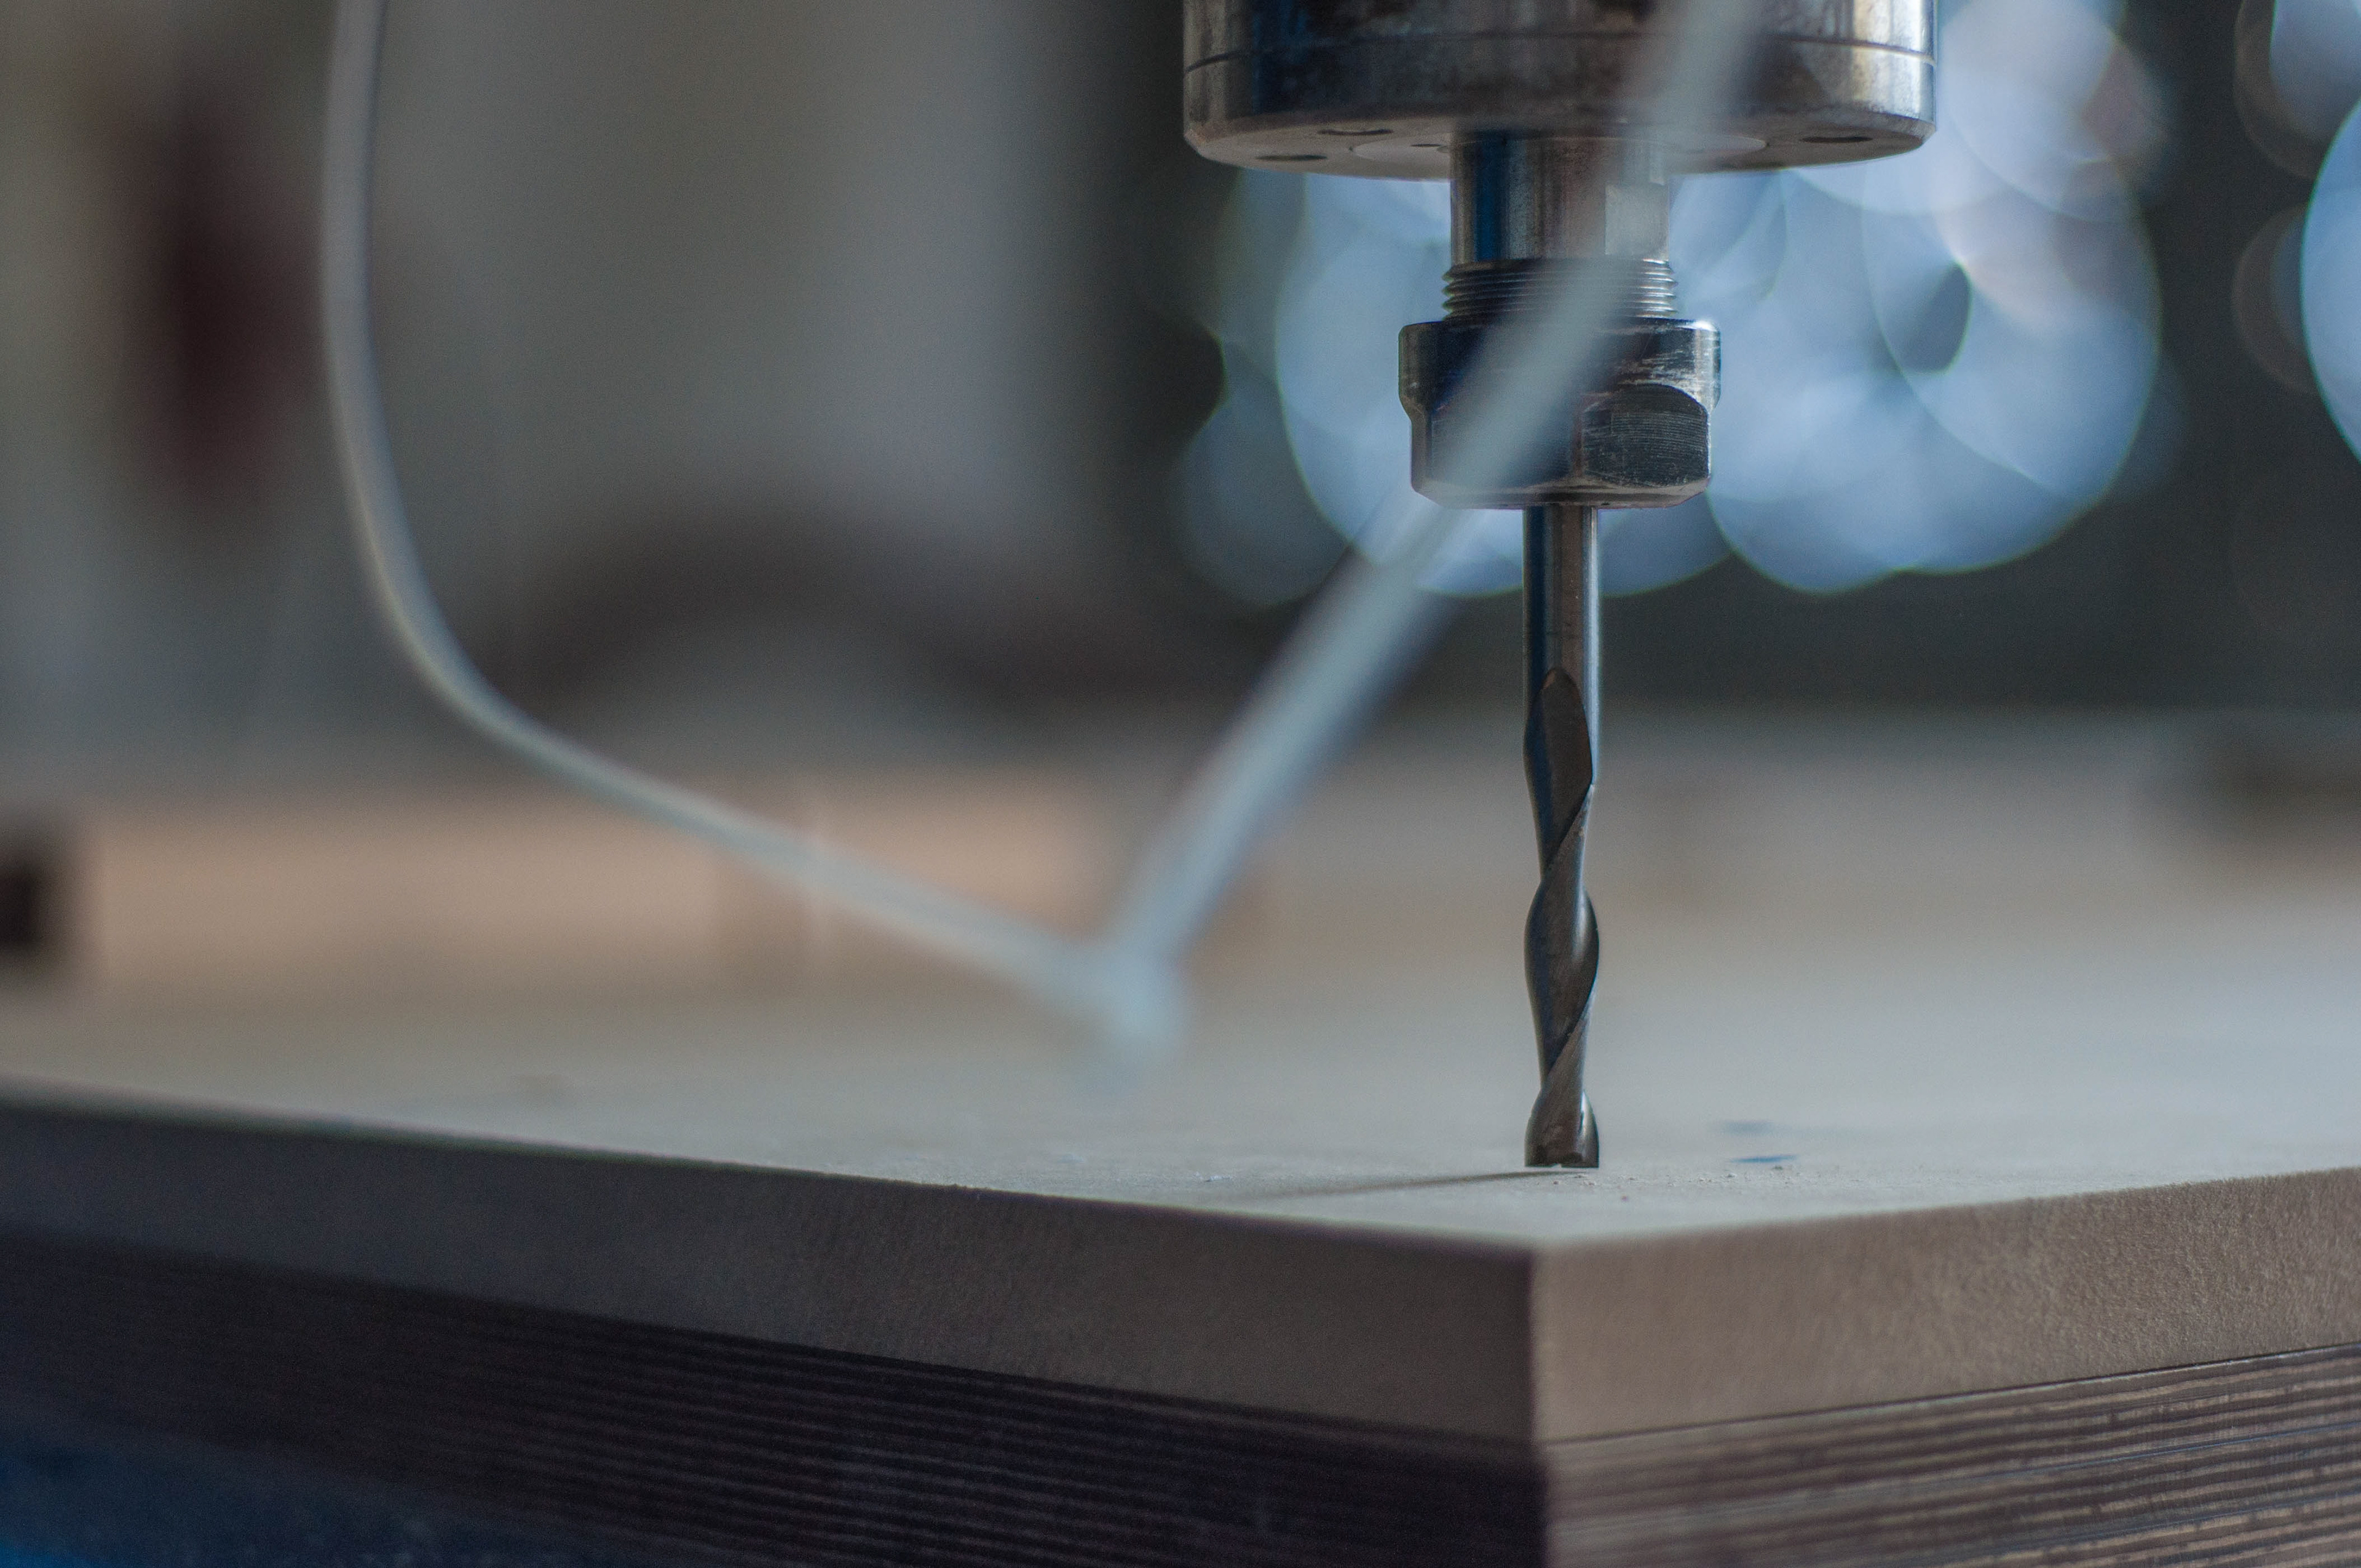
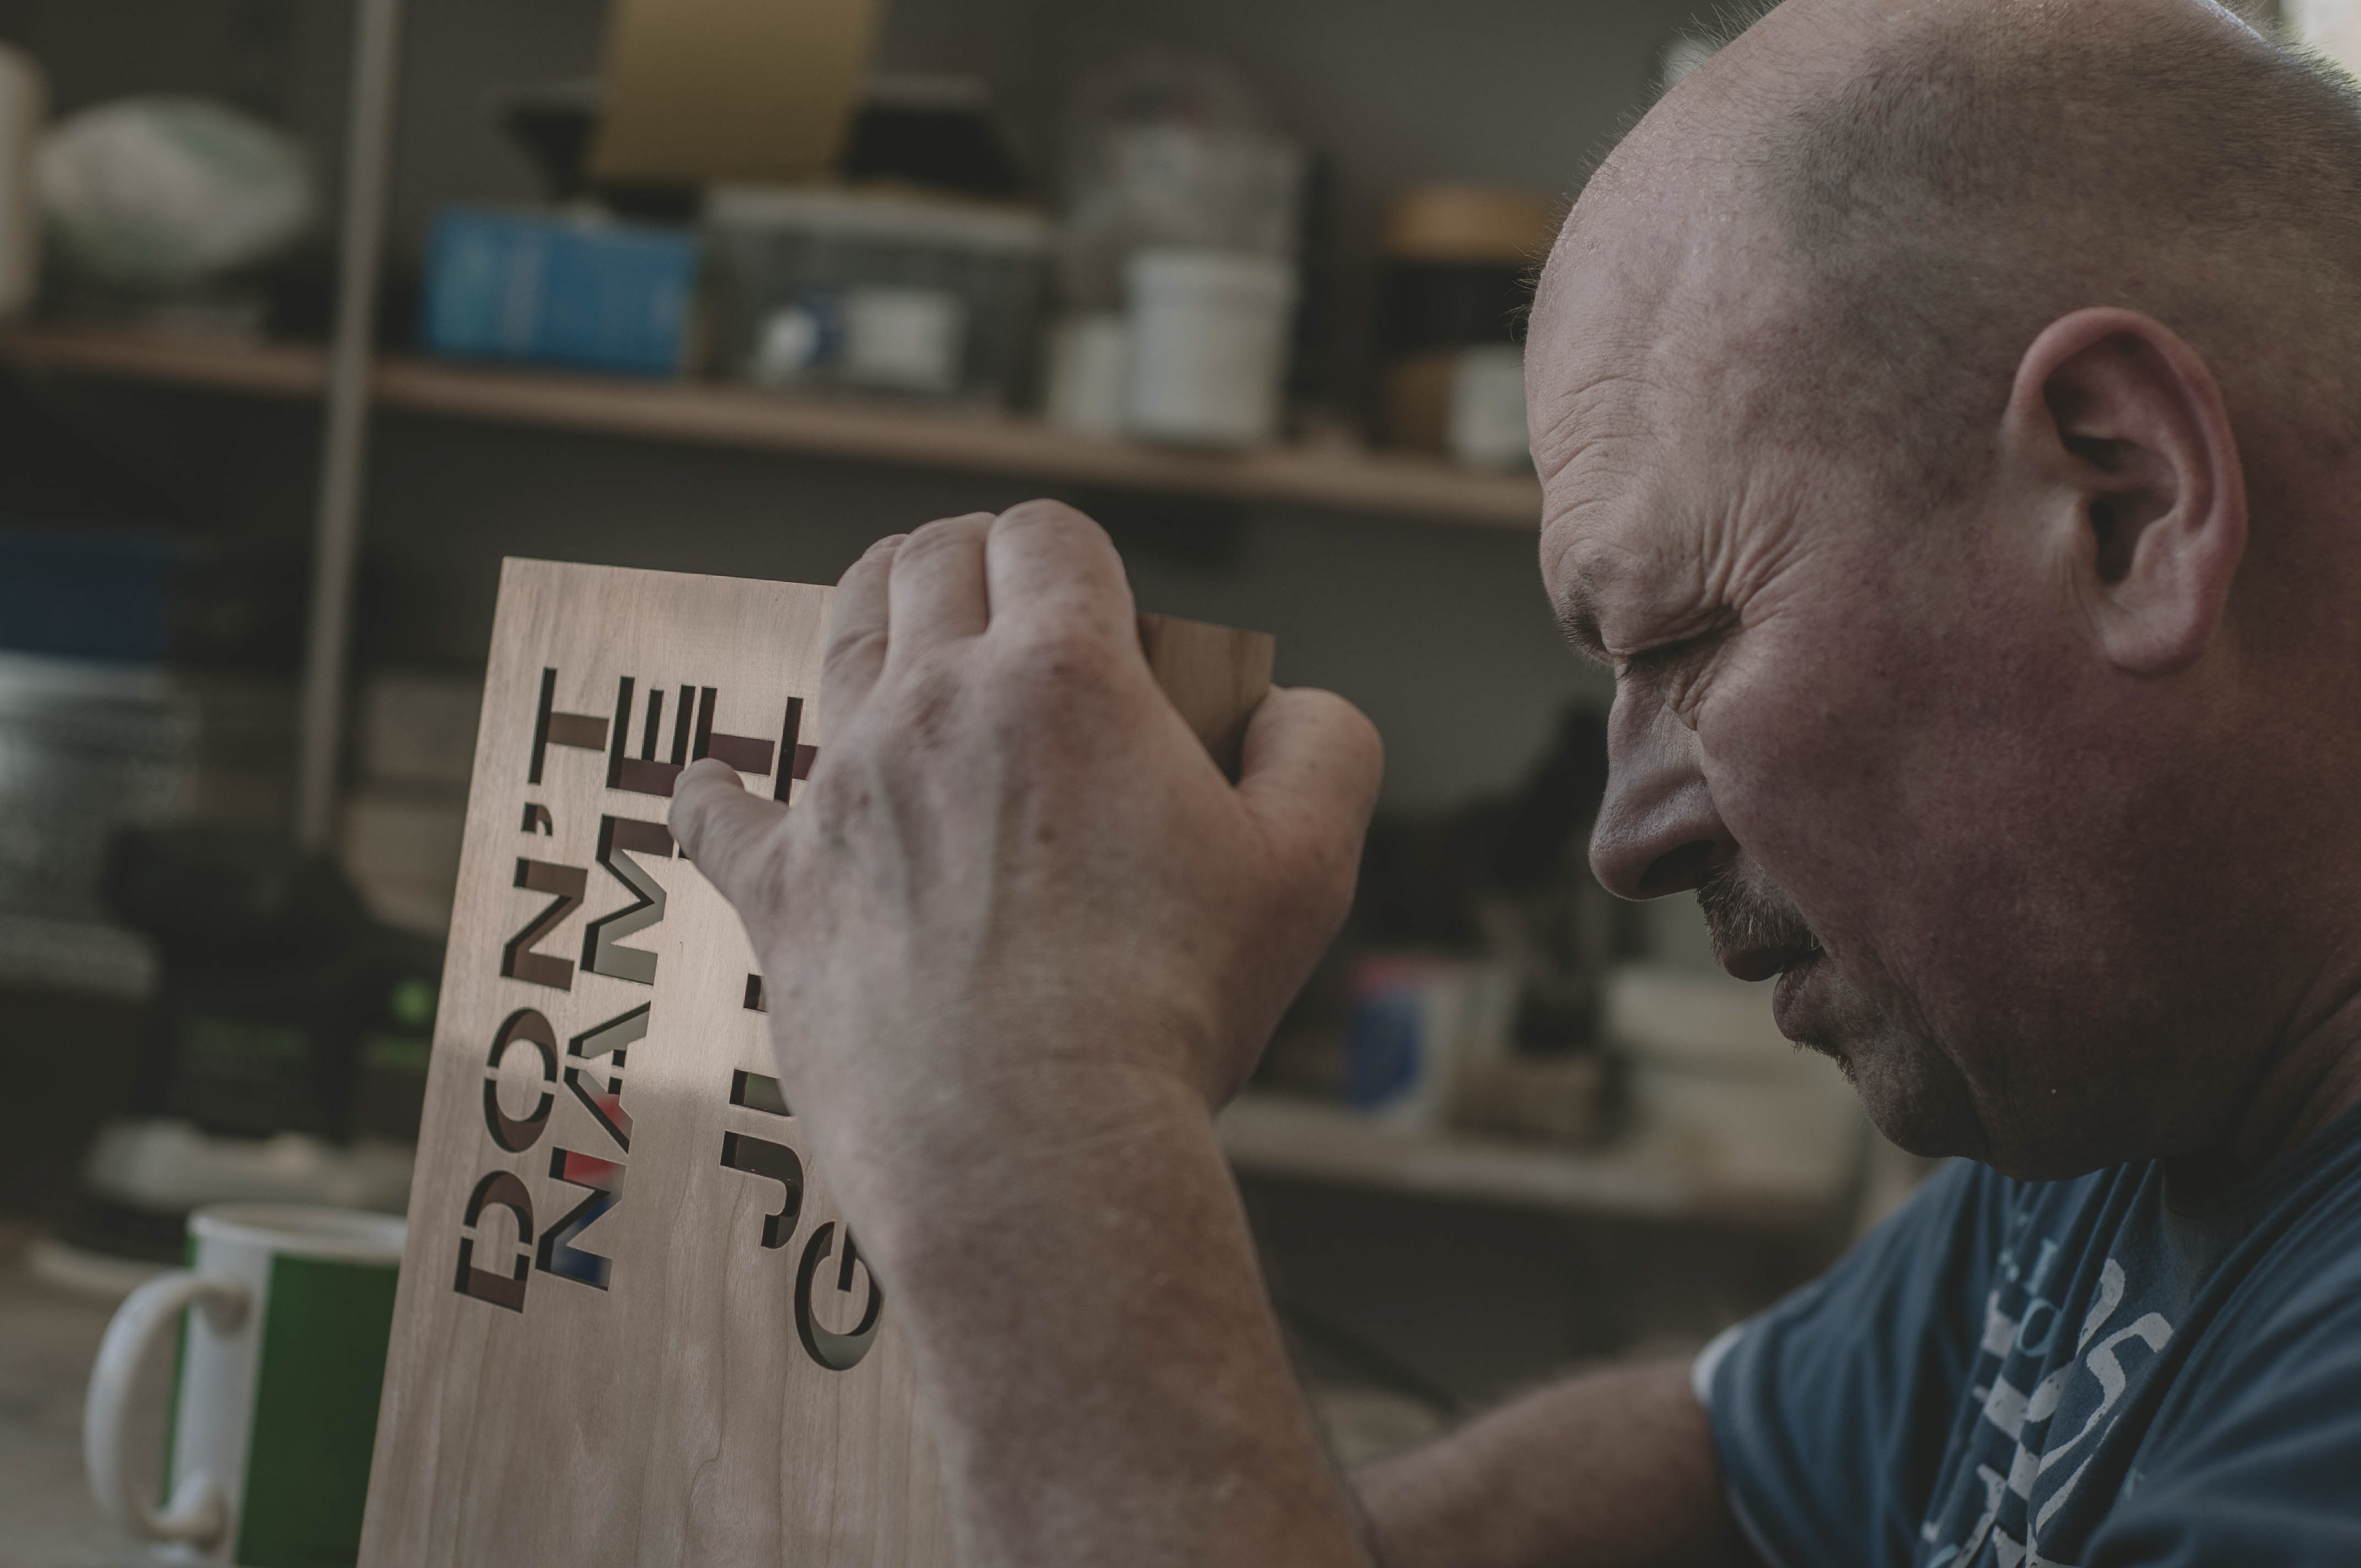
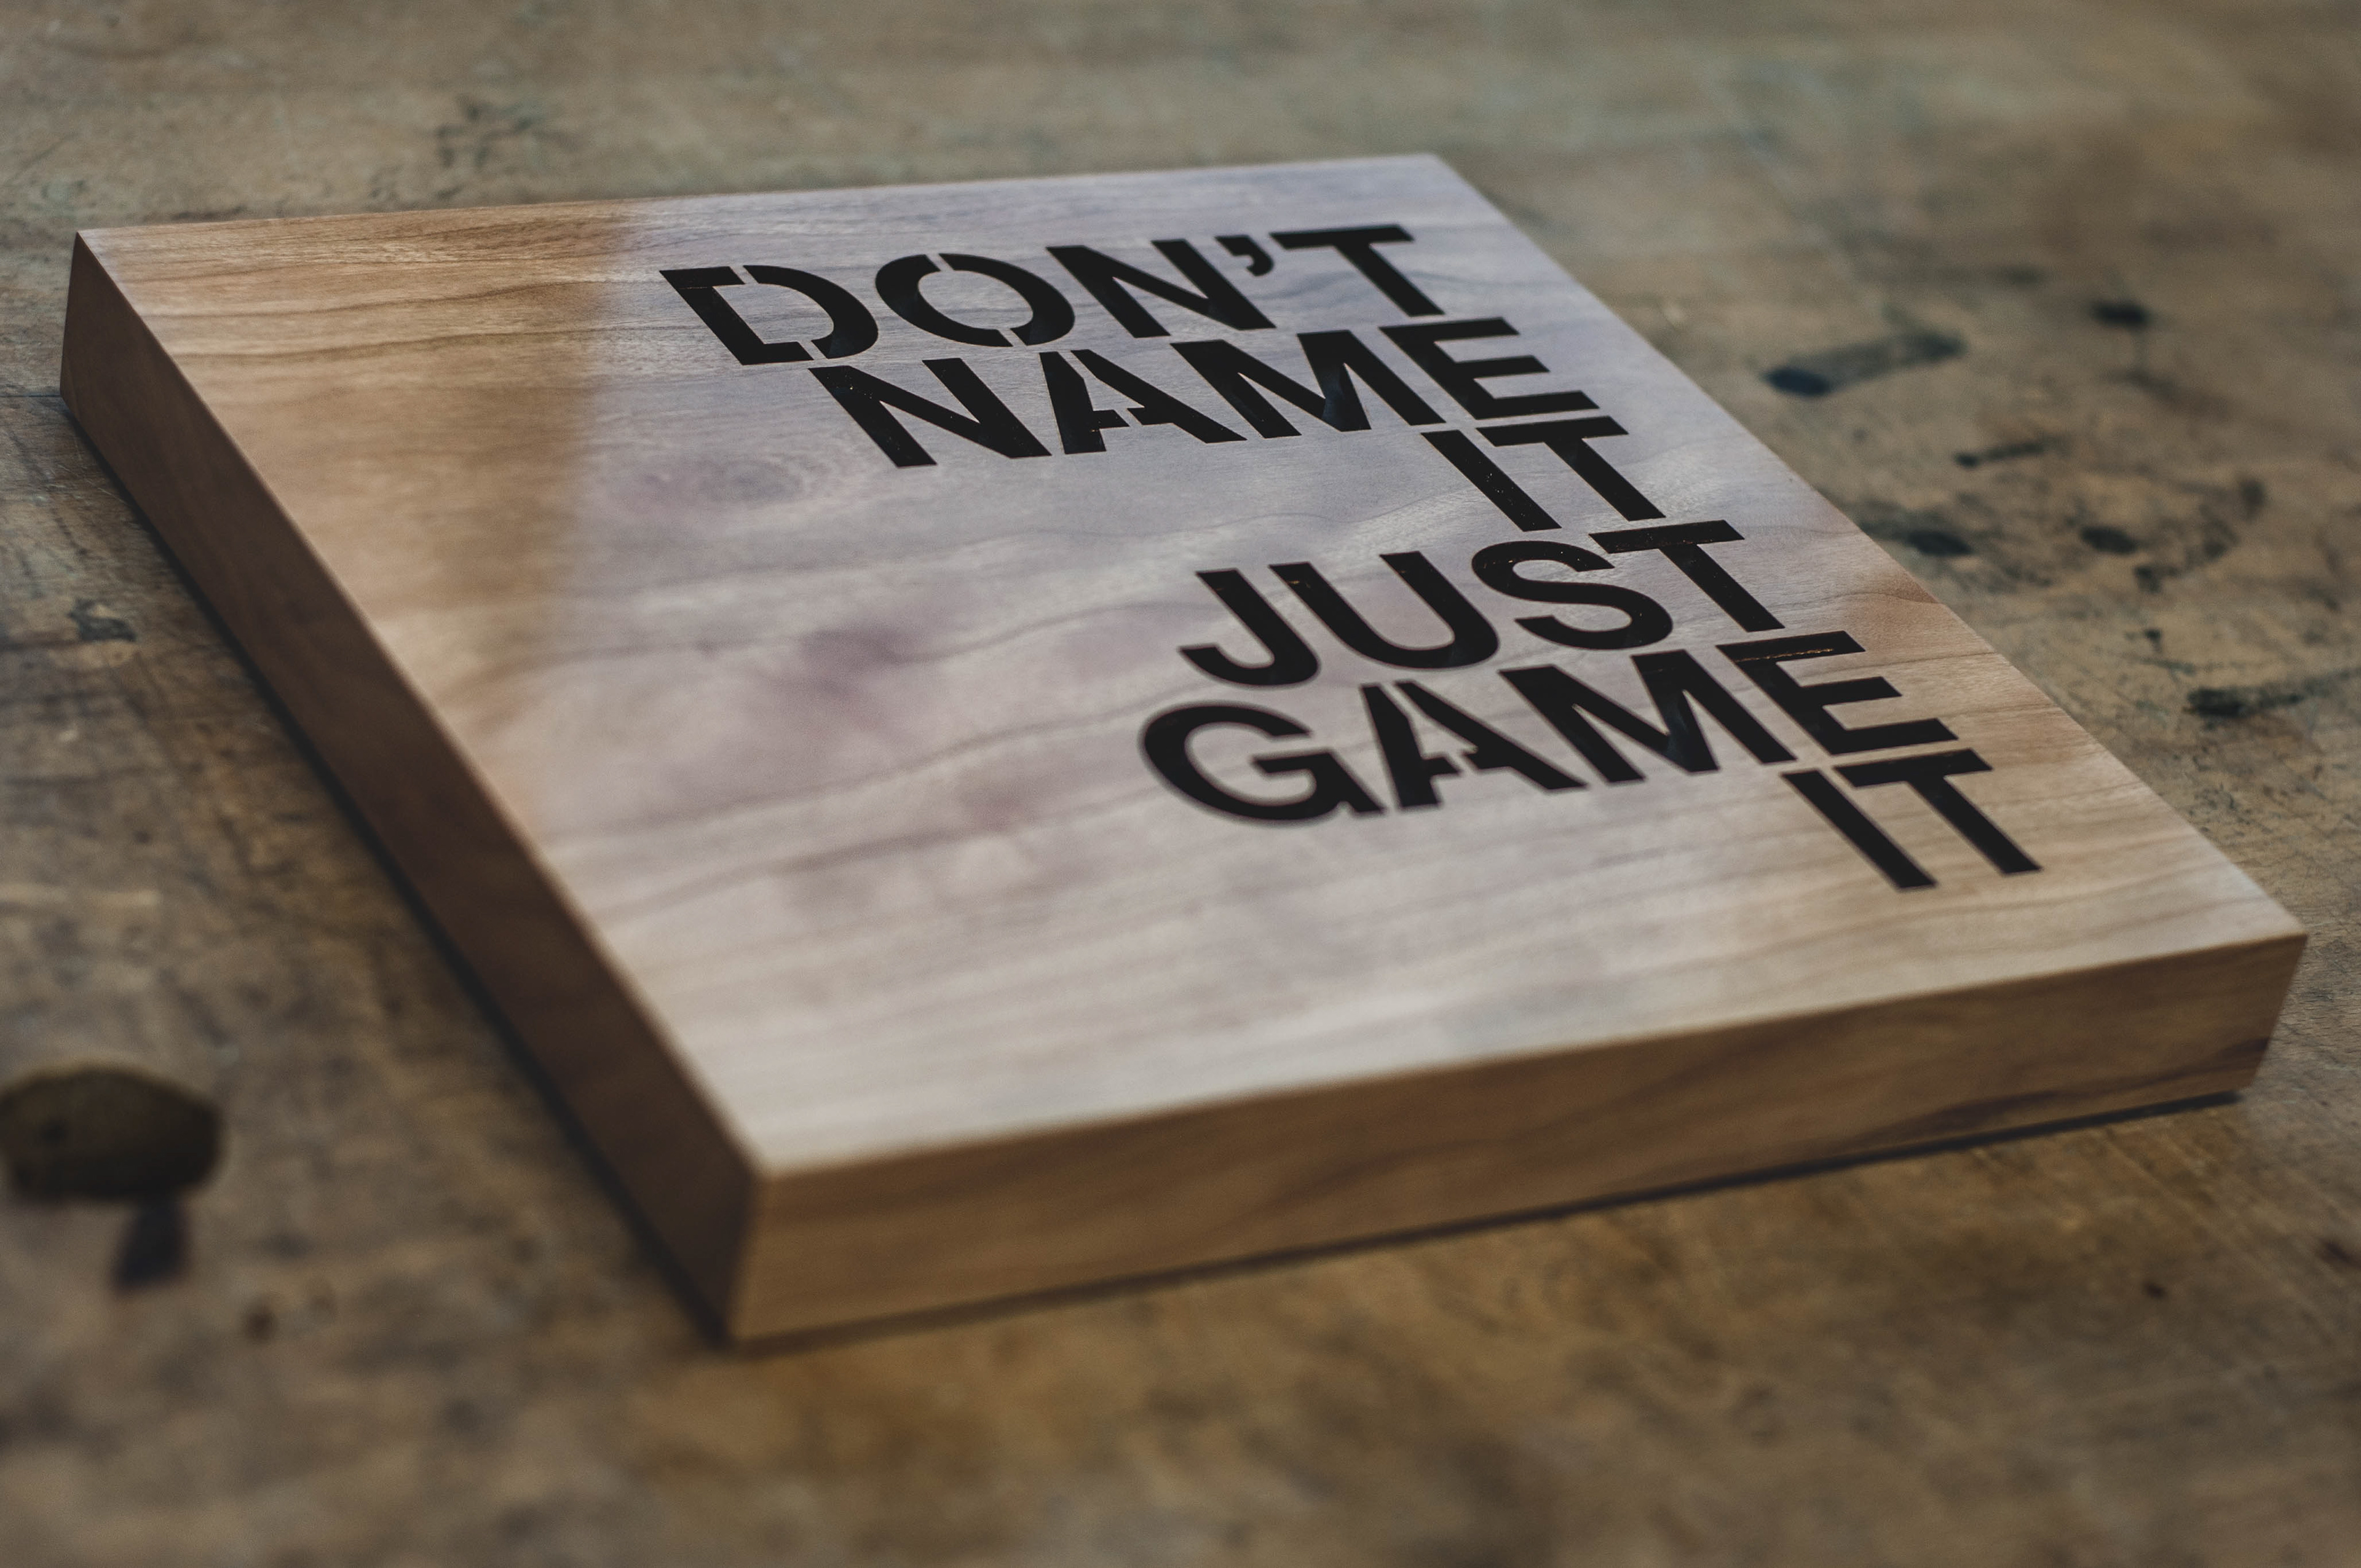
How would I be able to cut the lettering through? It was time to mold the wood, piece by piece. This part was quite crucial, as by myself I never used a CNC-molding machine and only had two trials in which things could go wrong… to hopefully get it right in the third attempt.
However, I calculated building one dummy in any way…


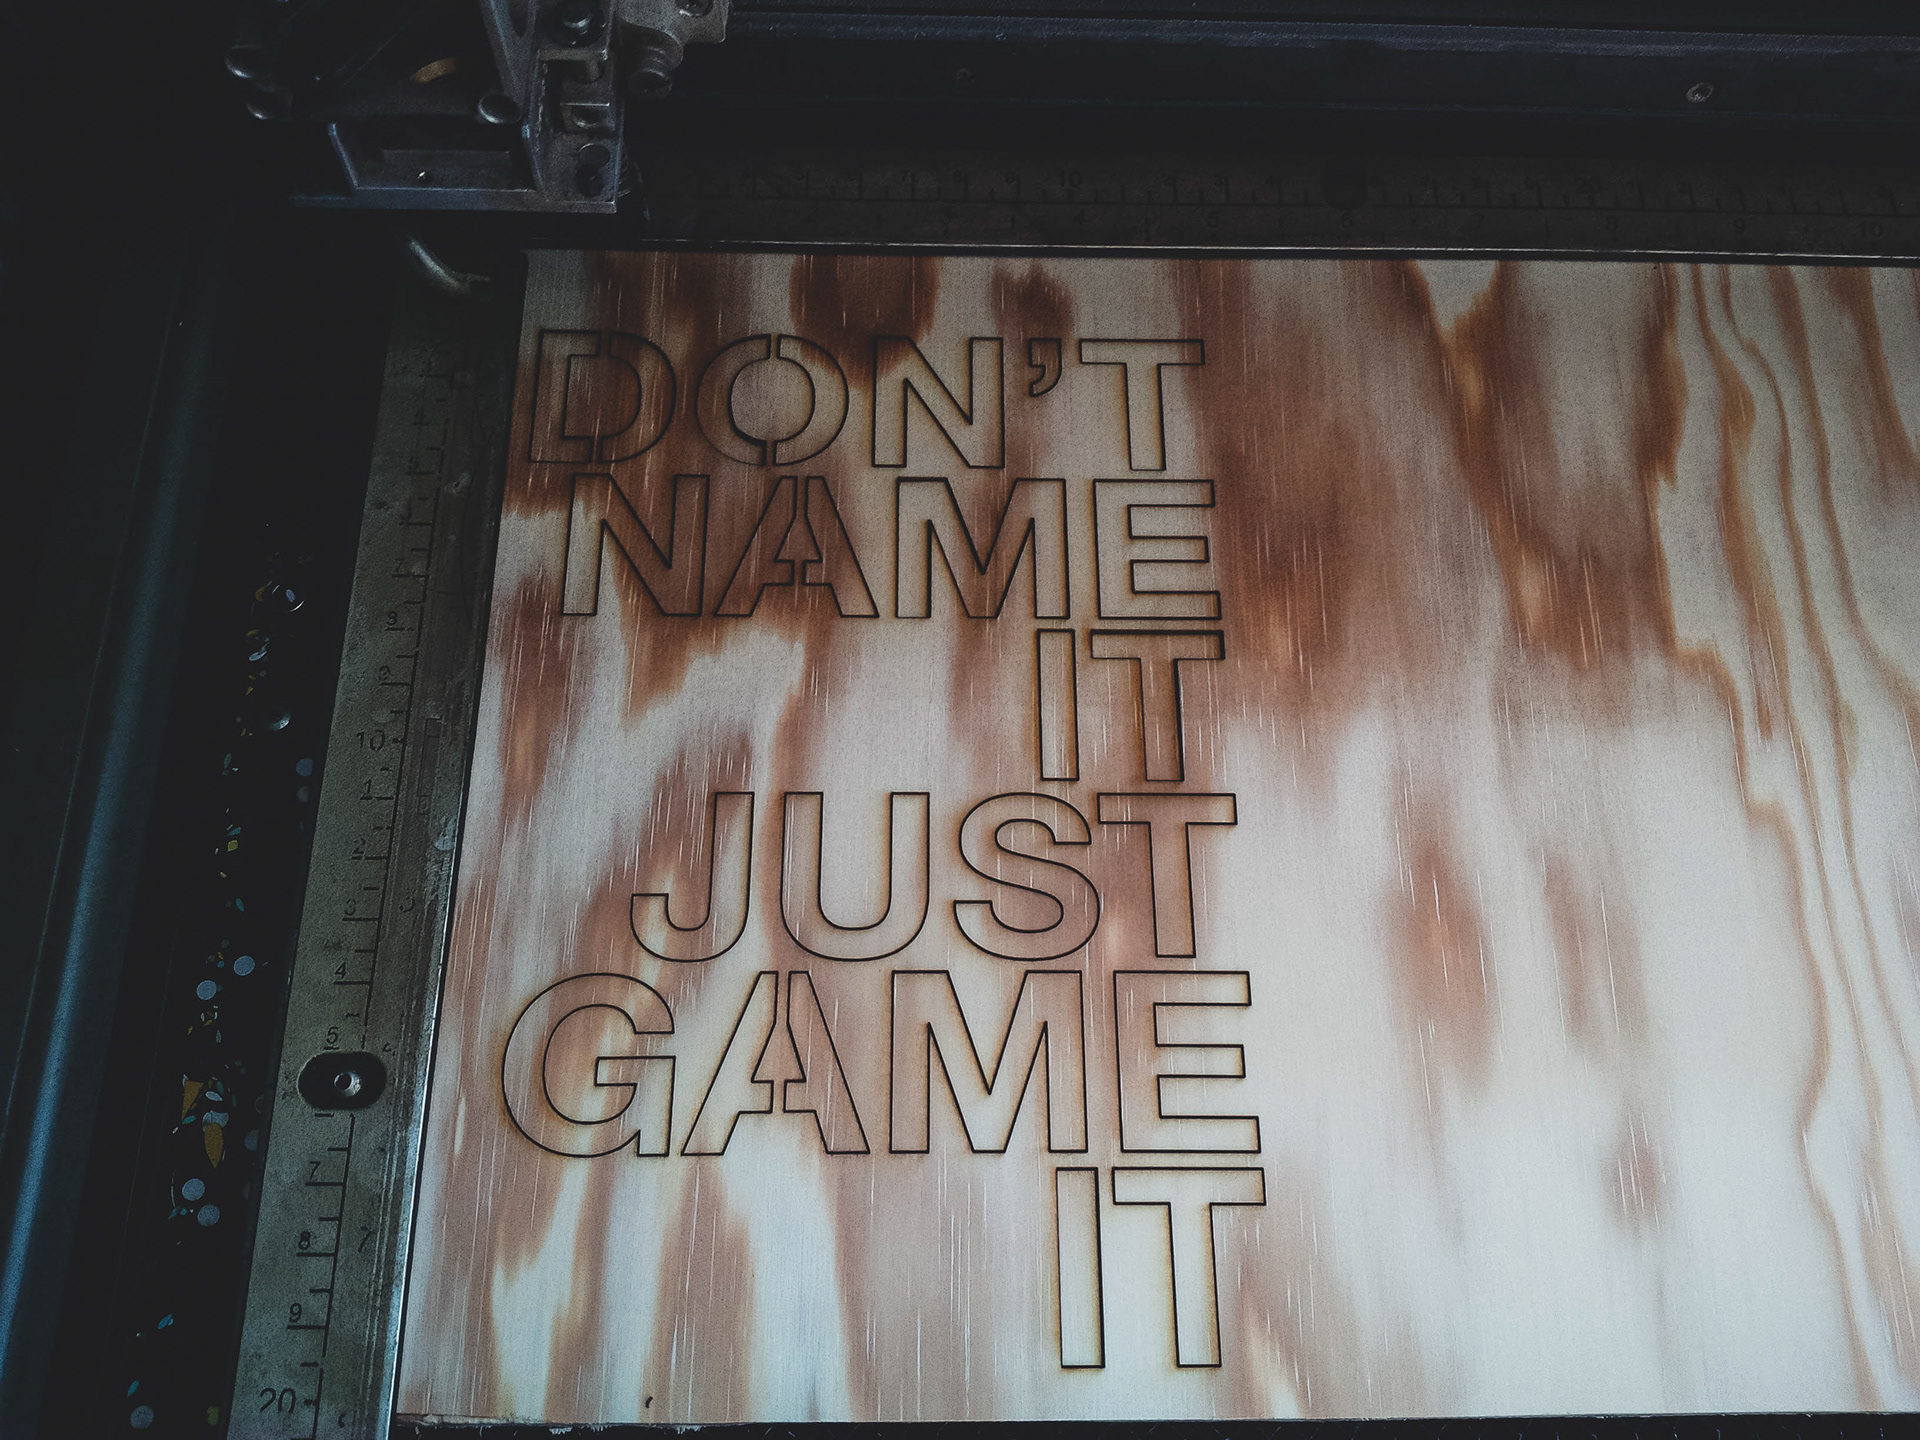
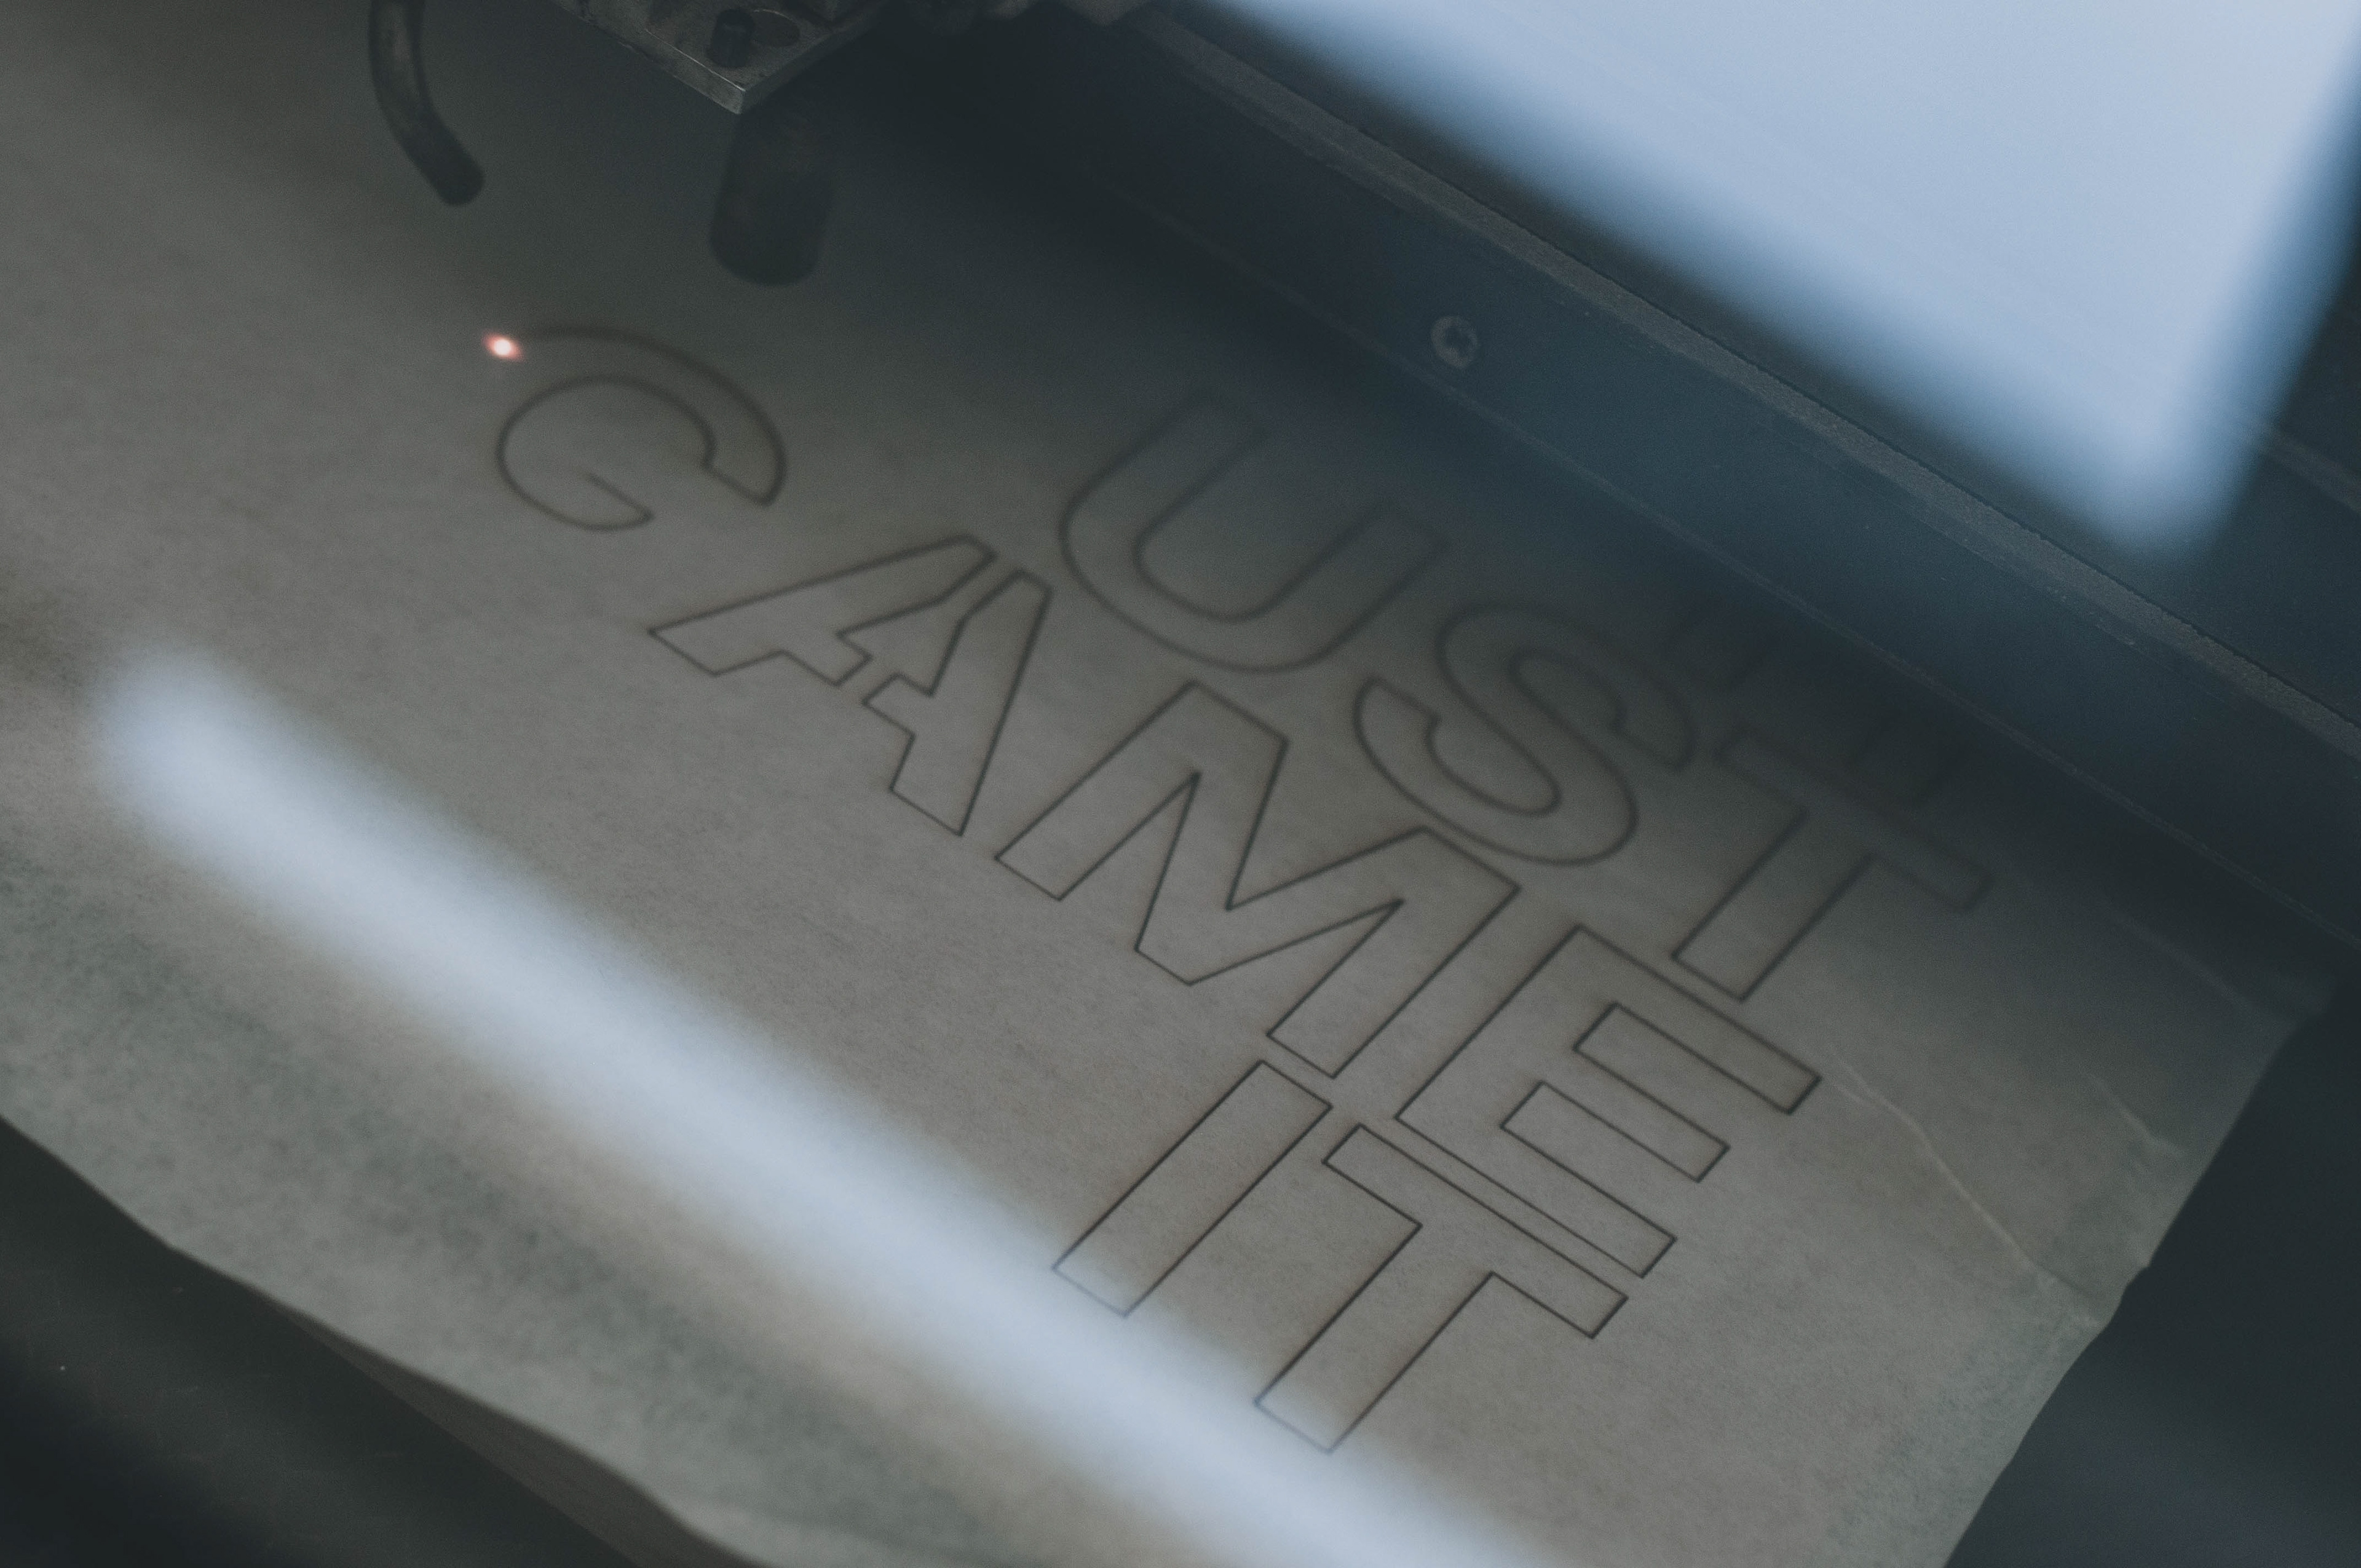
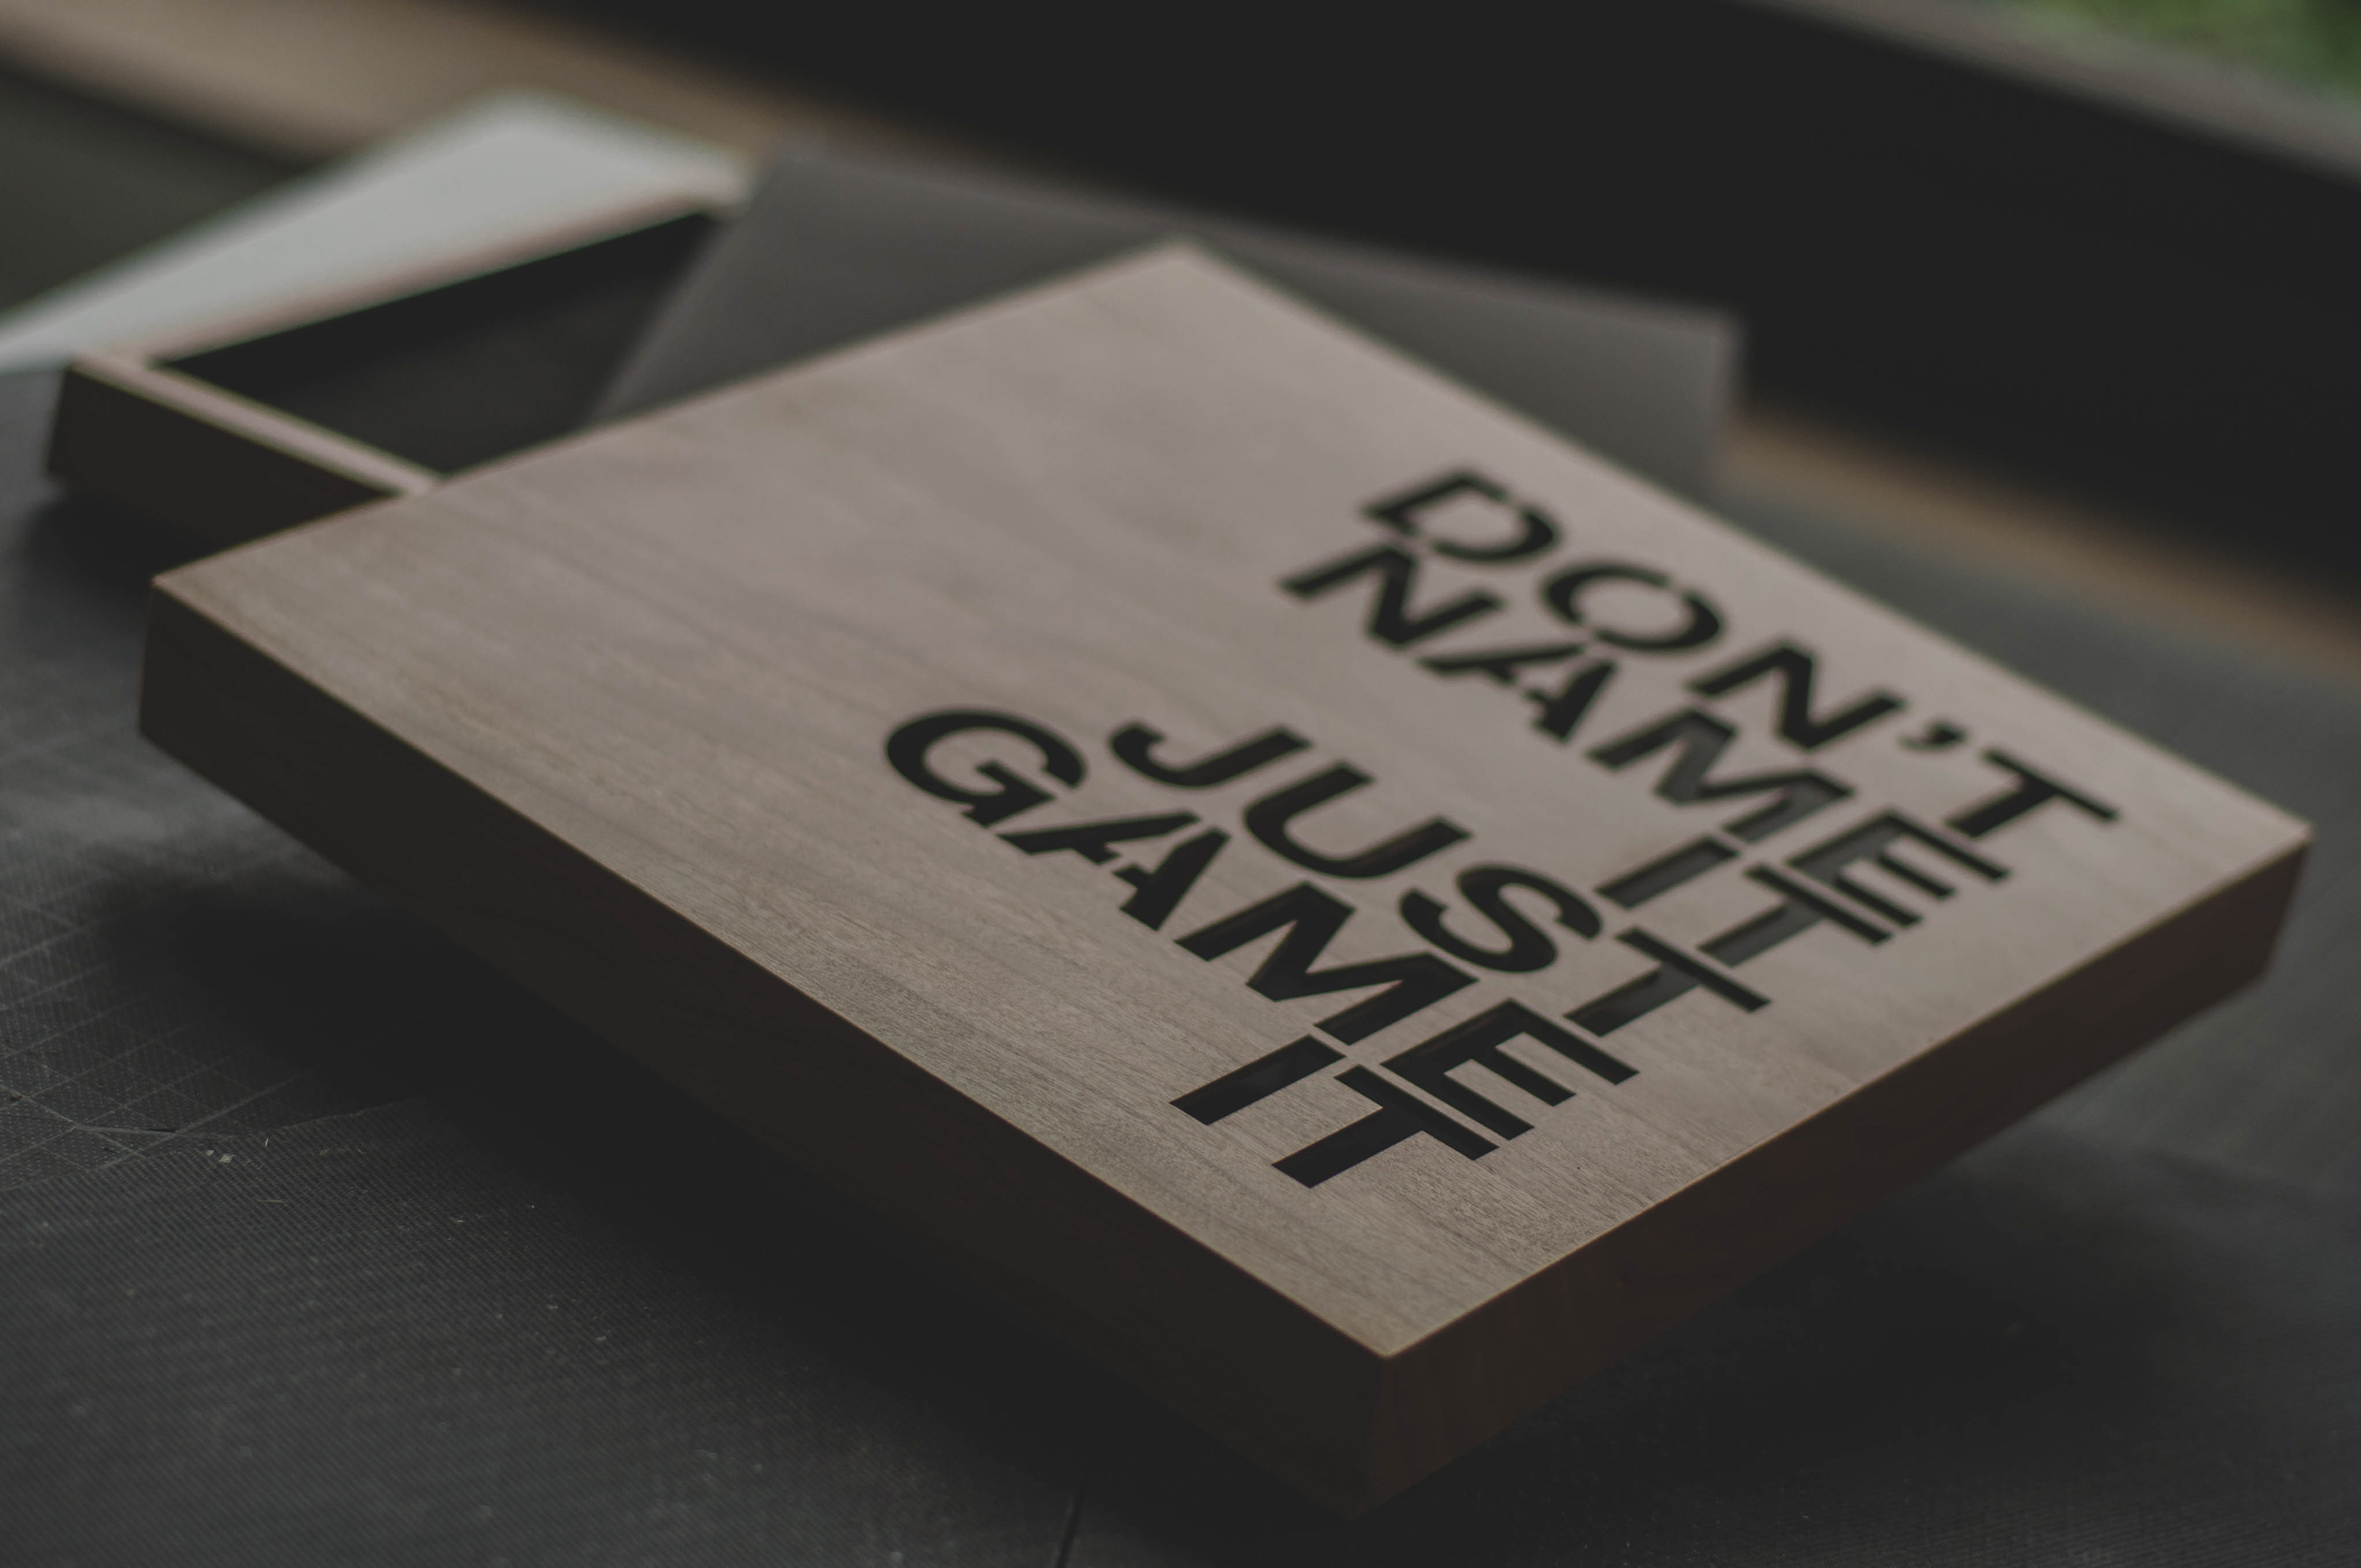
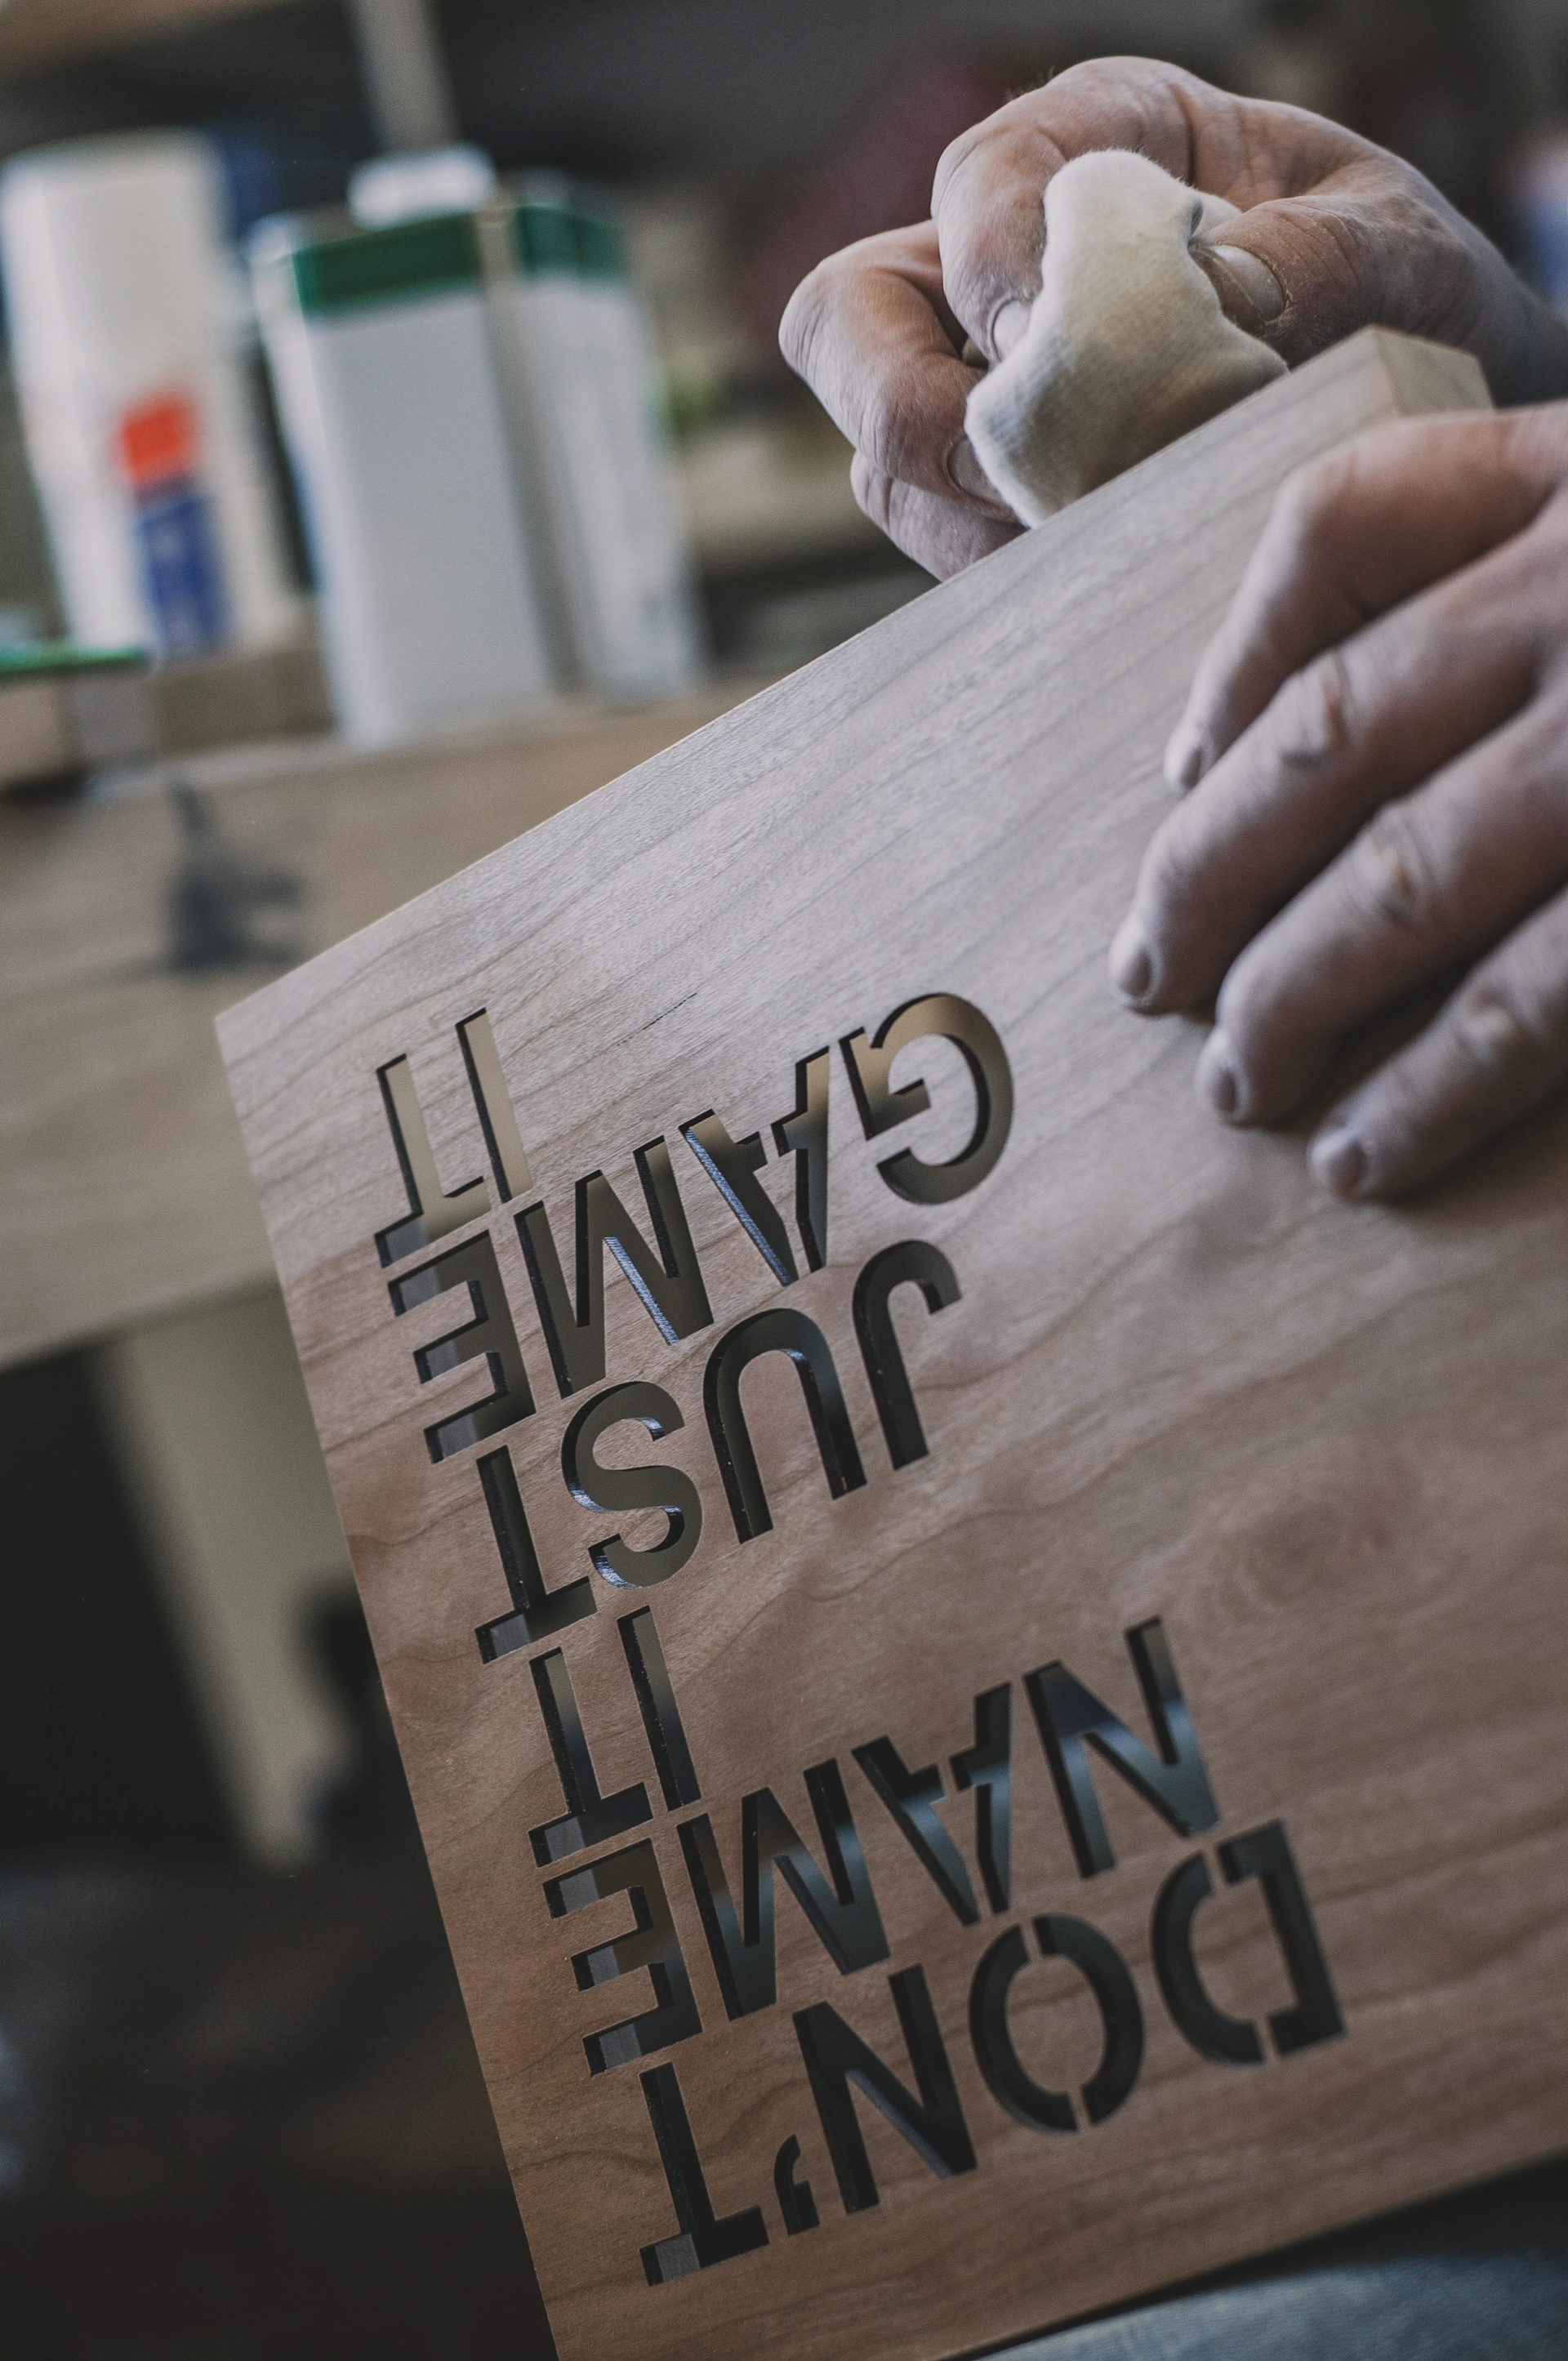
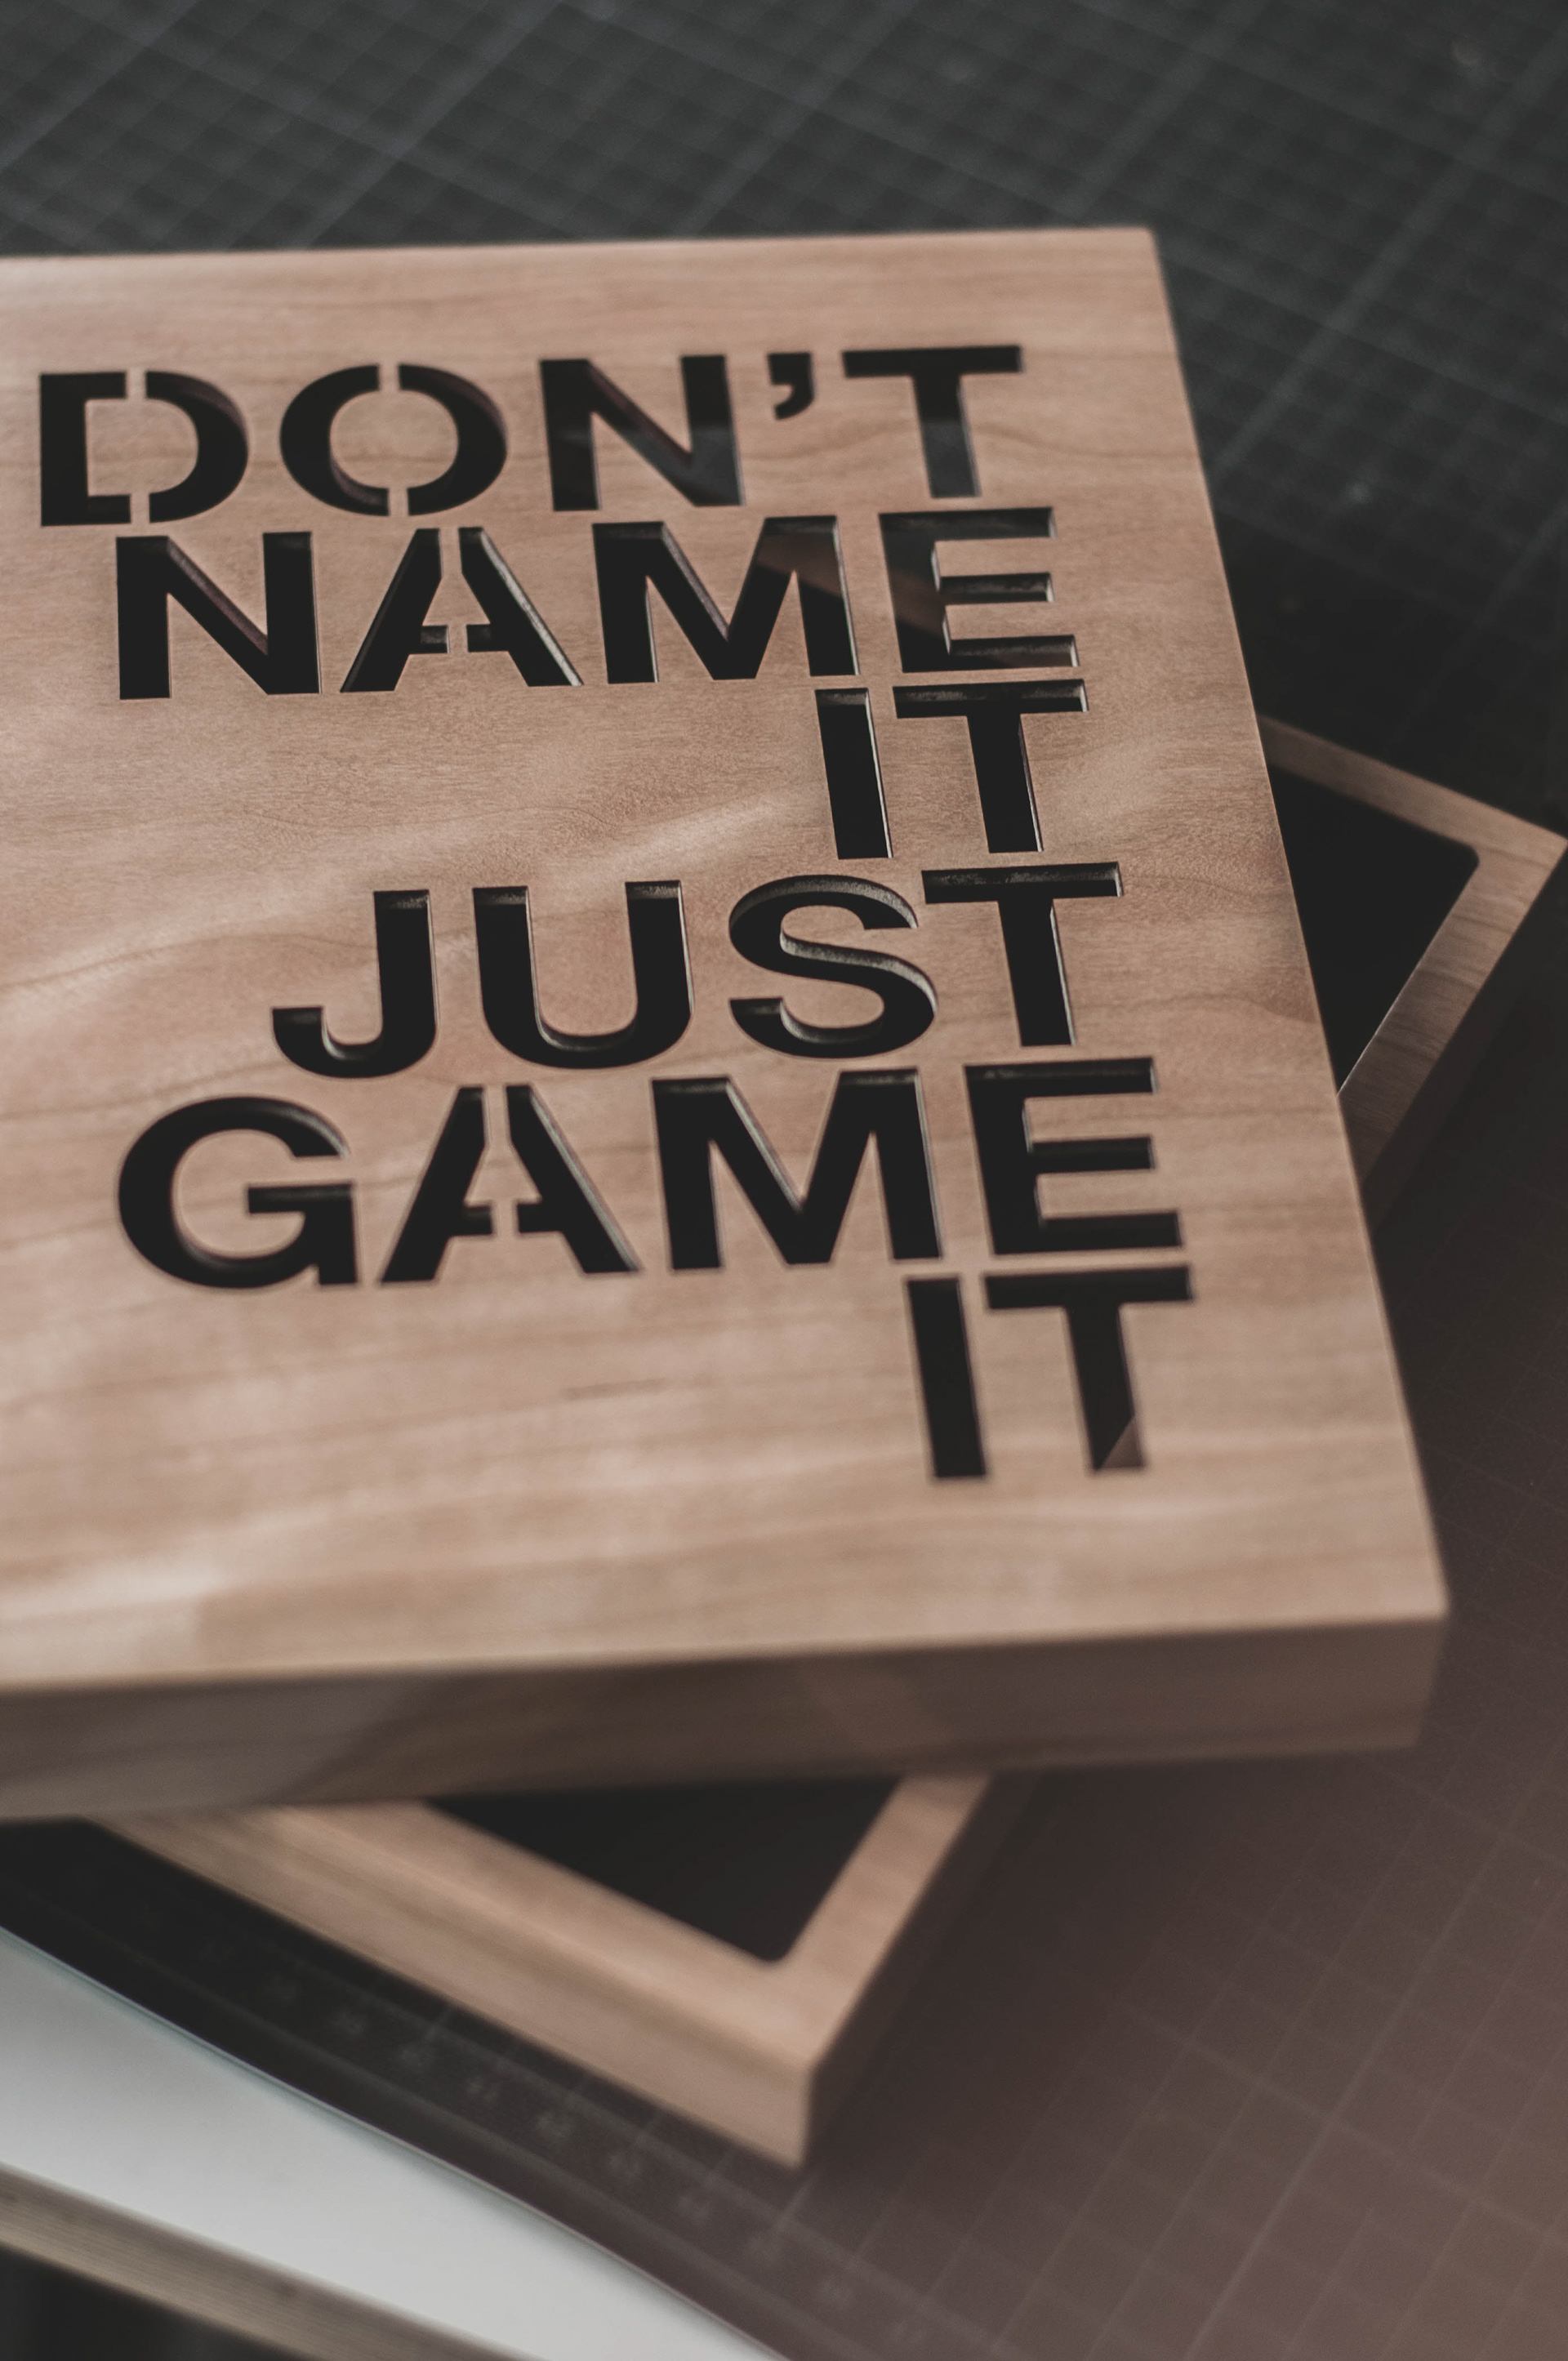
LASER IN DEPTH
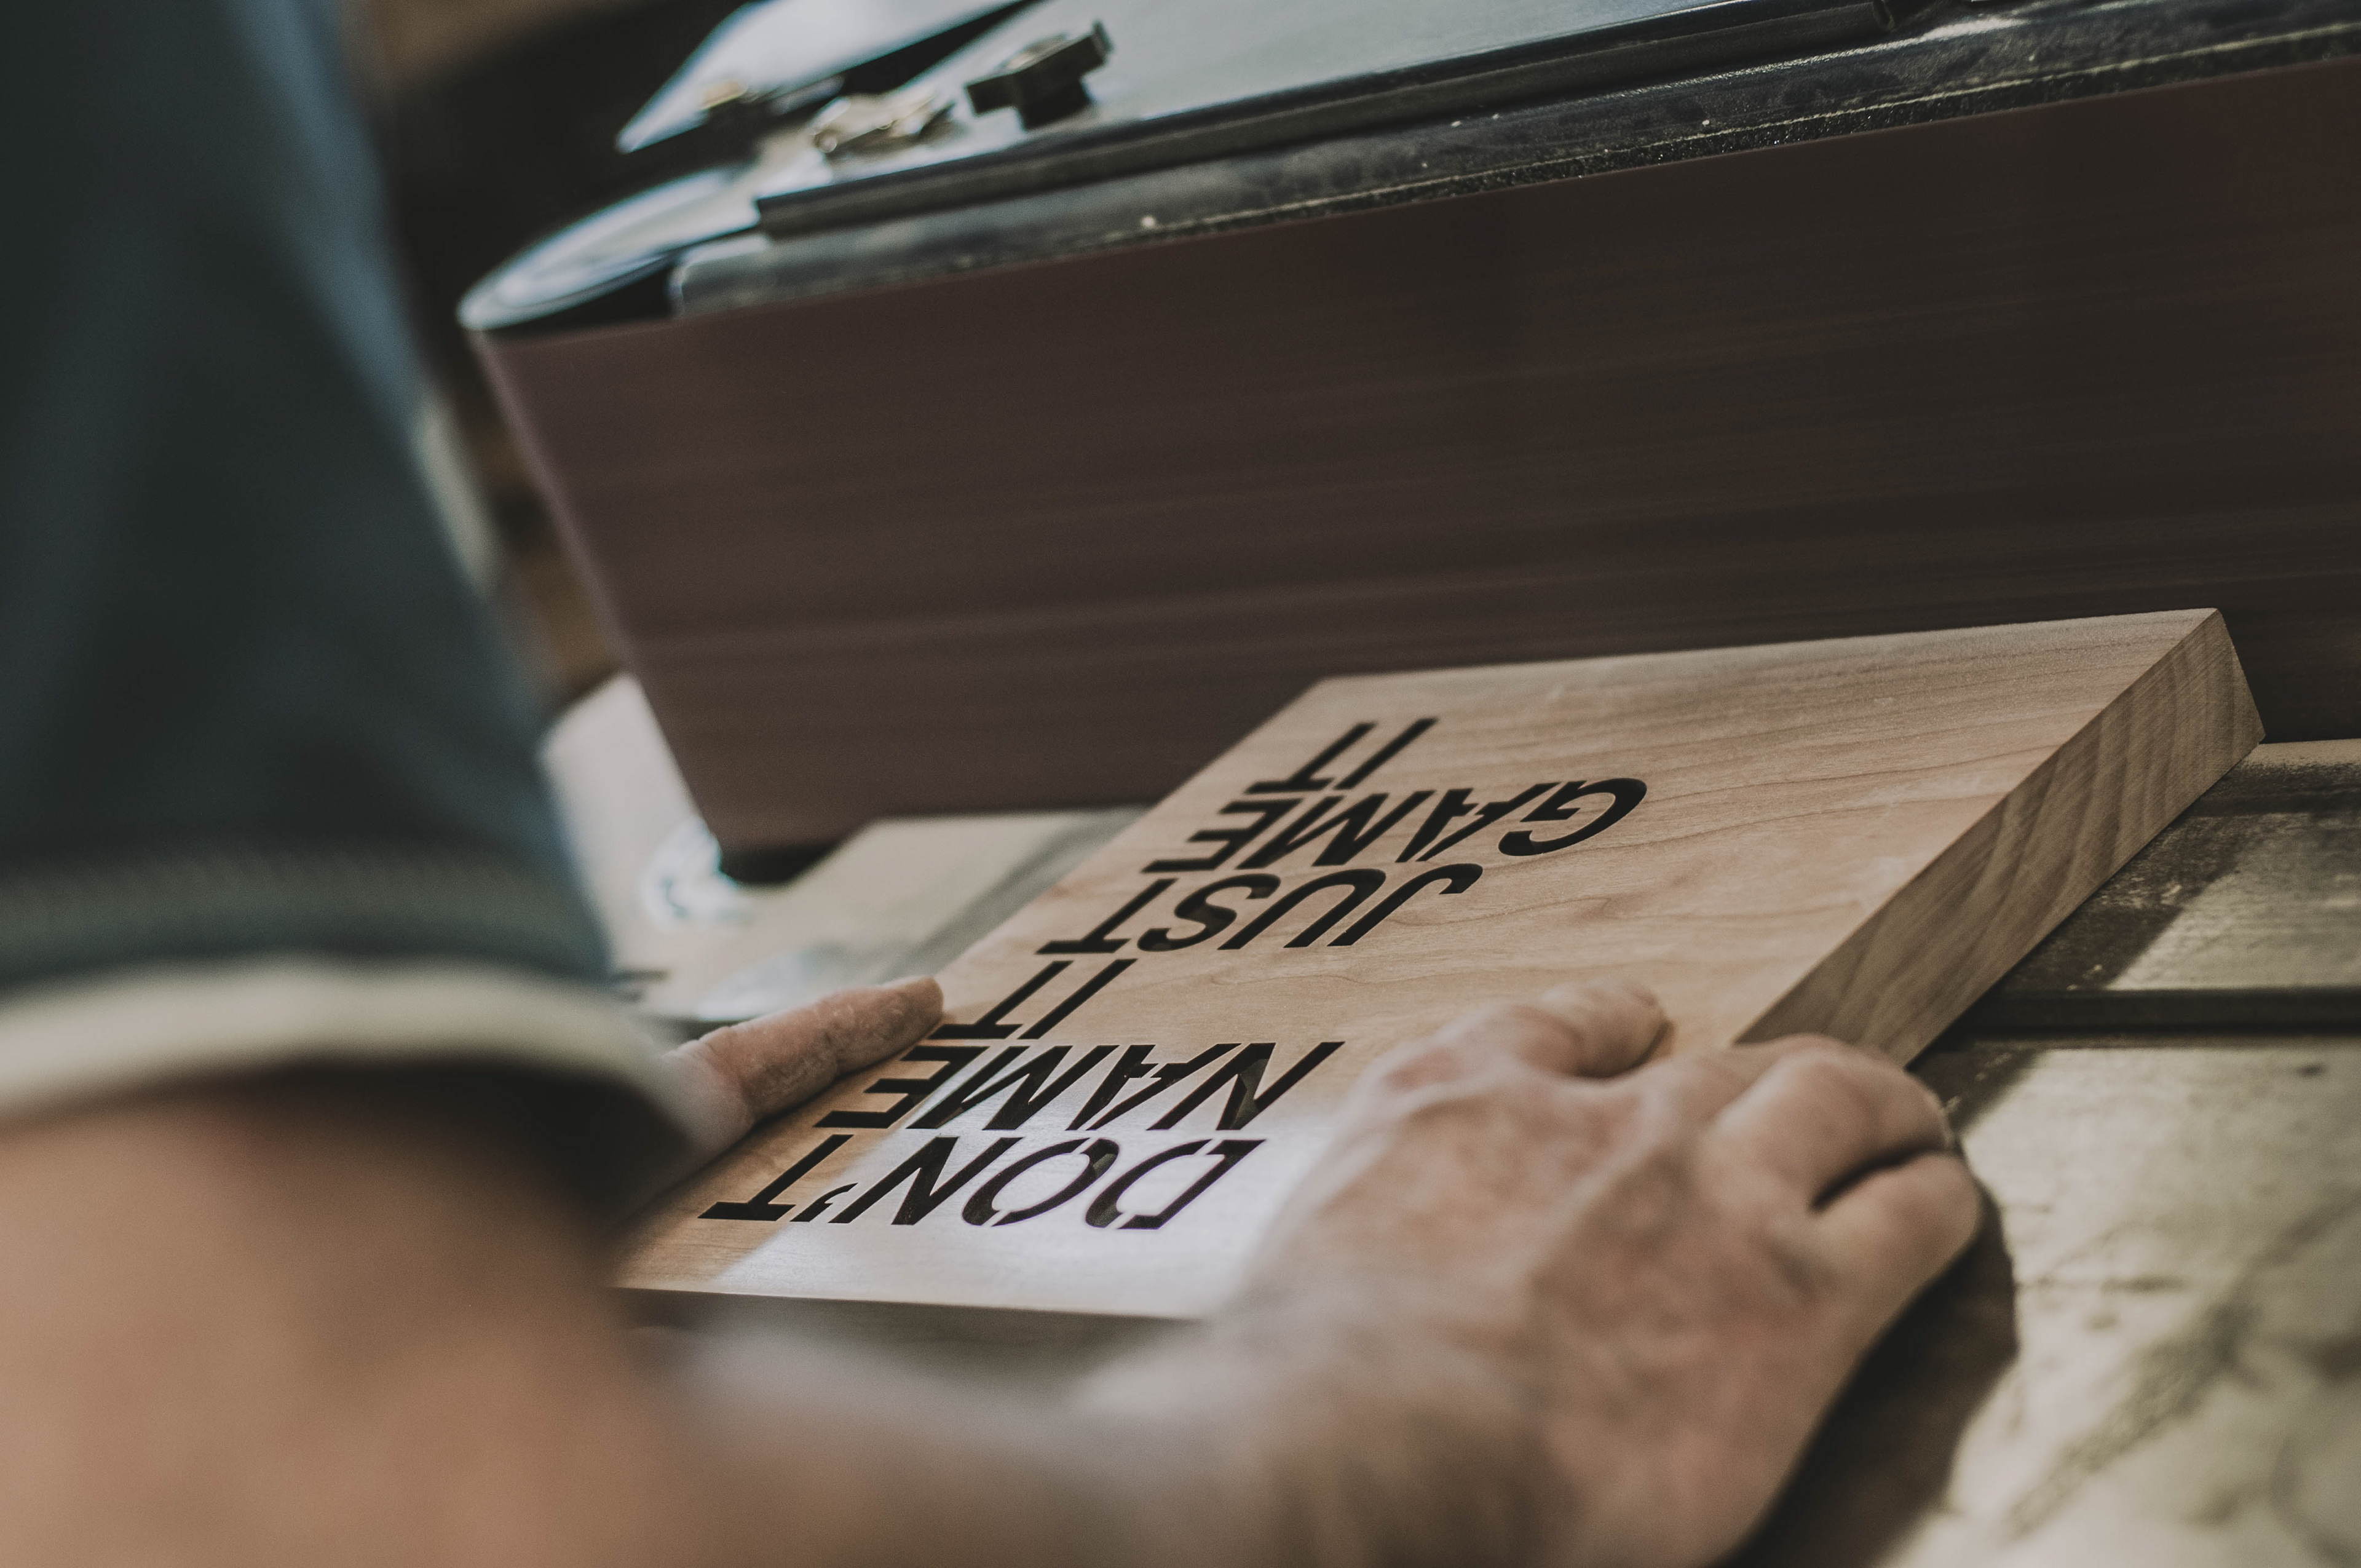
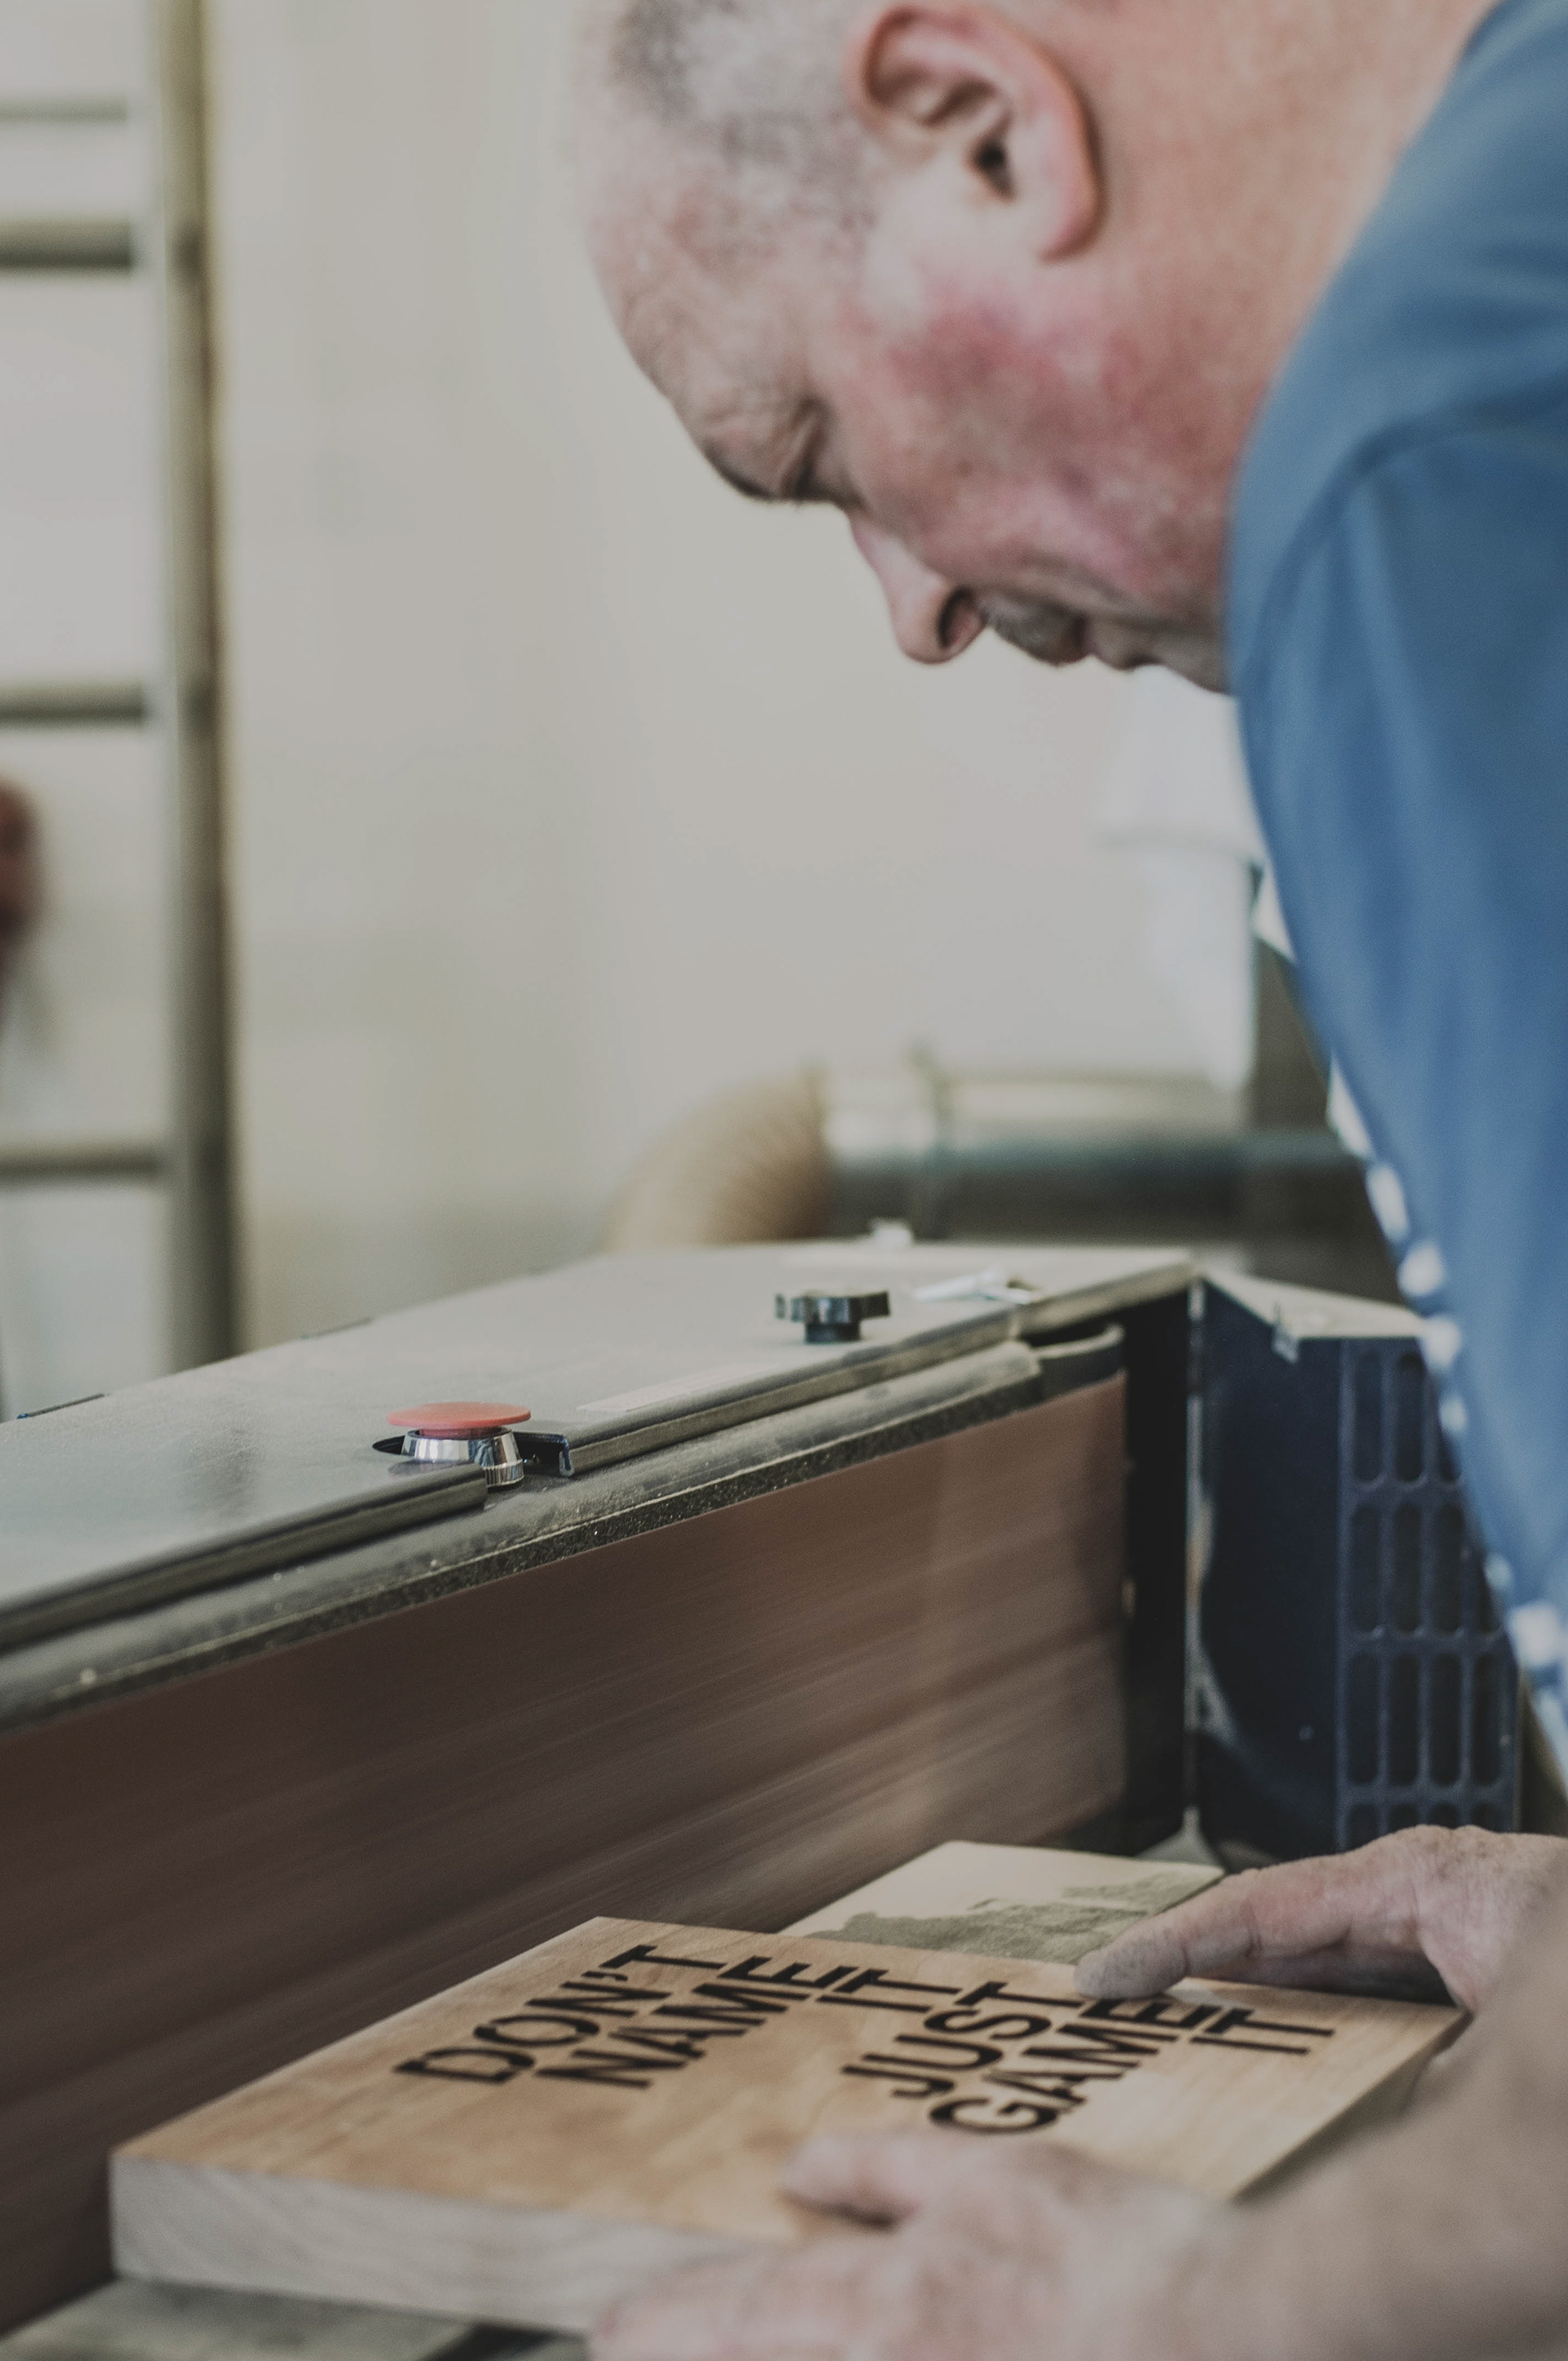
This is the stage I needed the wood being thin enough to get the lettering in, giving visual access to the inner opus waiting to be read.
As in advance I started off experimenting getting through cardboard and the thin wood, I considered myself not going through any bad times in the realization process anymore.
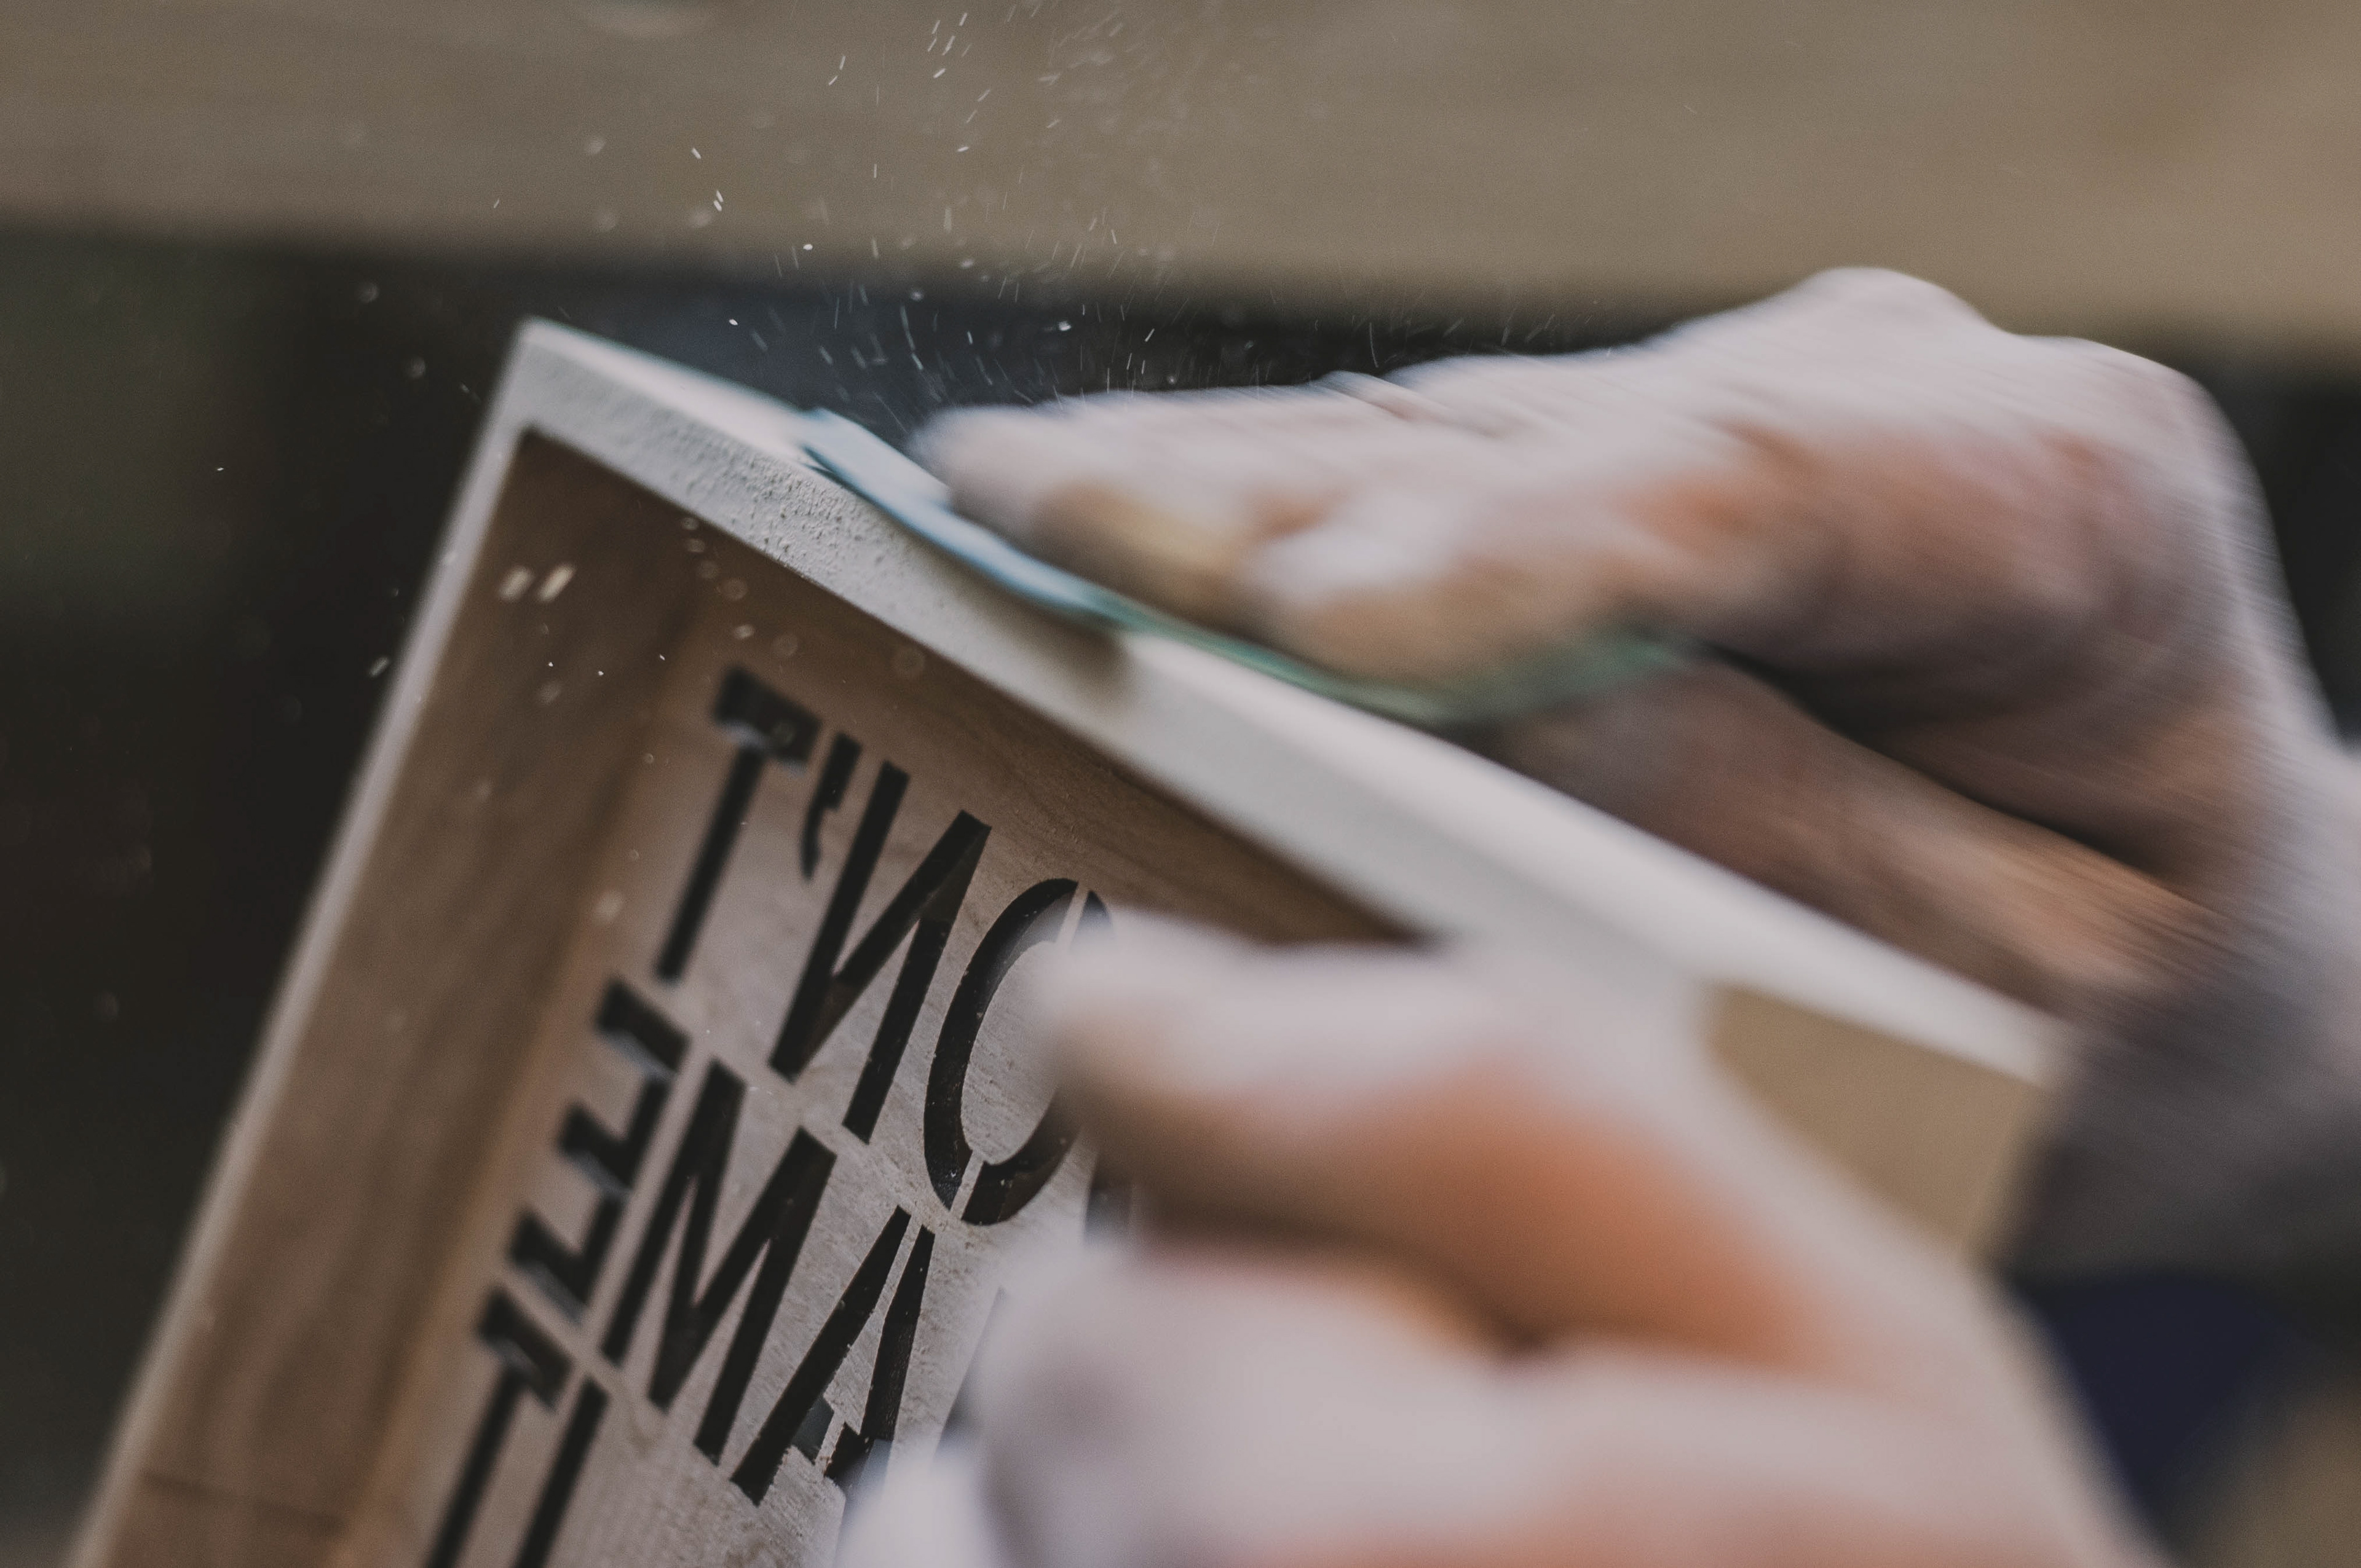
The first attempt cutting through by laser on my molded cherry tree wood dummy, proved I was insanely wrong… This is why, instead of getting a clear cut-out, the wood itself was burned a lot.
The different type of wood required to set the concentrated light in another way; the power, the frequency, the waves, the concentration, the time…
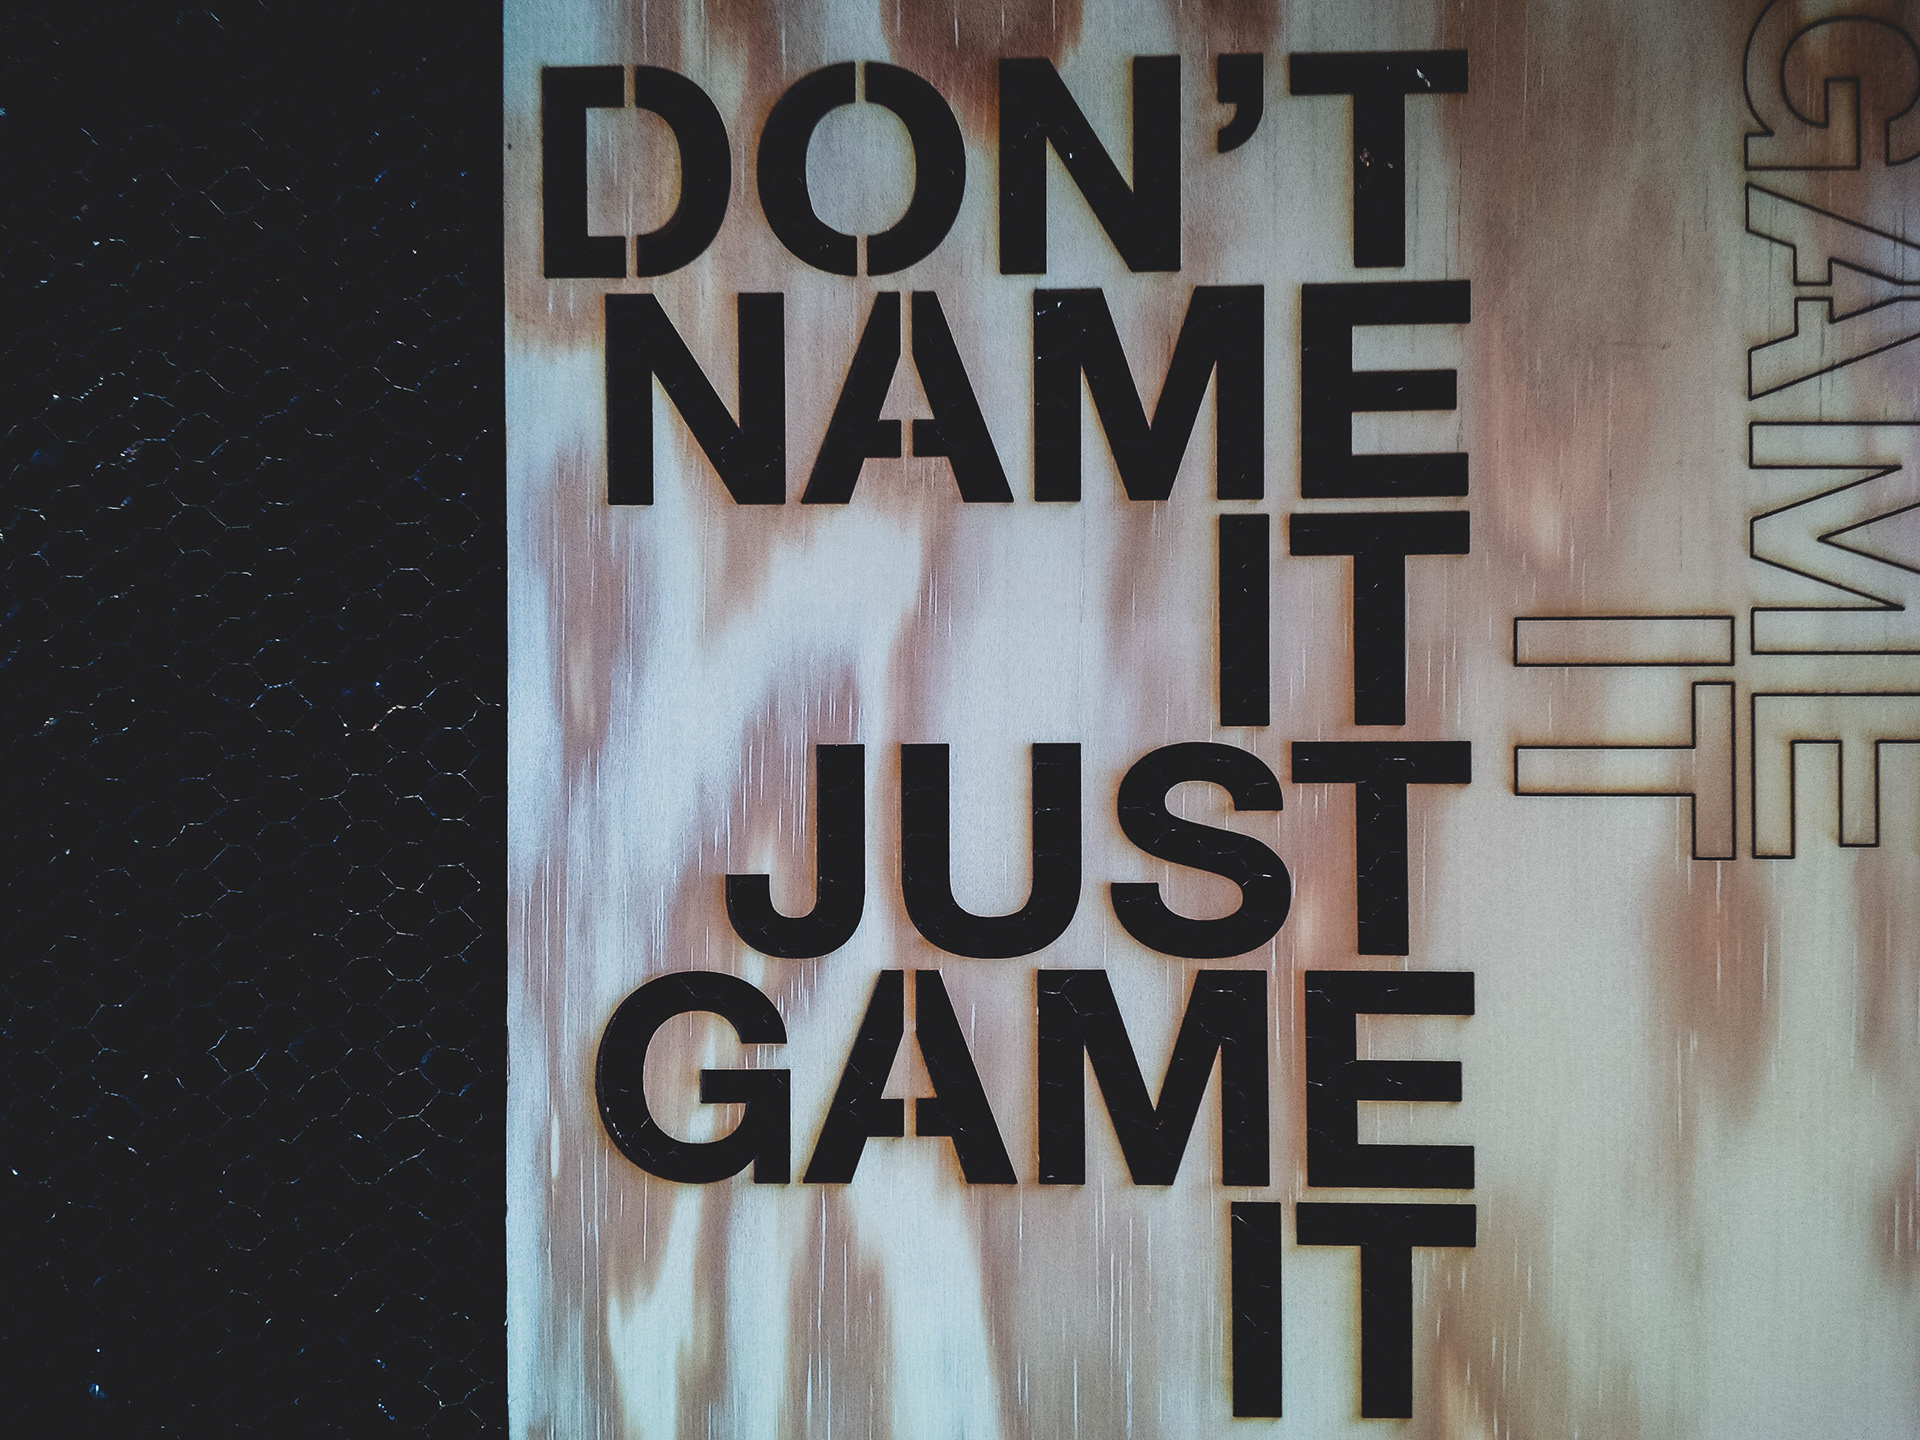
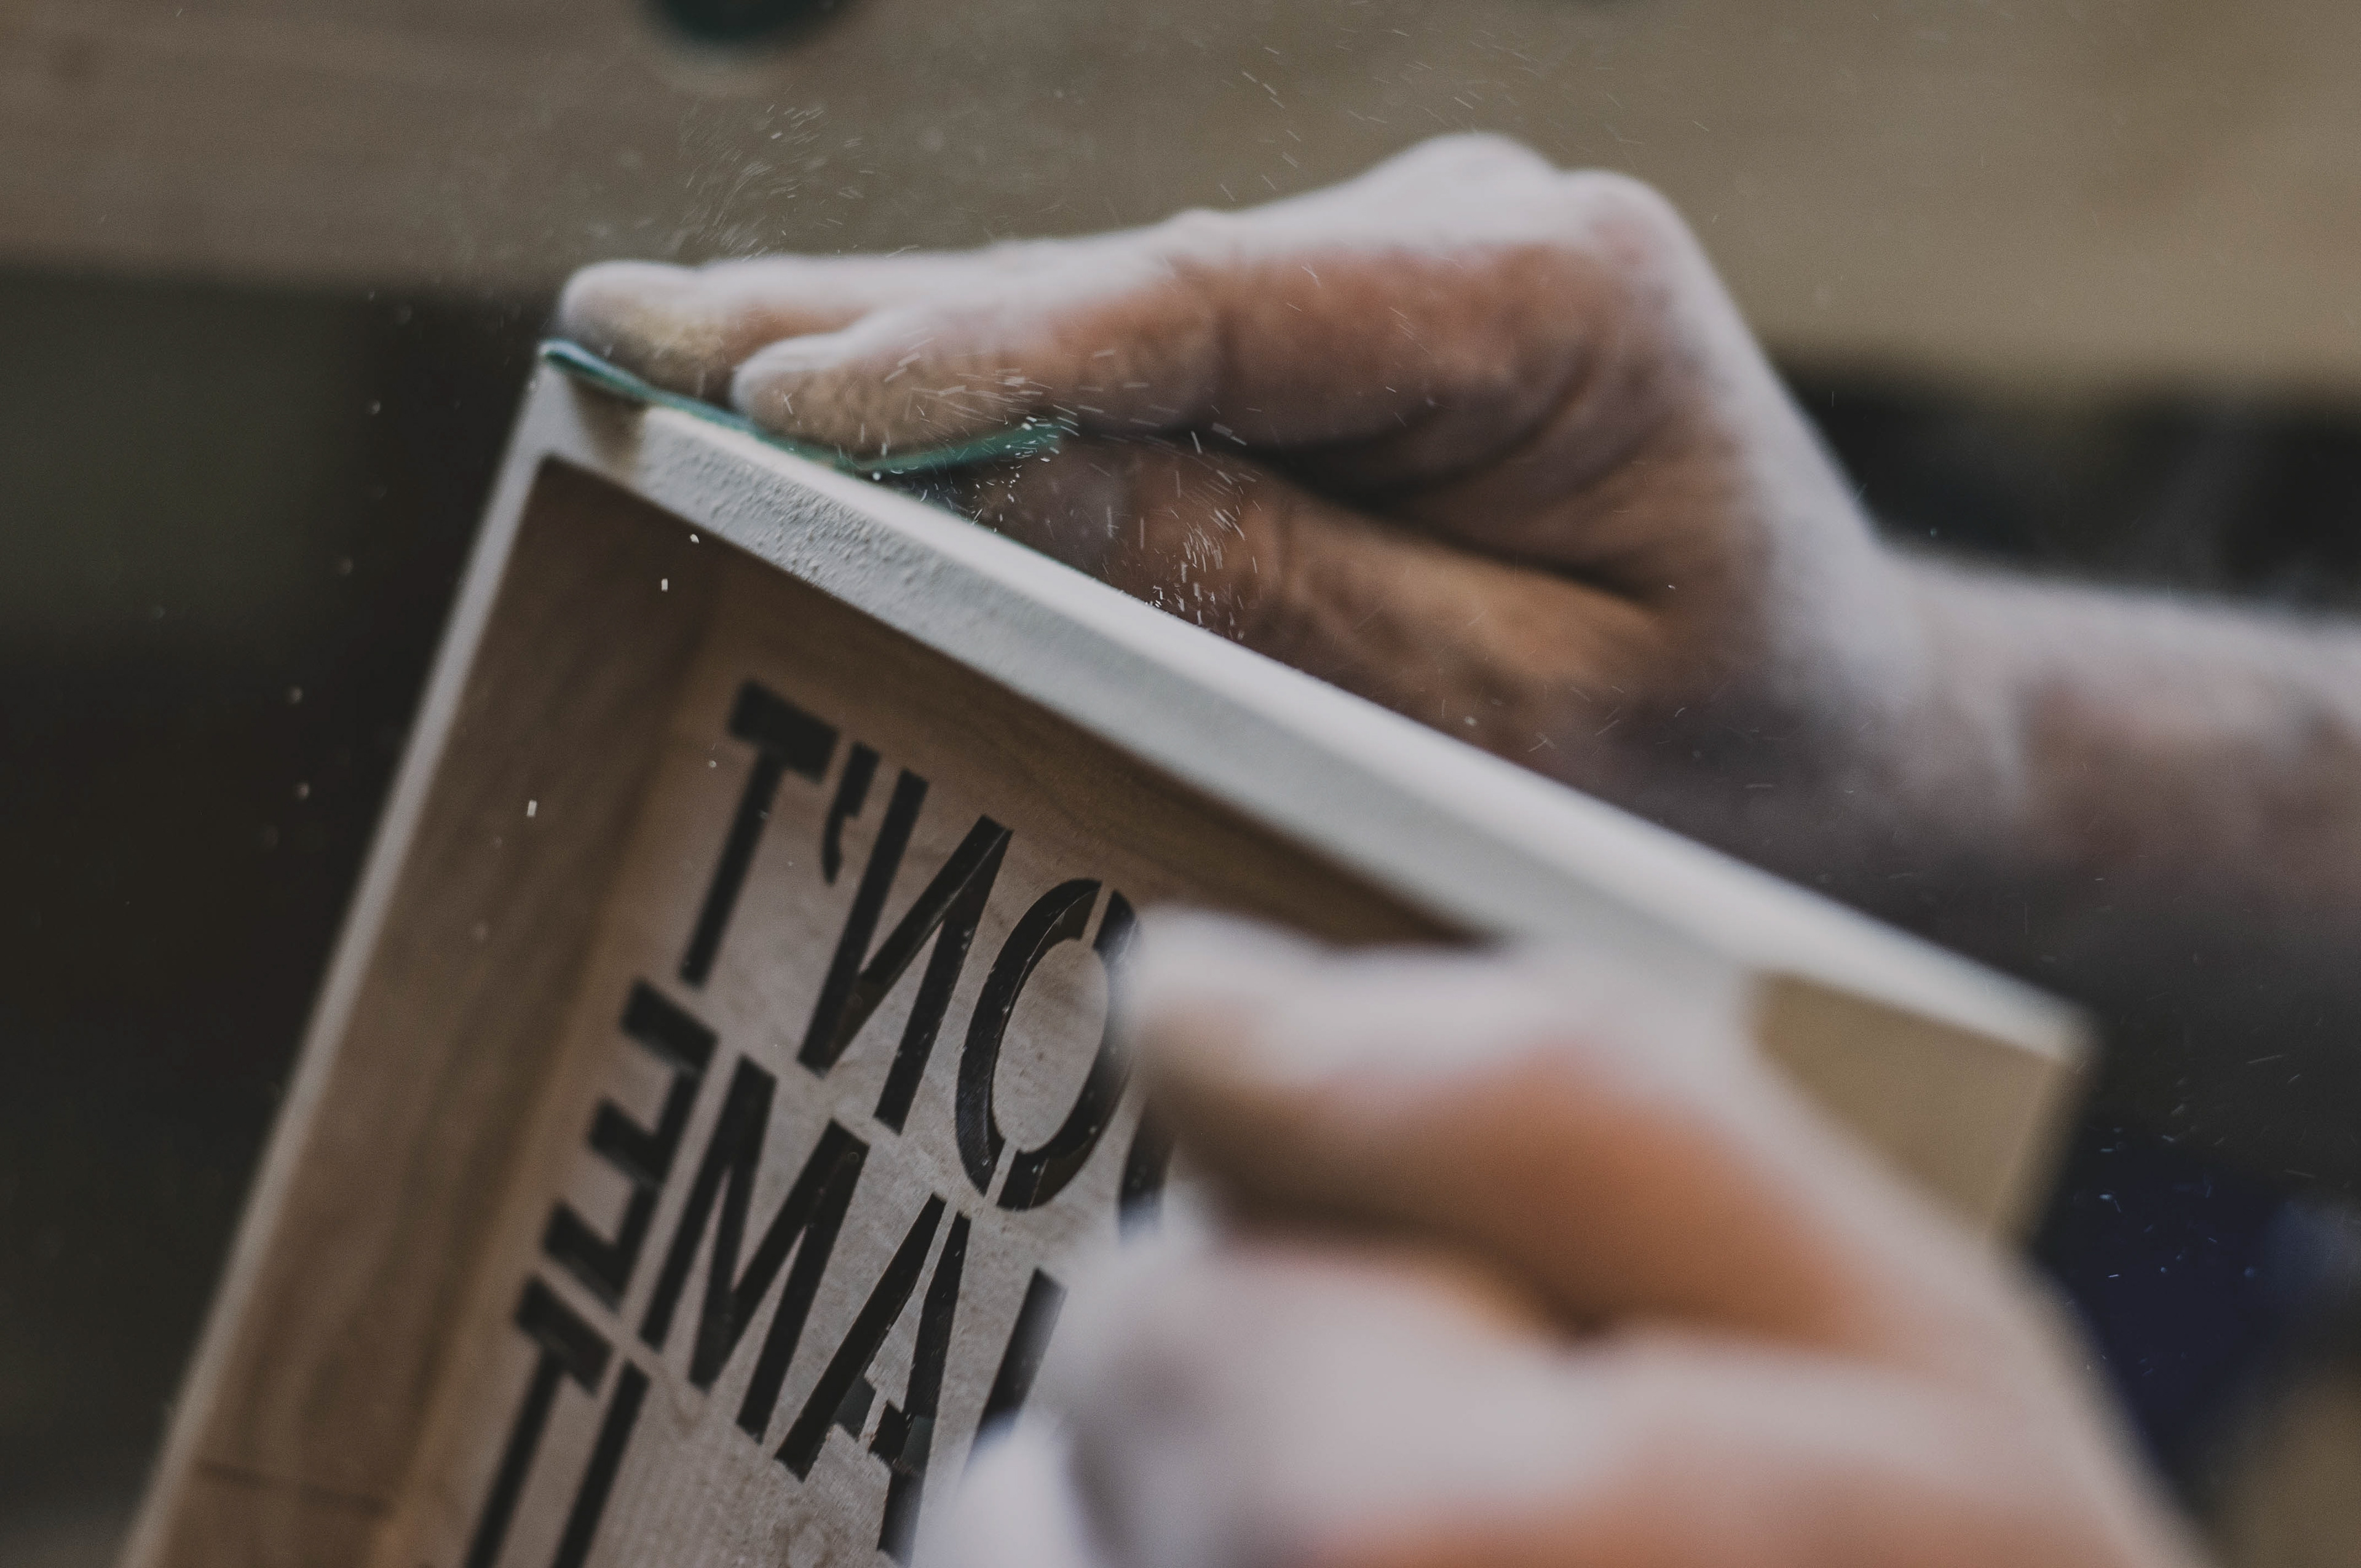
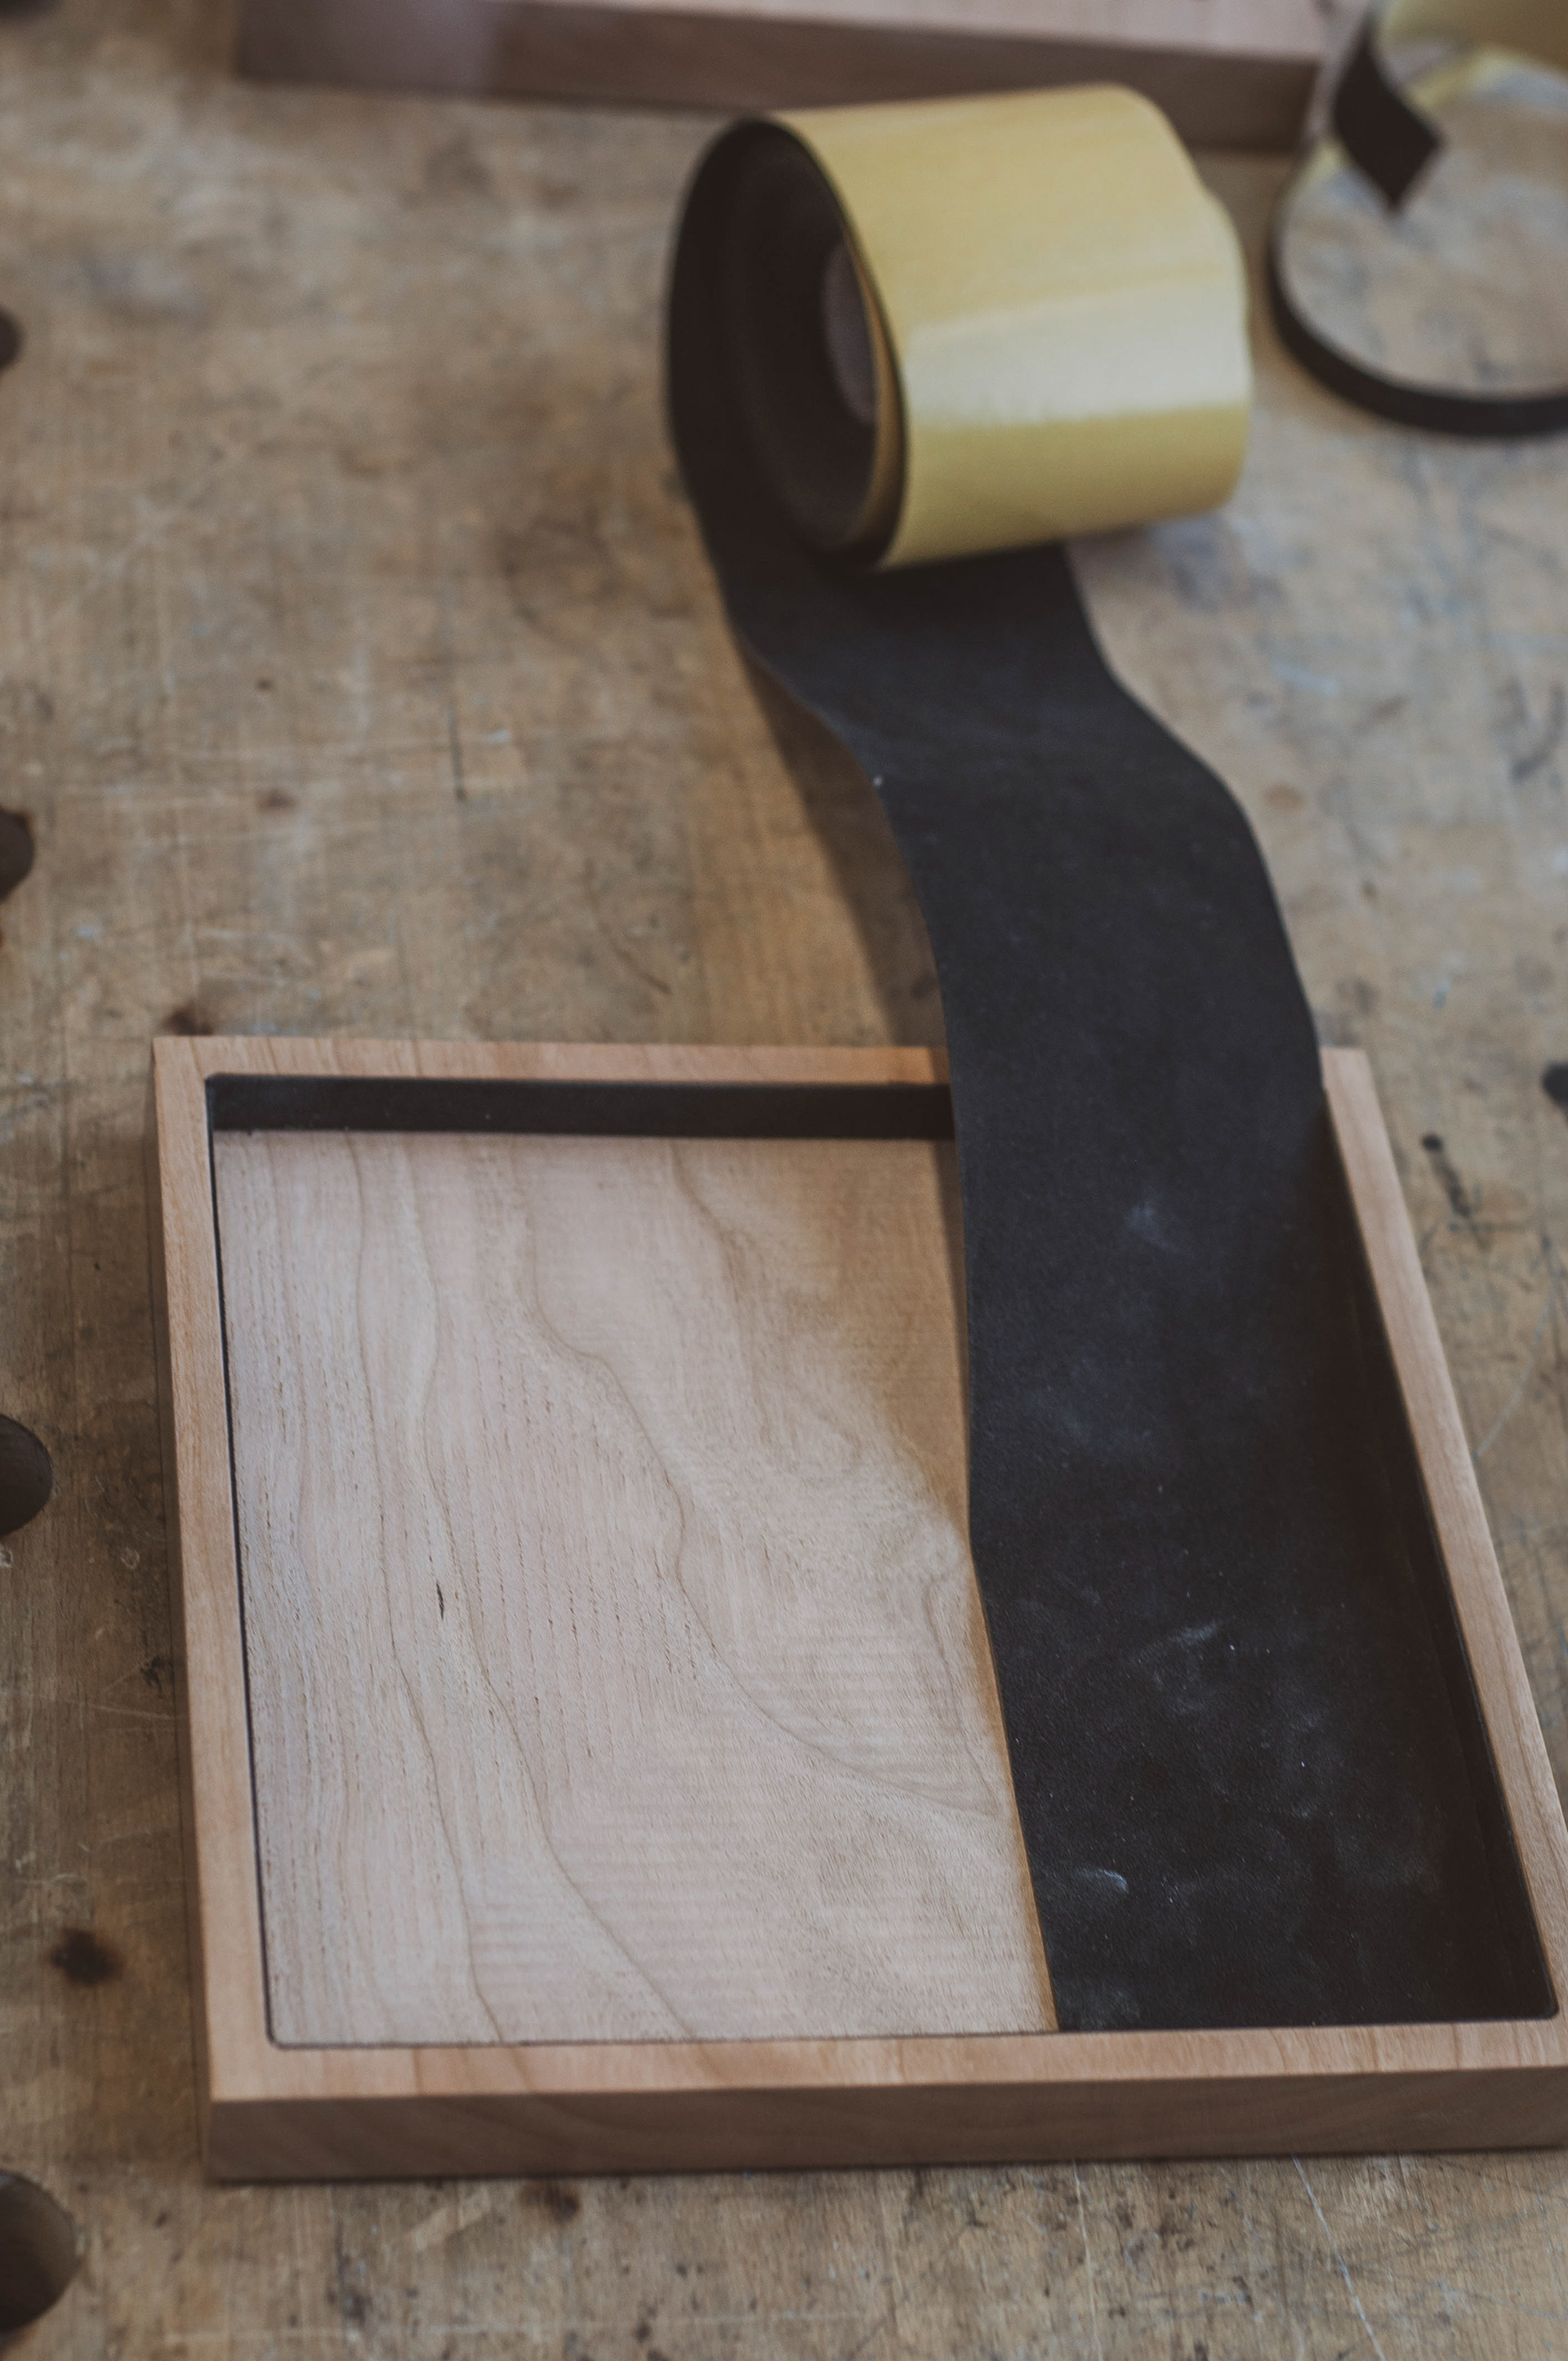
I decided to go easy on intensity, and in case the result wouldn't still be satisfying I could go on another round, try to get through the cherry tree wood. In addition, to make sure, in case it would burn again, the traces would remain on the upper layer. This is why I applied an upper layer of application tape, which even exposed to heat, would be able to be removed easily.
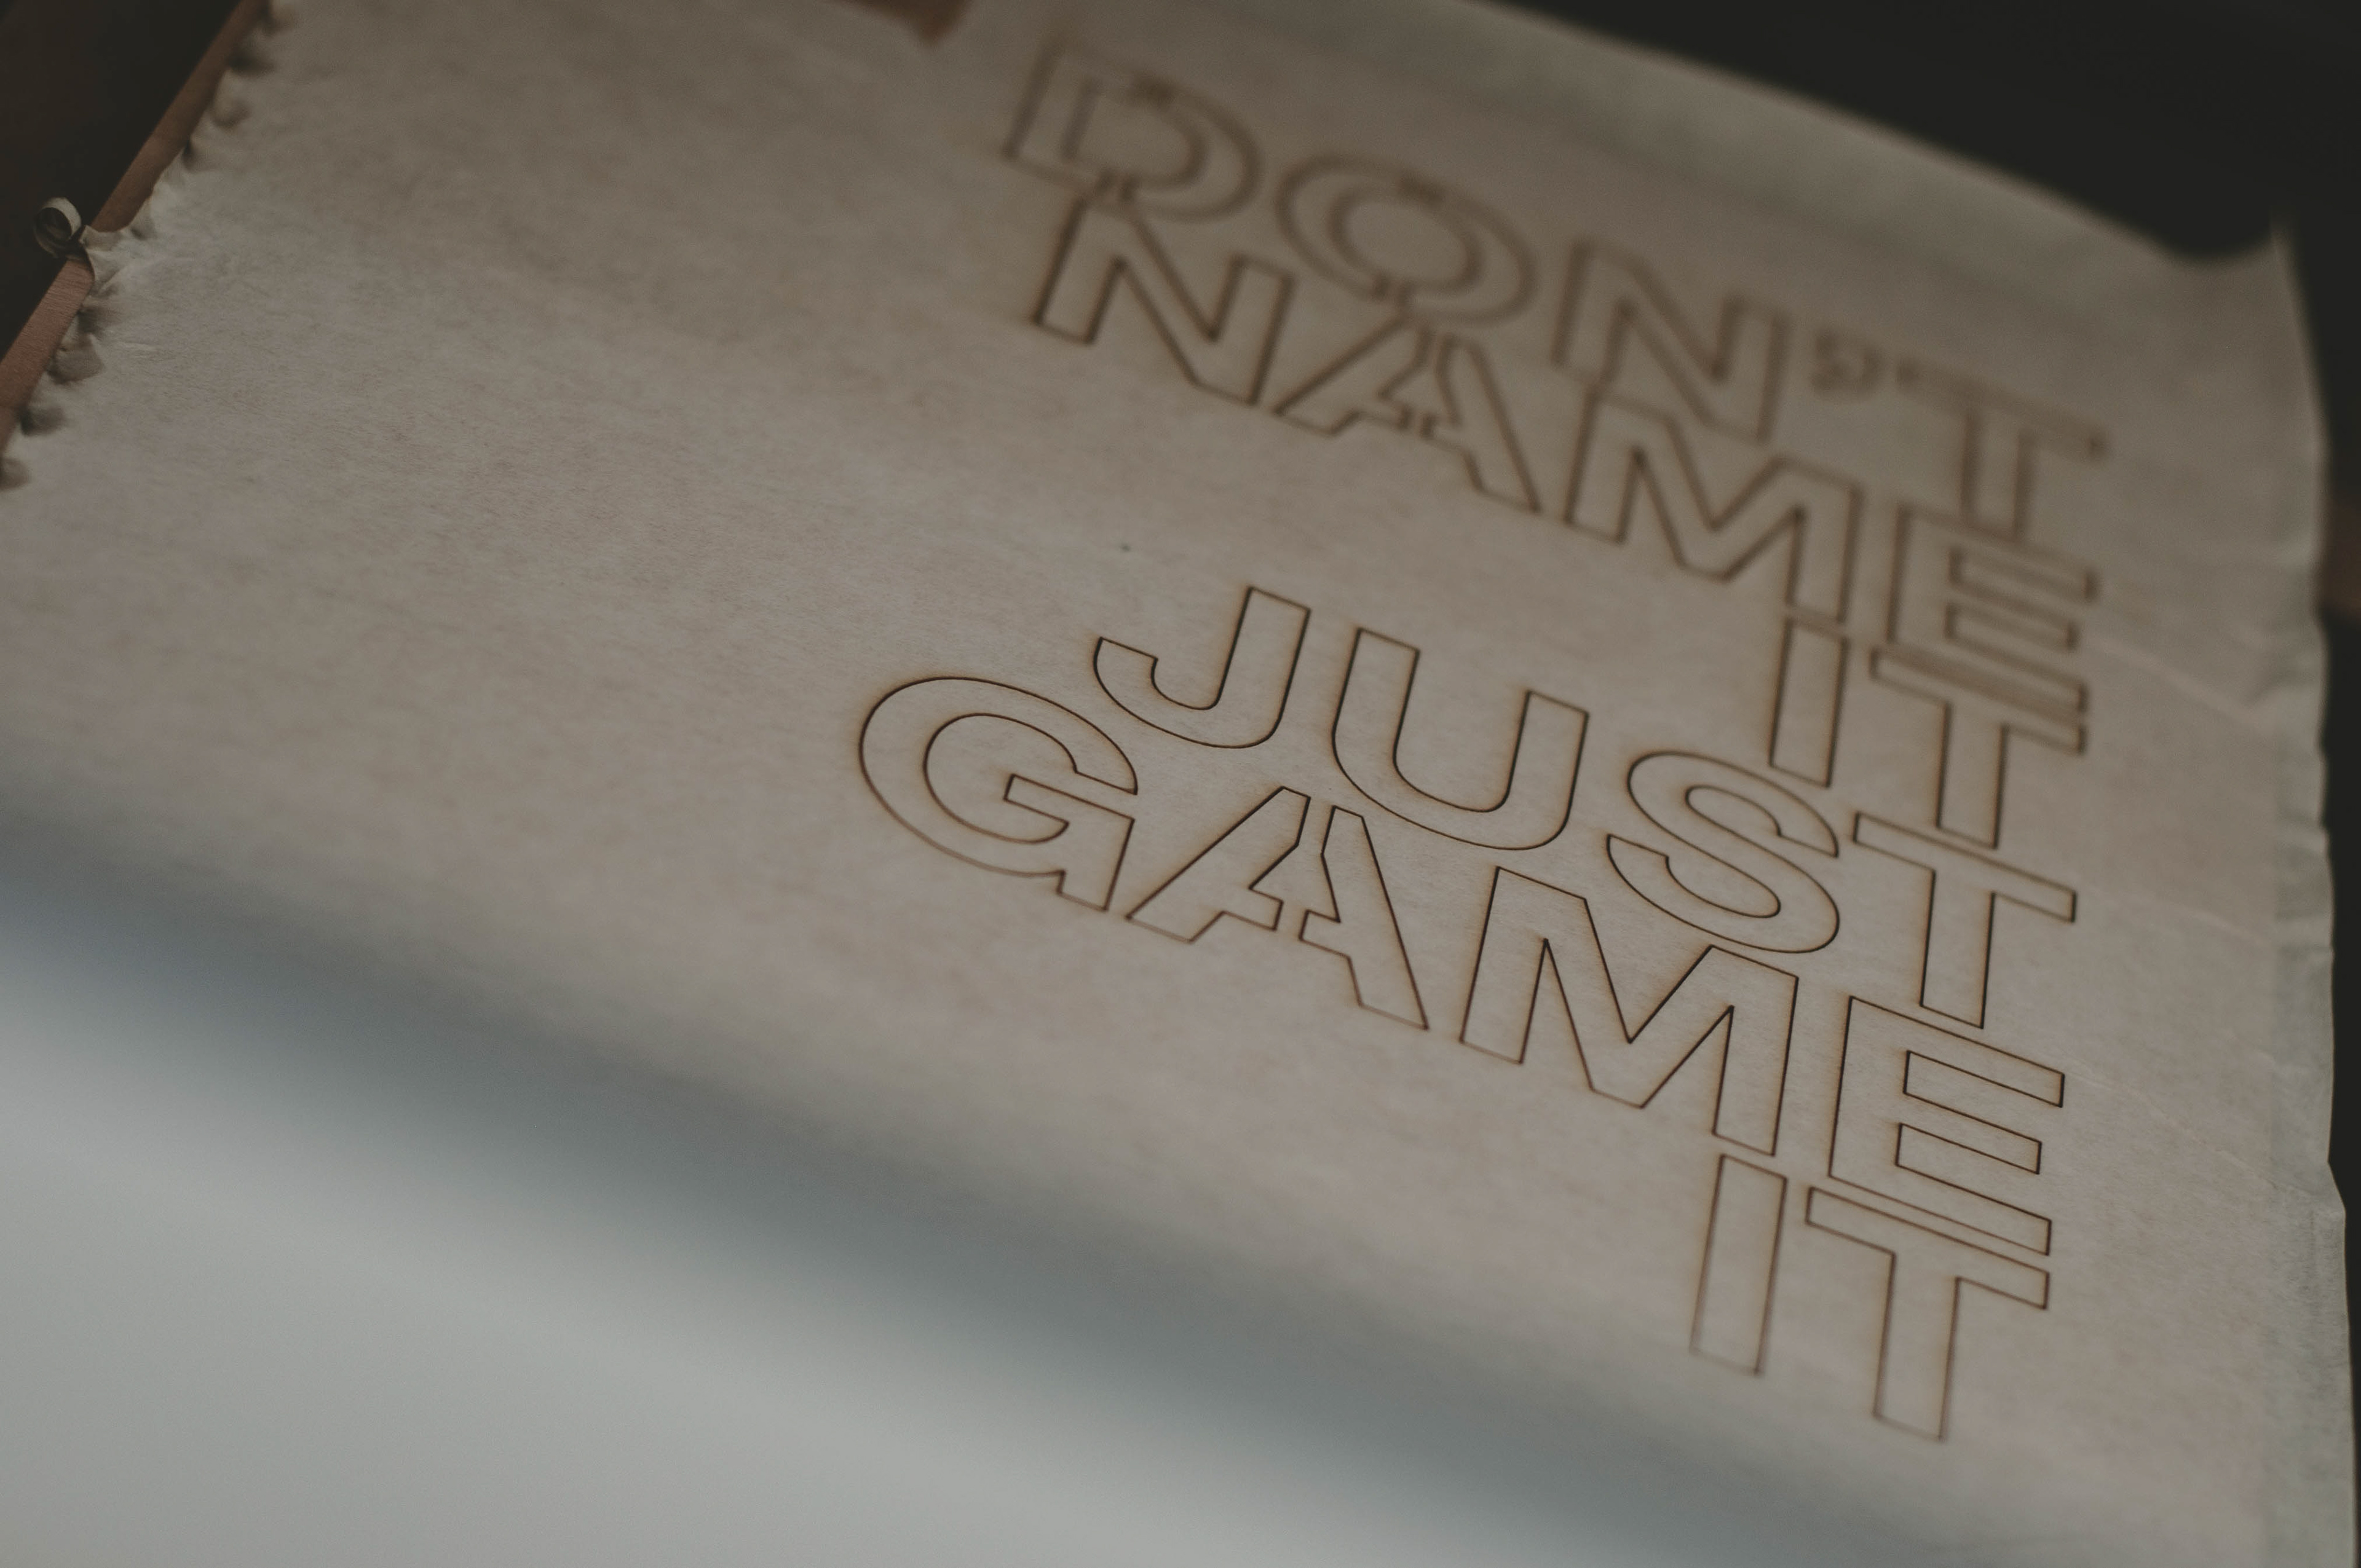
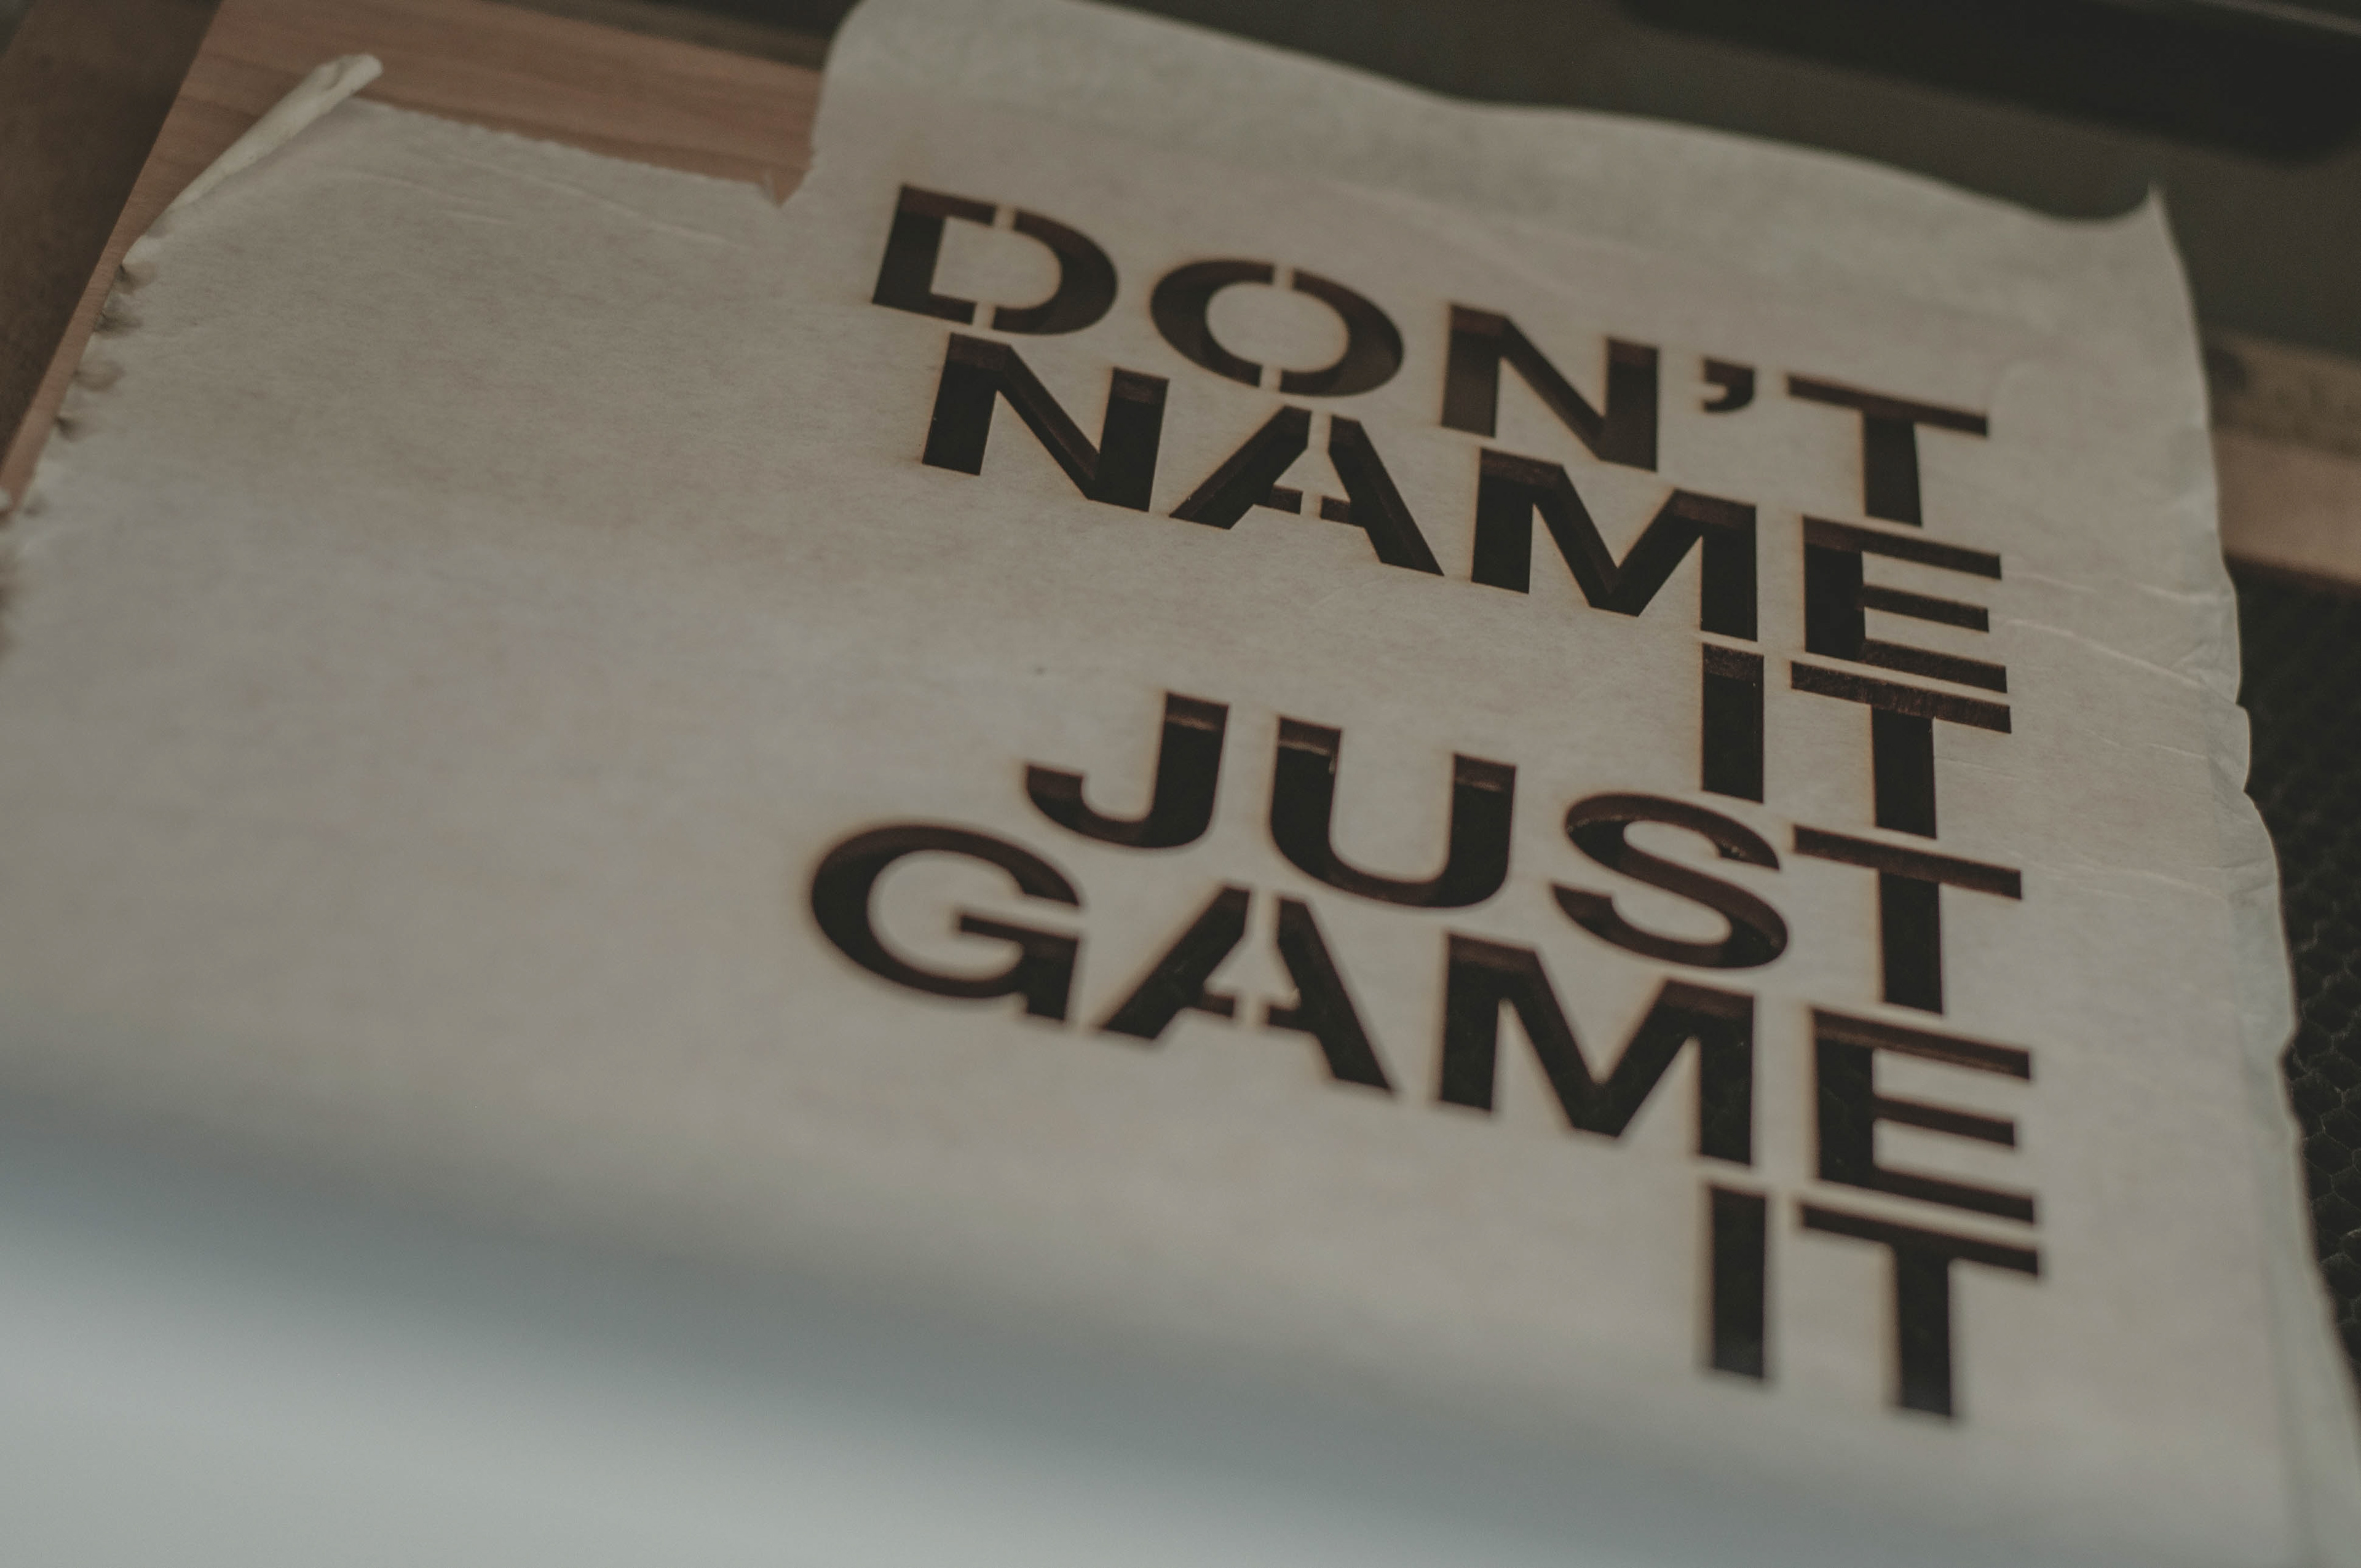
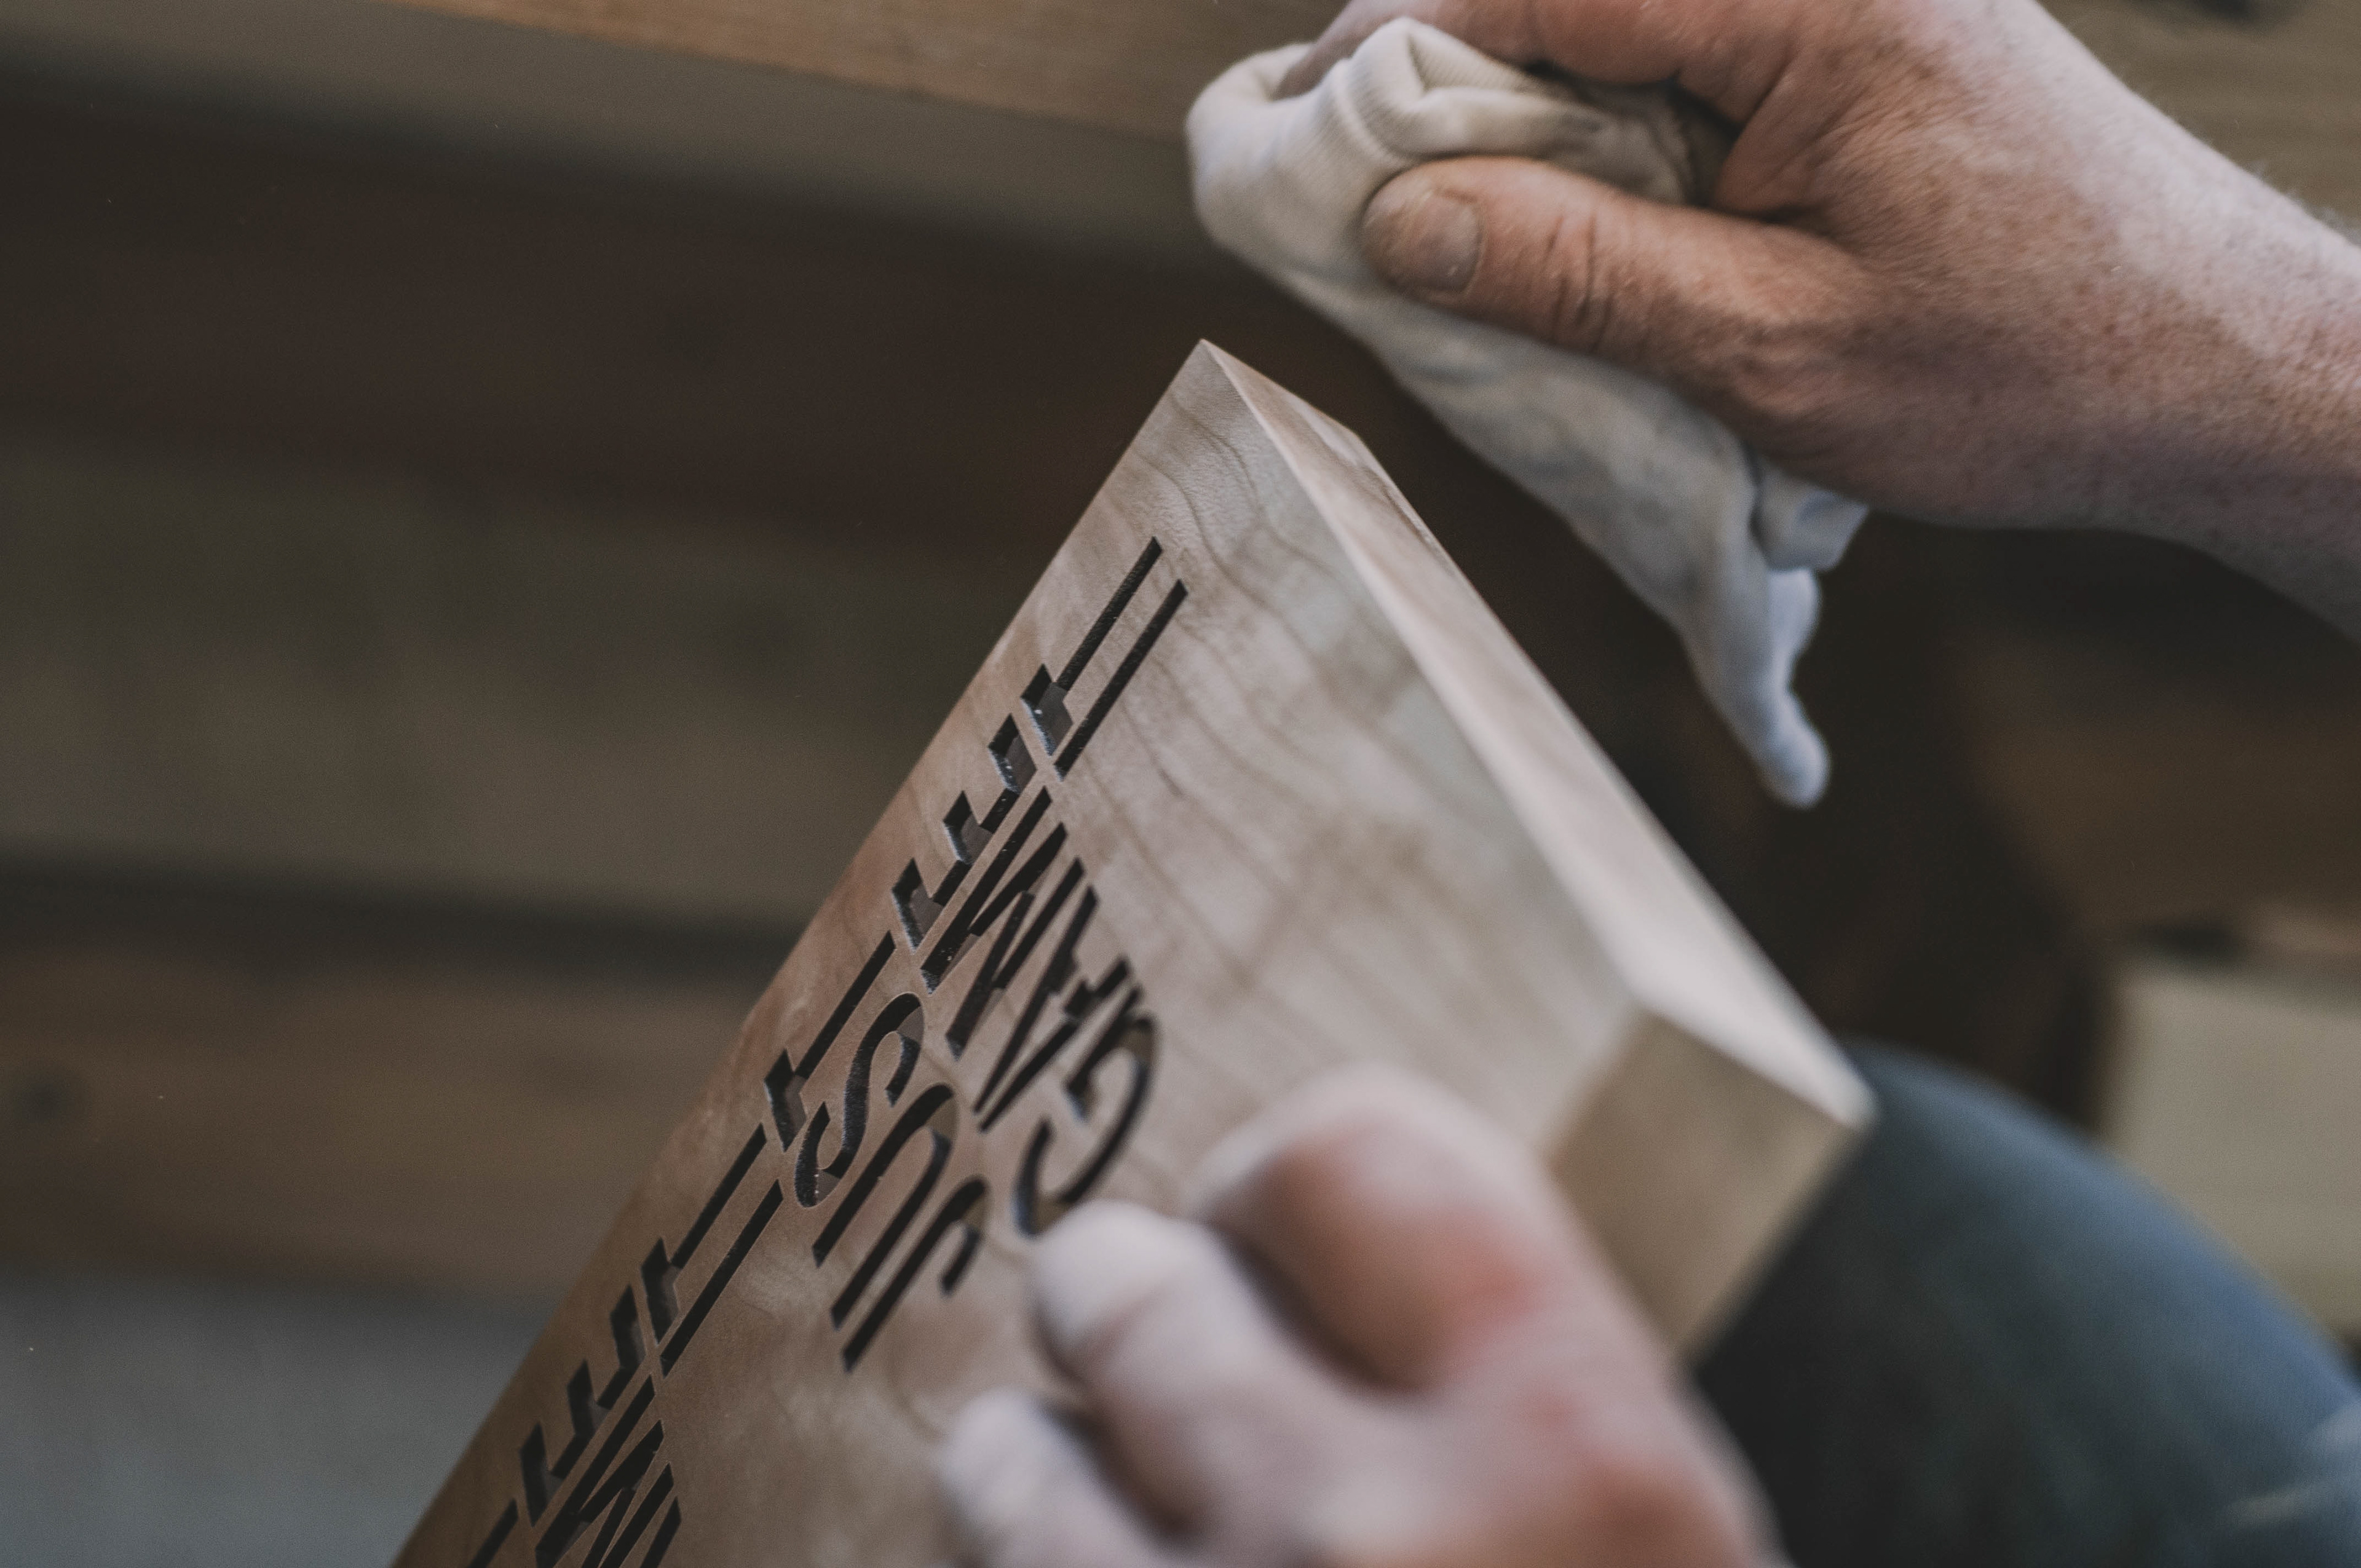
The result was really satisfying…
let's get to shine bright
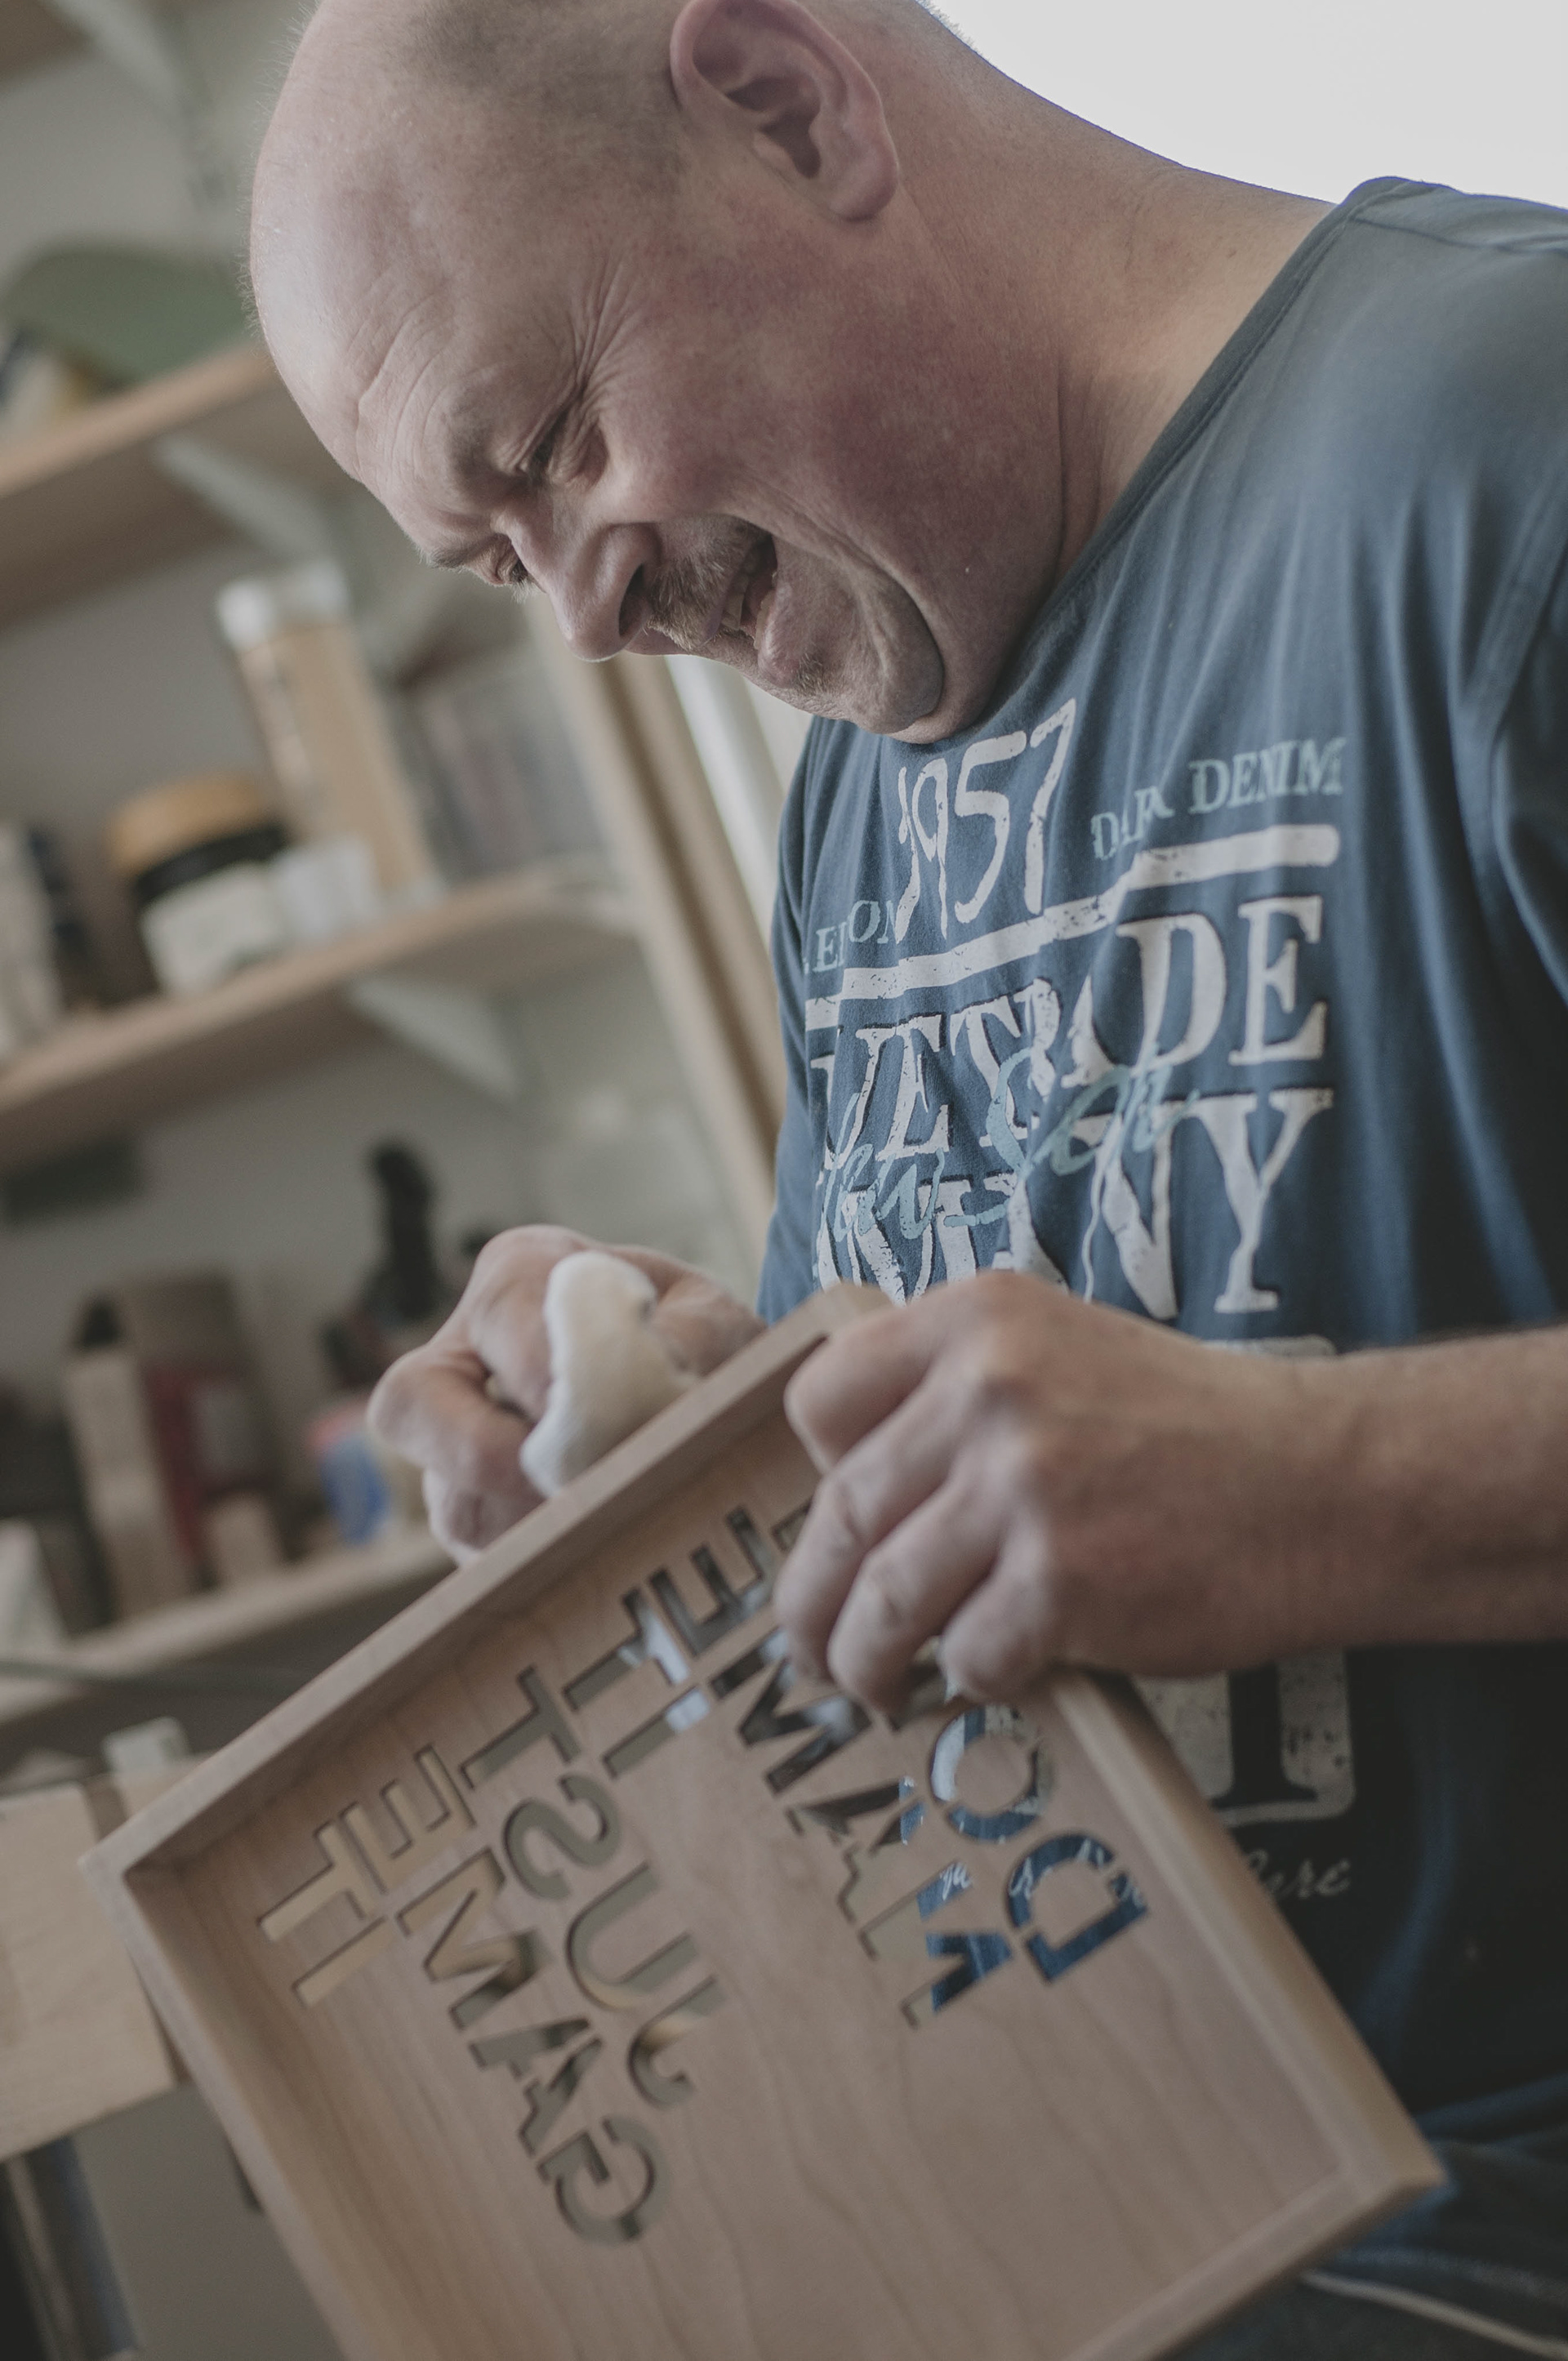
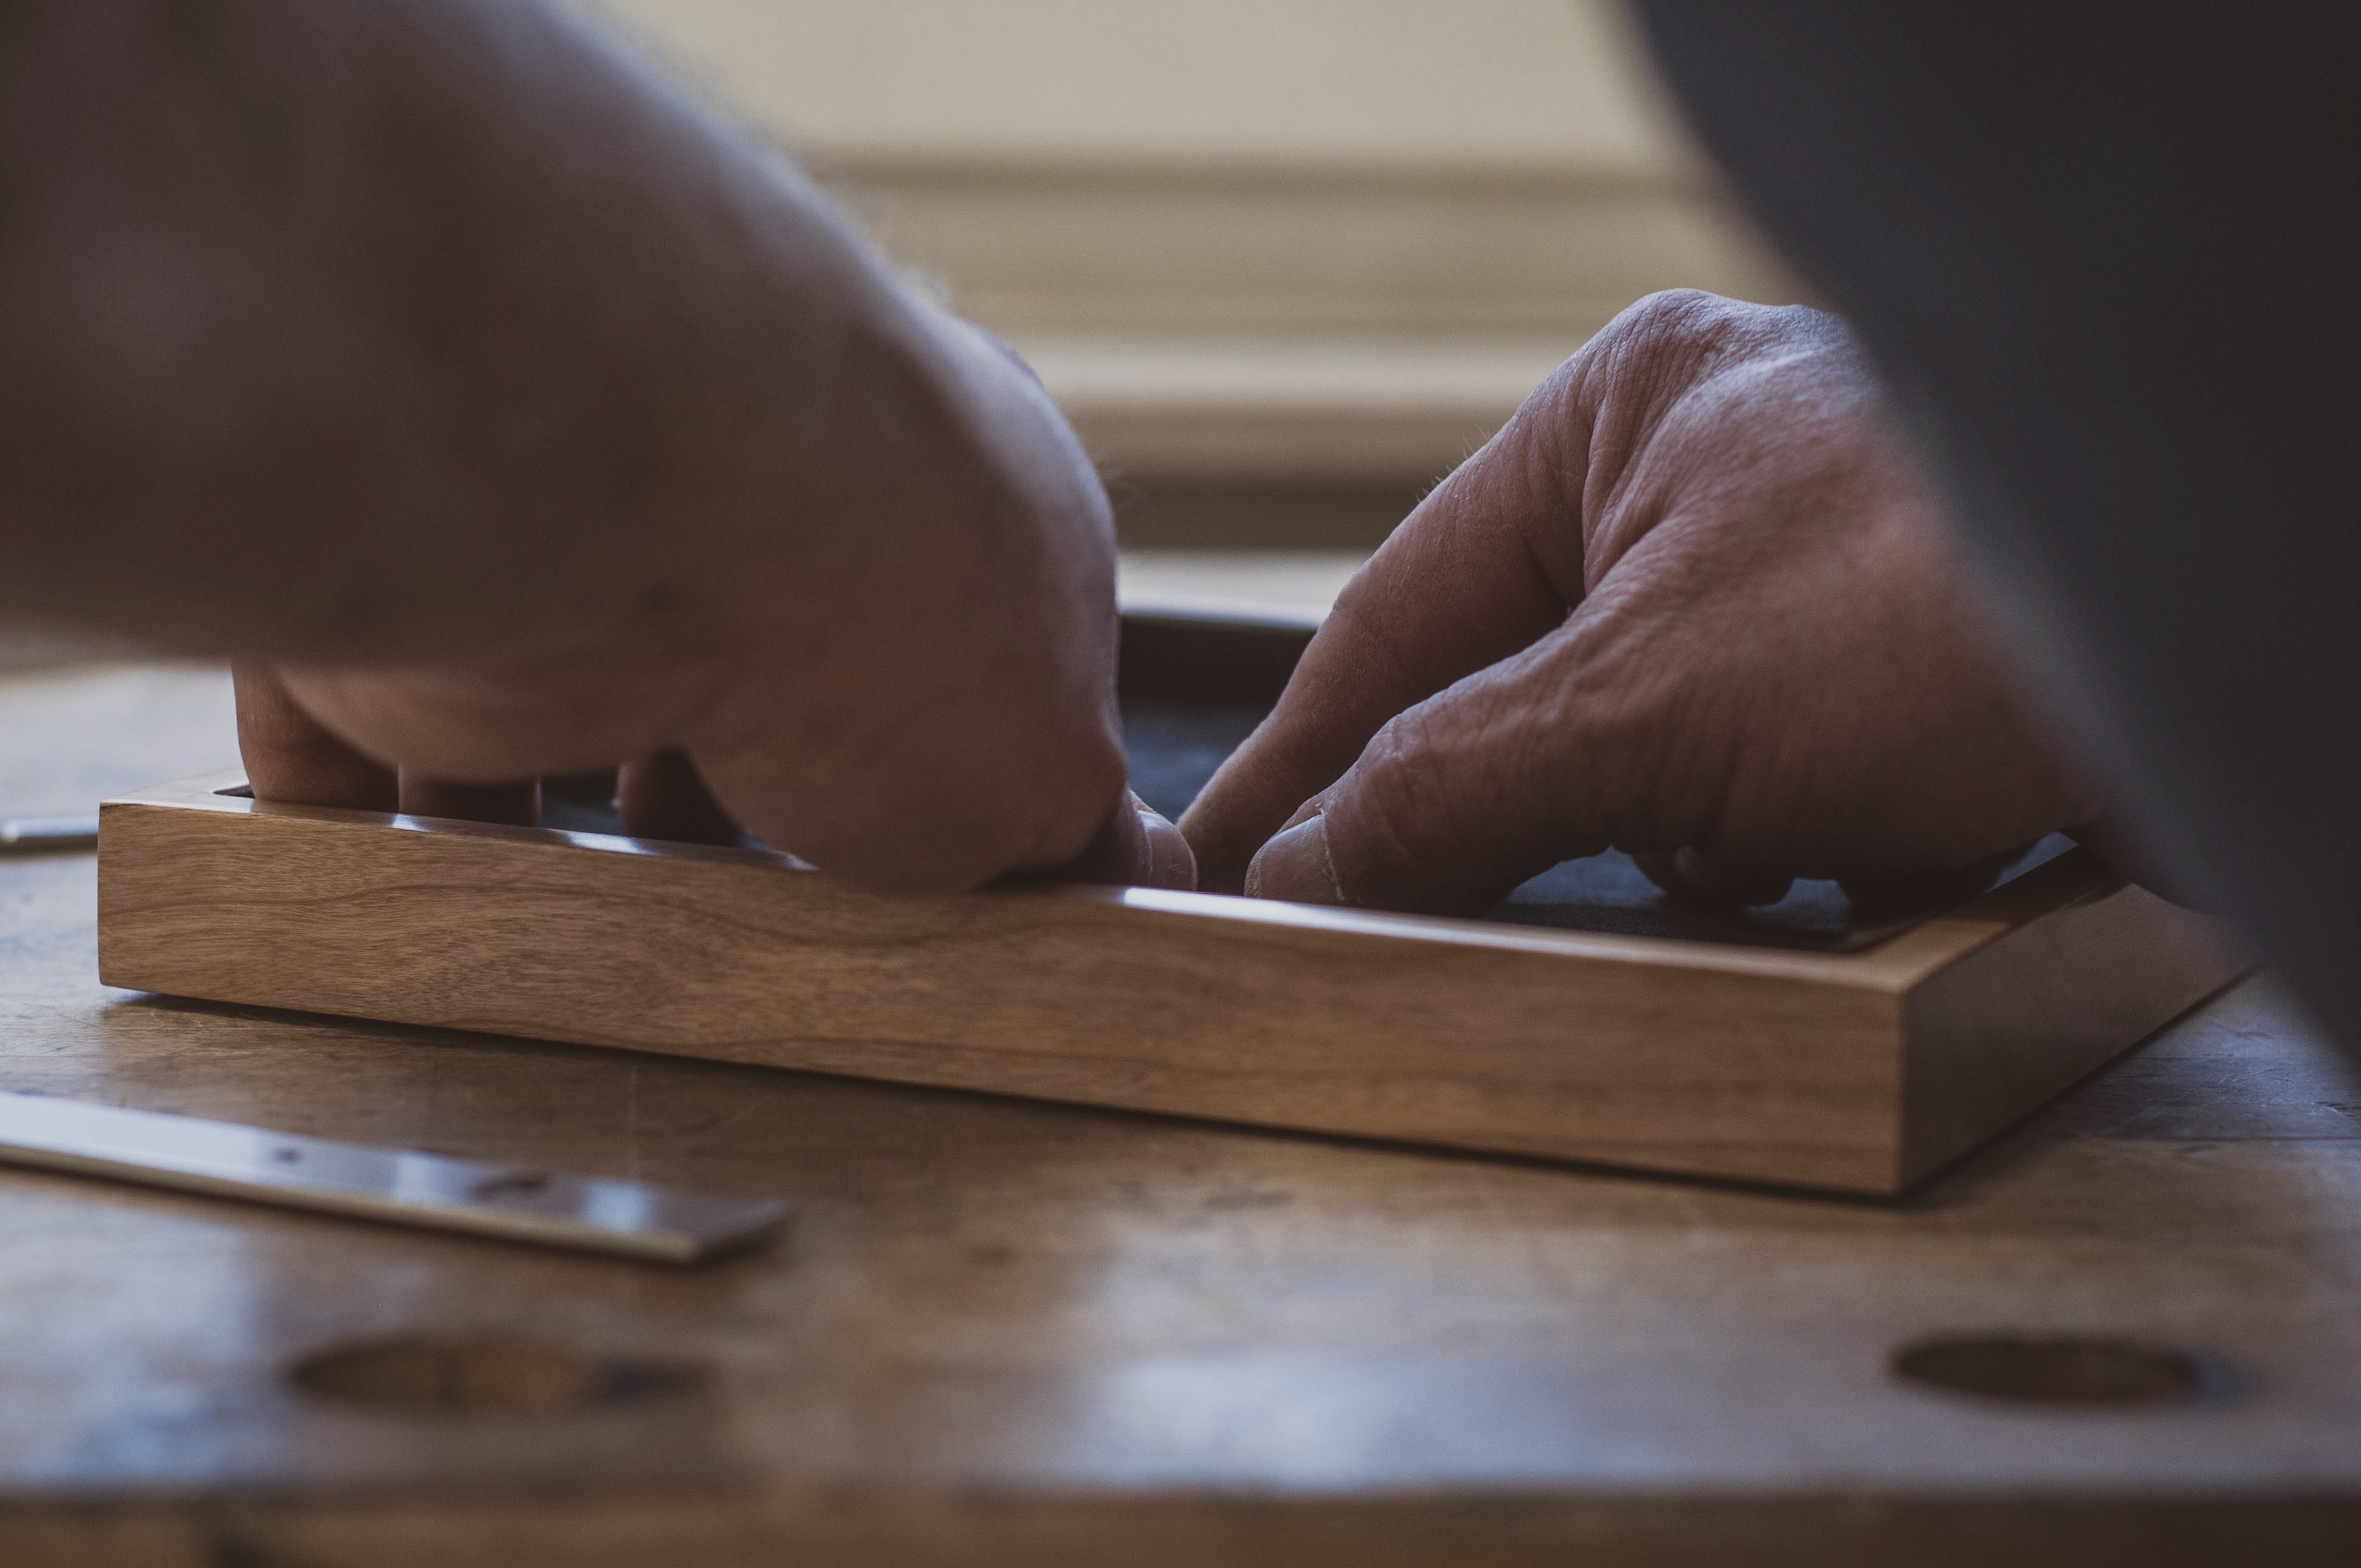
For the very special, premium and high class finish, I decided to get back to my former carpenter, why I knew brings the same dedication when it comes to details and especially who can trust.
Therefore I wanted him to adopt my vision altogether, thereby there is no misunderstanding. Also he brought in his very own experience, which led me on the right way in finalization process.
It was not only about the wood, which I wanted to be upper class. It the whole wrapping which I wanted to be top notch.
So I decided getting the outside shiny as previously display on the first thin wood dummy. Furthermore I added another detail; rubber dots, so the case itself will stand bold and won't slipp on a sleek surface, such as a table for example.
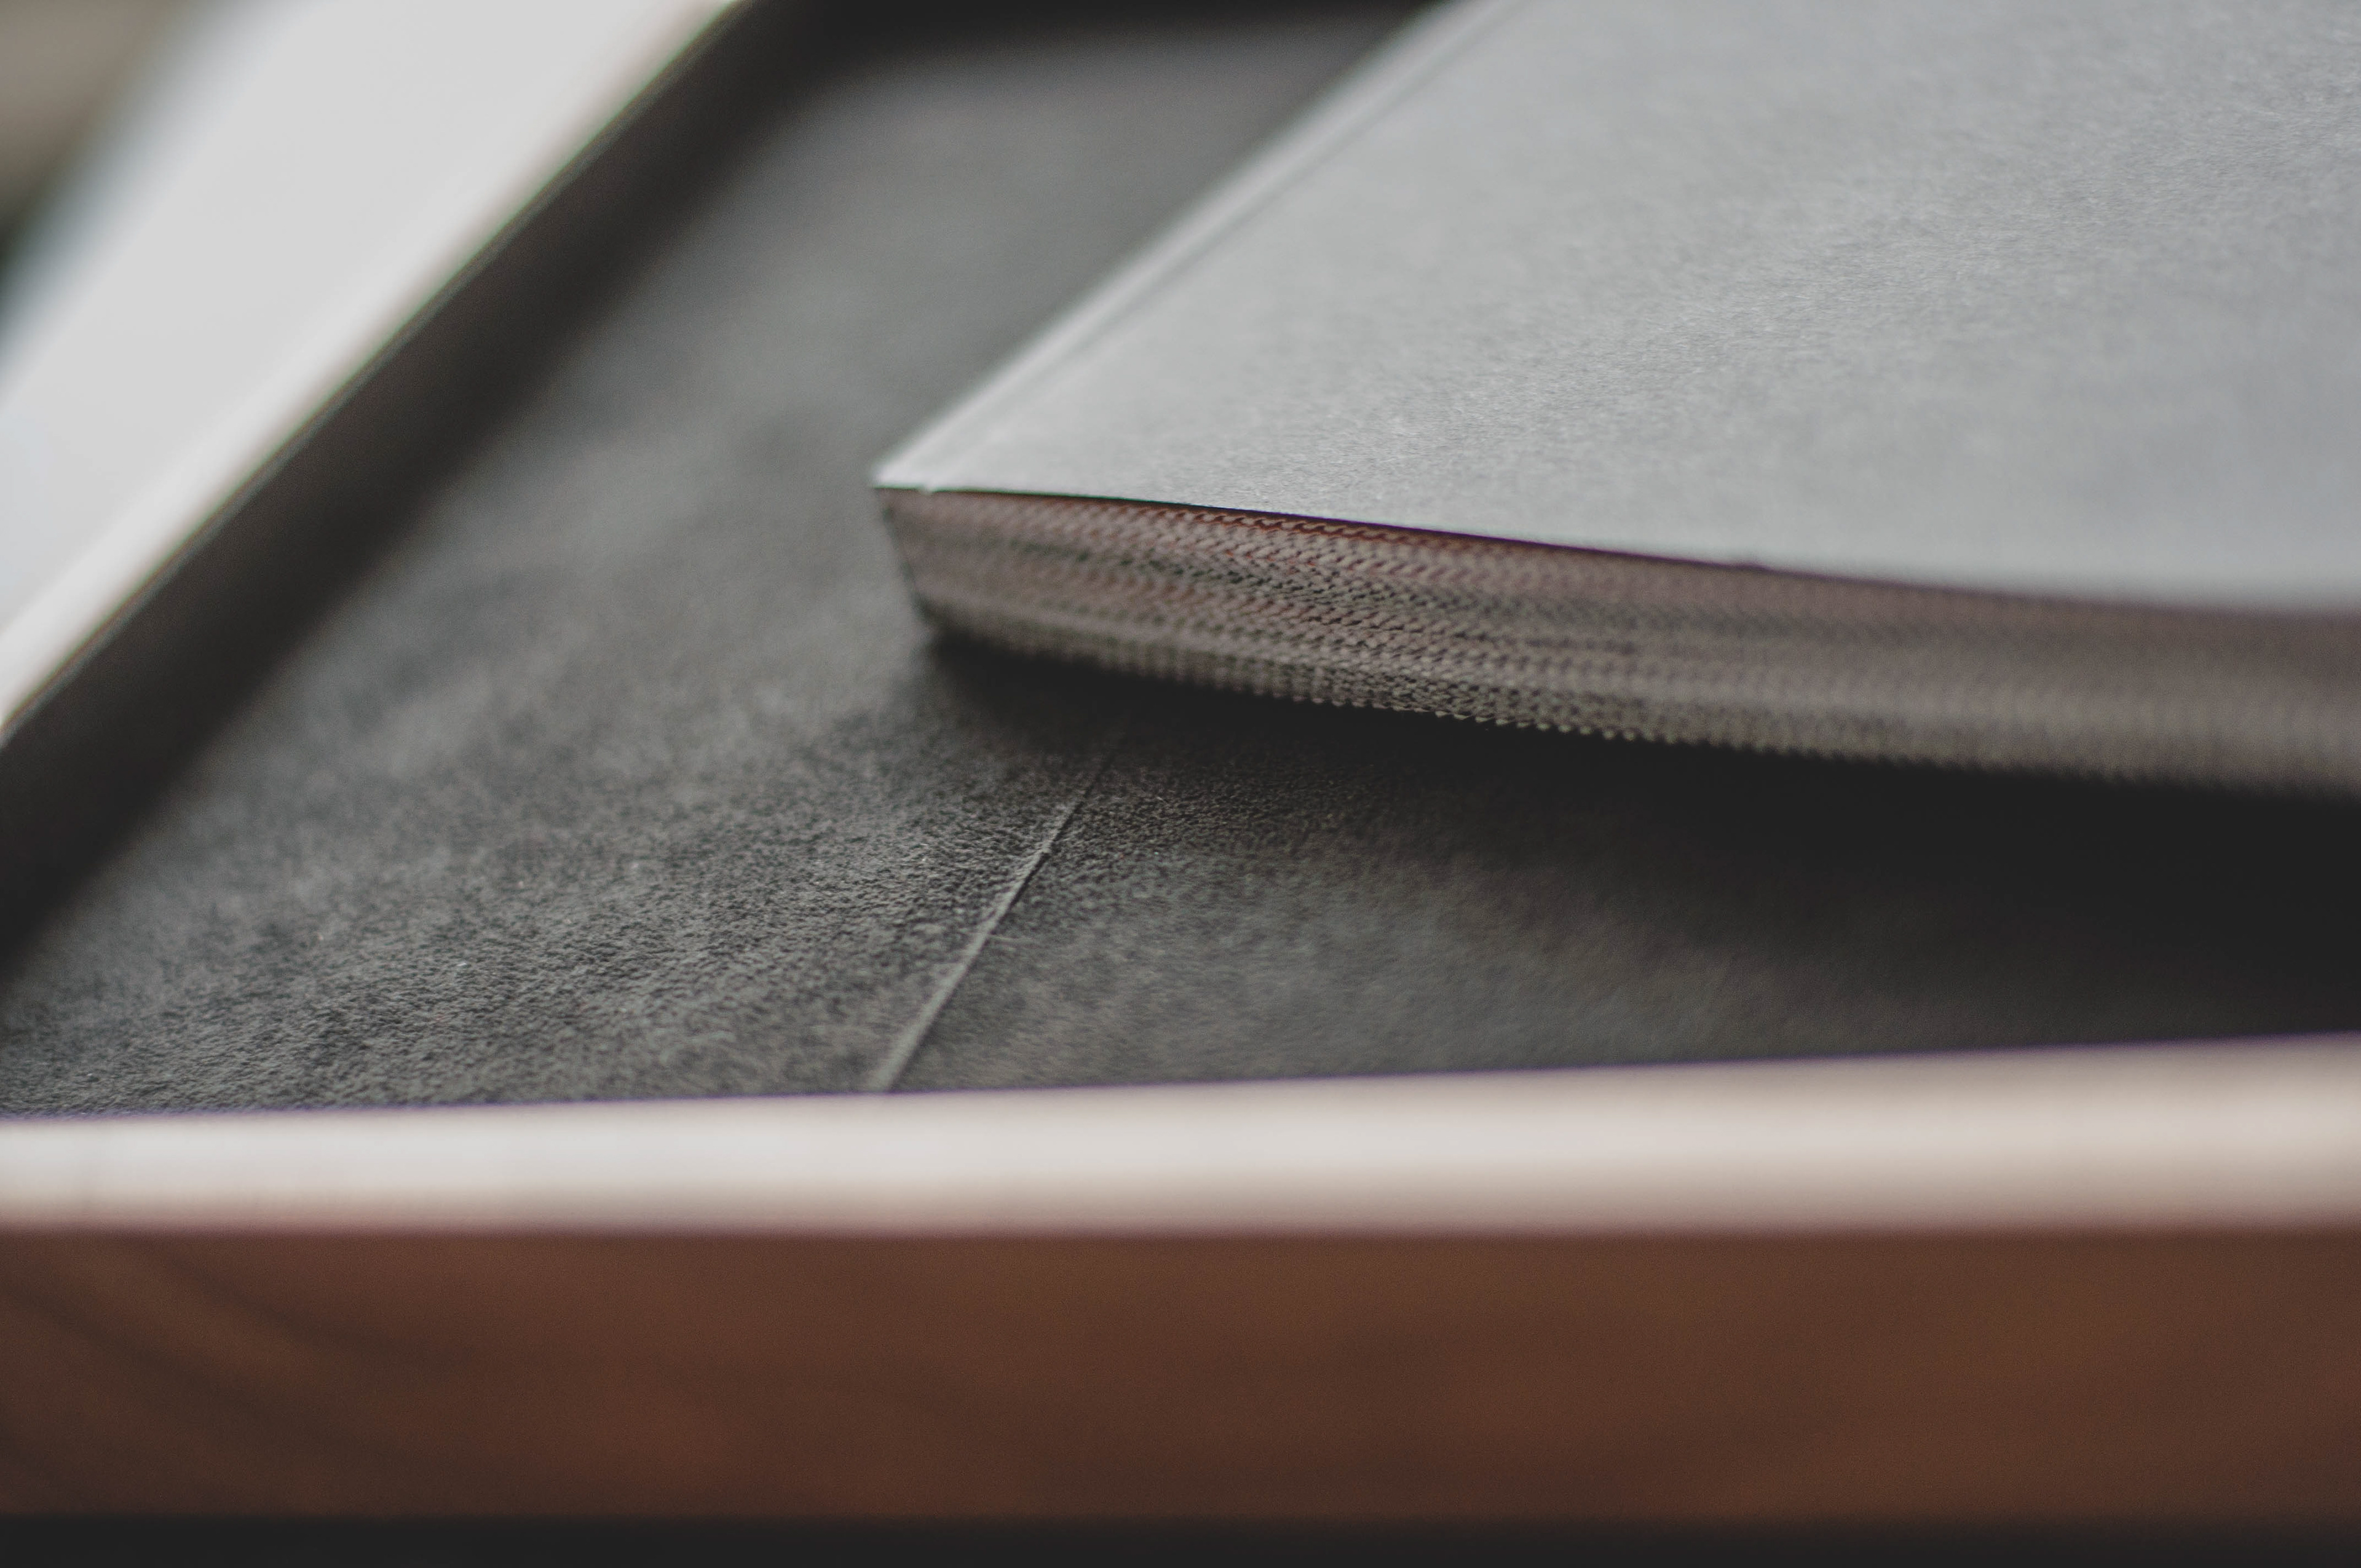
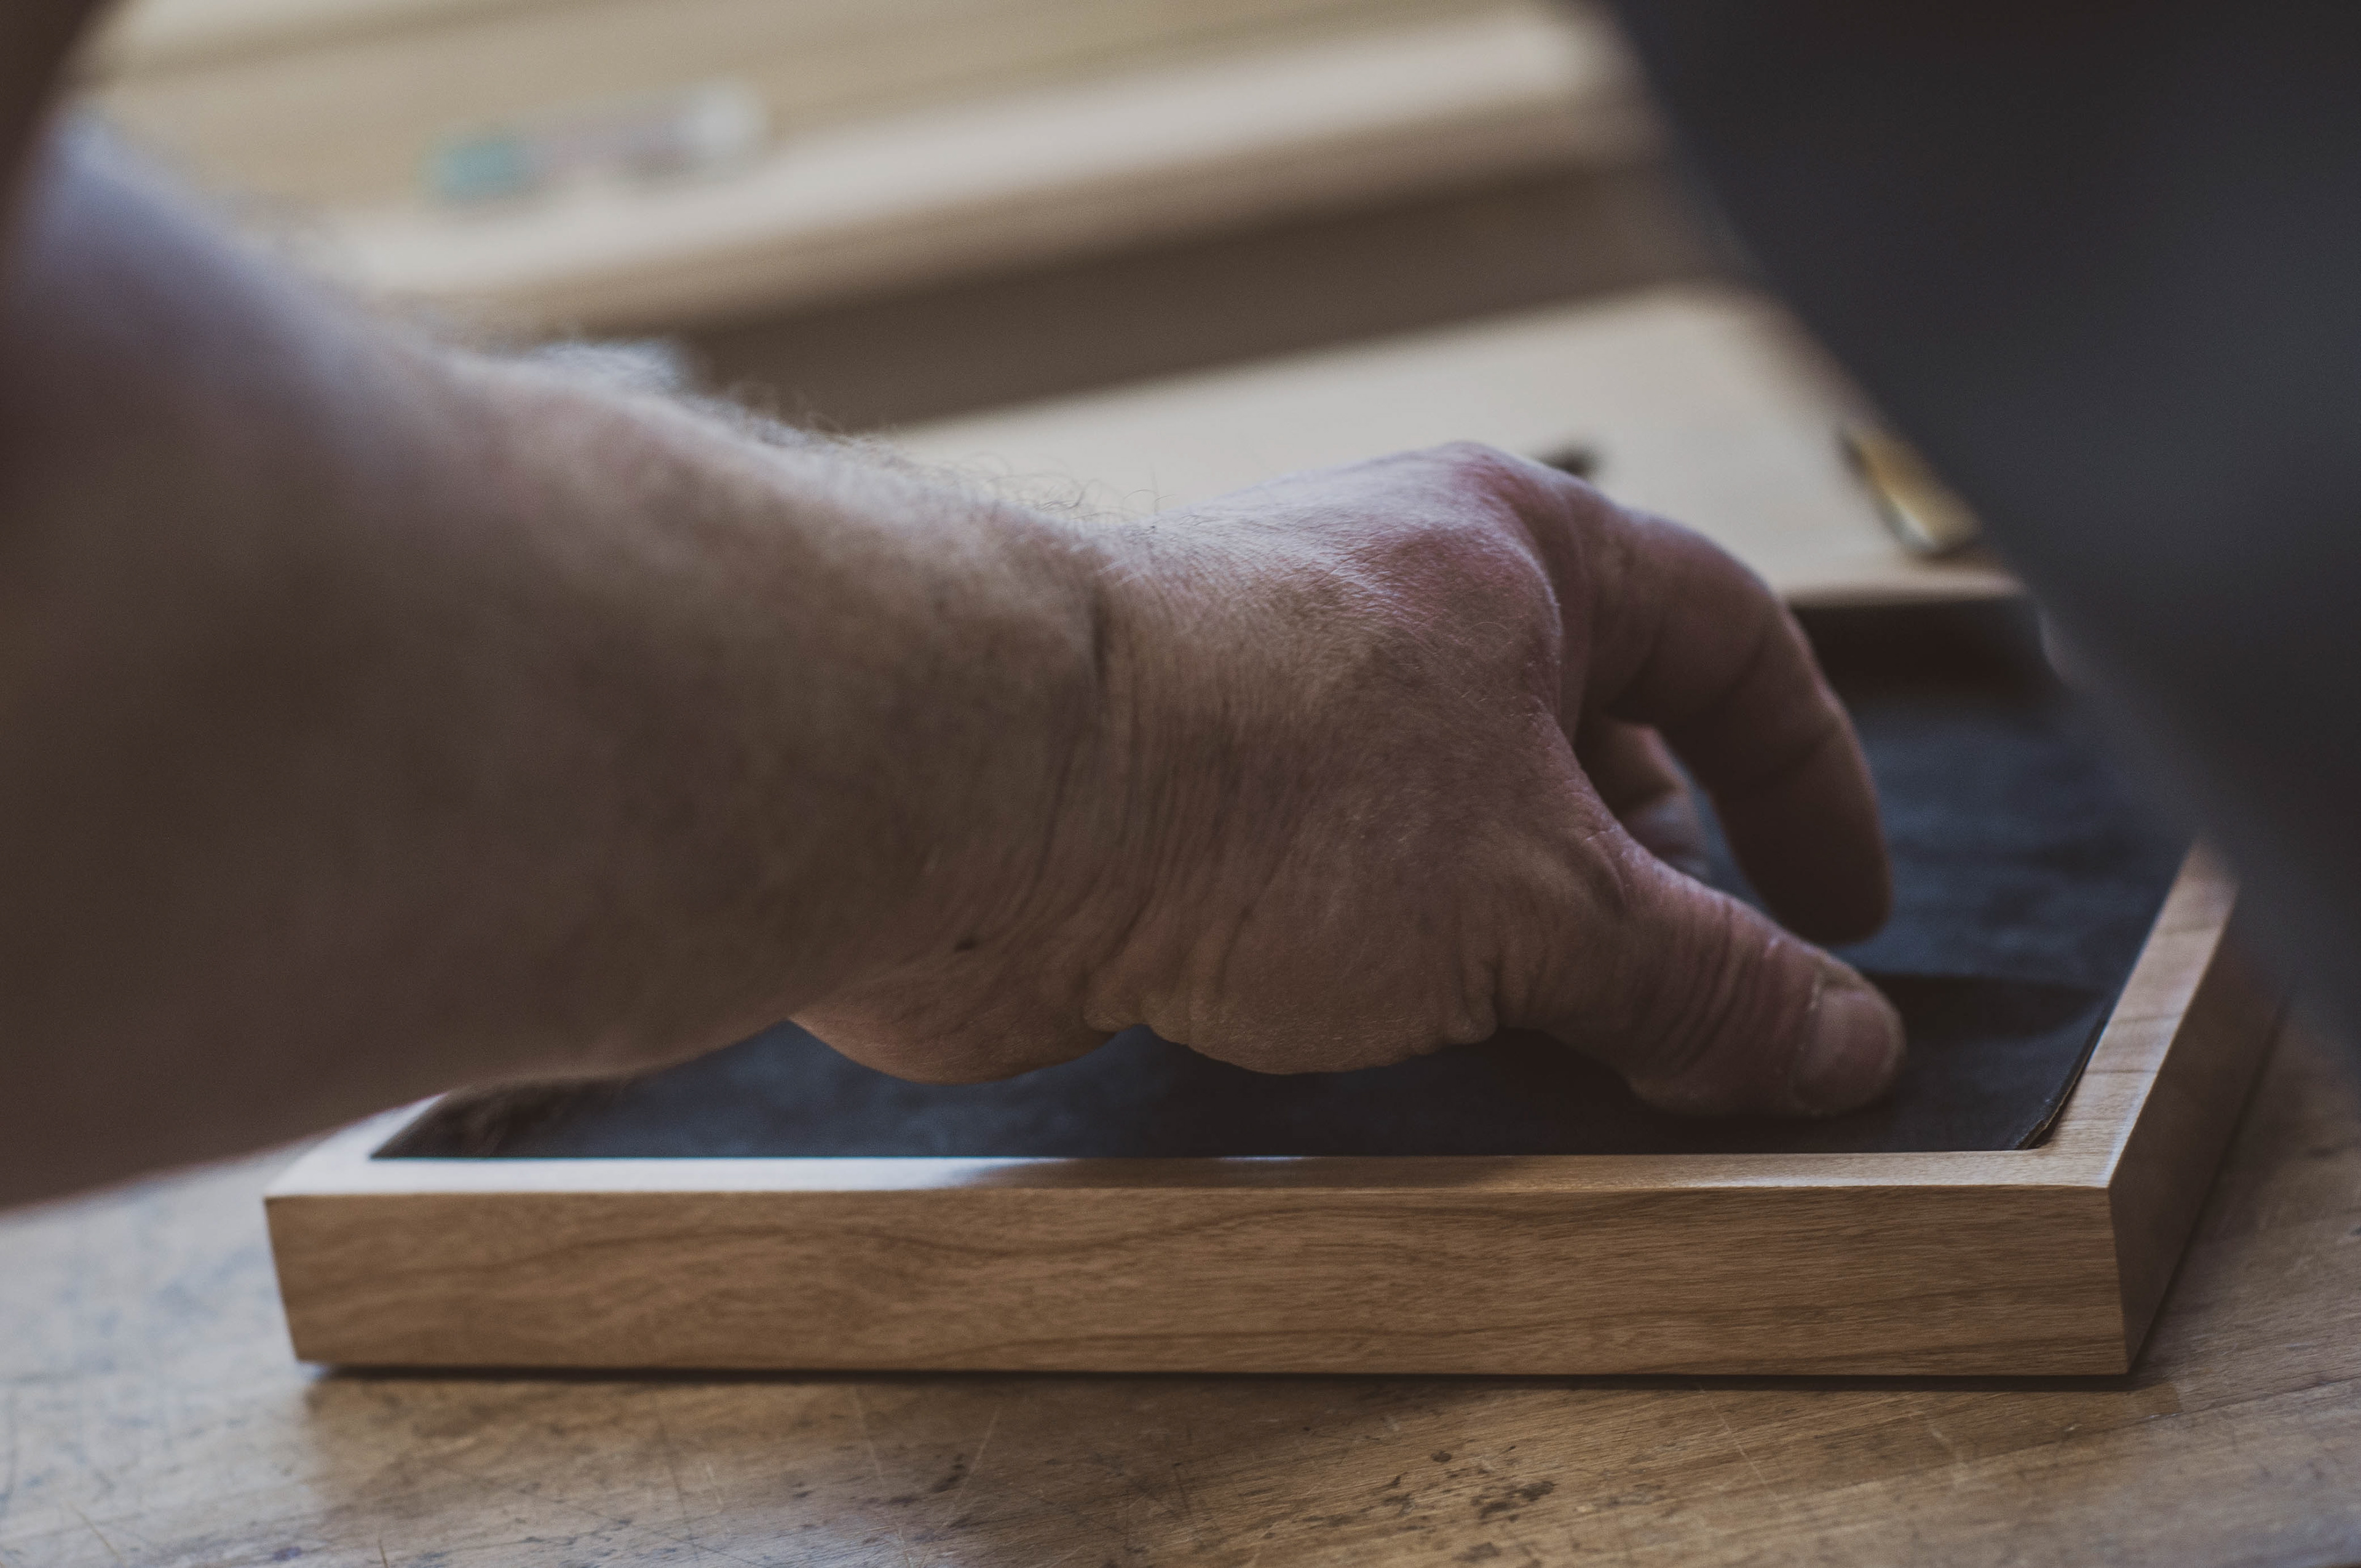
In addition to that, I decided to line the inner of the wooden case with soft and black alcantara fabric.
For the very final step, of the WHOA-experience when opening the case for the first time, the upper-case got meticulously adapter to its lower negativ, for a very smooth opening.


NOTE: In case you are looking for any high-class premium worked (grand) pianos, please get in touch with Helge Huwig from Pianohaus Kohl in Saarbrücken, Germany.
BOOK AND CASE UNIFIED